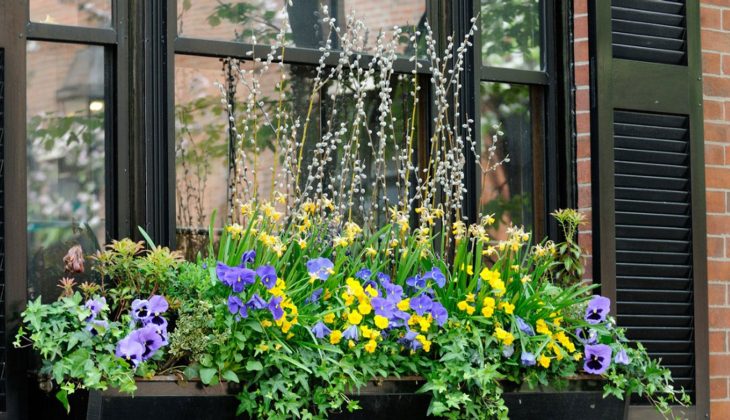
- Self-watering window boxes eliminate daily hand-watering by delivering moisture directly to plant roots through built-in reservoirs or drip irrigation systems.
- DIY drip irrigation setups cost a fraction of commercial self-watering planters, which often underperform despite their high price tags.
- Urban window boxes dry out faster than ground beds due to limited soil volume, wind exposure, and direct sun — making automation even more critical.
- The right plant choices matter just as much as the watering system — sun exposure at your specific window determines everything.
- Keep reading to discover why even expensive pre-made self-watering boxes fall short, and what setup actually works long-term.
Stop watering your window boxes every single day — there’s a smarter way to keep them thriving all season long.
Whether you’re growing petunias on a second-floor ledge or herbs on a city apartment sill, the frustration is always the same: you miss one hot afternoon, and everything wilts. Longbourn Farm has been one of the go-to resources for urban gardeners tackling this exact problem, offering practical DIY solutions that outperform even the priciest commercial planters on the market.
The good news? A self-watering window box system isn’t complicated or expensive. Once it’s set up, your plants stay consistently hydrated with almost zero daily effort on your part.
Hand-Watering Window Boxes Is a Daily Battle You Don’t Need to Fight
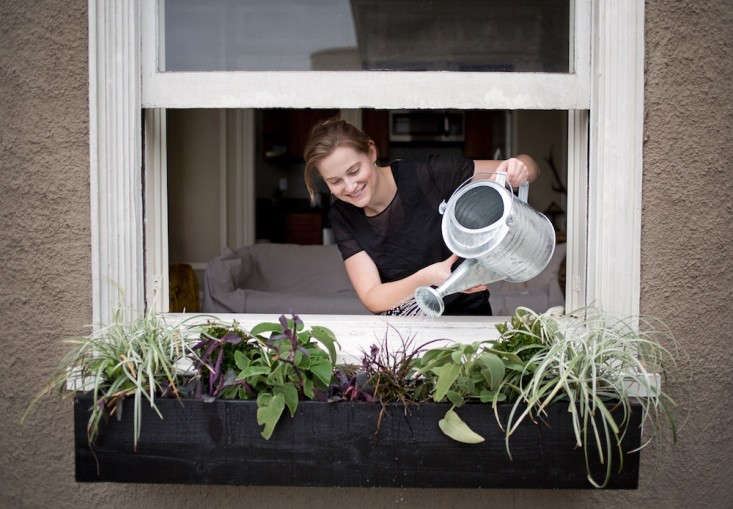
“Why I Hand Water: A Love Story – Gardenista” from www.gardenista.com and used with no modifications.
Most urban gardeners start out enthusiastic, watering their window boxes every morning before work. Then life gets busy. A long day, a weekend trip, one stretch of unexpected heat — and the whole box is dead within 48 hours. It’s not laziness. It’s just the reality of how demanding traditional window boxes actually are.
Why Window Boxes Dry Out Faster Than Ground Beds
Window boxes are essentially small containers with a fraction of the soil volume you’d find in a raised bed or garden plot. Less soil means less water retention — full stop. Add in the fact that most window boxes sit in direct sun exposure on south or west-facing walls, get hit by drying winds at elevation, and are made from materials like terracotta or thin plastic that accelerate moisture loss, and you’ve created a near-perfect environment for rapid drying. On a hot summer day, an unprotected window box can lose its available moisture in as little as 12 hours. To combat this, consider using a self-watering system for window boxes to maintain consistent moisture levels.
Ground beds benefit from surrounding soil that acts as a moisture buffer. Window boxes have no such buffer. Every drop of water either gets absorbed by the plant, evaporates from the soil surface, or drains out the bottom — and the cycle starts over again the next morning.
The Real Cost of Neglect: Wilting Plants and Wasted Money
A single flat of annual flowers typically costs between $8 and $25 at a garden center. A full window box setup with soil, plants, and hardware can easily run $60 to $100 per window. When those plants die mid-summer because watering became inconsistent, that’s not just a visual loss — it’s real money walking out the door.
Beyond the financial hit, there’s the time investment. Watering two or three window boxes thoroughly takes 10 to 15 minutes daily. Over a single growing season of 120 days, that’s up to 30 hours spent standing with a watering can. A one-time drip irrigation setup can recover all of that time while keeping your plants in better shape than hand-watering ever did.
The choice is clear once you frame it that way. A self-watering system isn’t a luxury upgrade — it’s the practical solution every window box gardener eventually wishes they’d started with from day one.
What Makes a Window Box “Self-Watering”
The term “self-watering” gets applied loosely to a lot of products, but there are really two distinct mechanisms at work. Understanding the difference helps you choose the right approach for your setup, your schedule, and your budget.
How the Sub-Irrigation Reservoir System Works
A true sub-irrigation system places a water reservoir at the base of the planter, separated from the growing medium by a platform or barrier. The soil draws moisture upward through capillary action — the same physics that causes a paper towel to soak up a spill. Plants take exactly what they need, when they need it, without any excess puddling at the roots.
Most commercial self-watering window boxes, like those from Lechuza or the Classic Home and Garden Honeysuckle series, use this reservoir design. You fill the reservoir through a dedicated fill tube — usually marked on the side of the box — and the water level indicator tells you when it’s time to refill. In moderate weather, a well-sized reservoir can last anywhere from three to seven days before needing a top-up. For more information on setting up your own system, check out this self-watering system for window boxes.
Wicking vs. Drip Irrigation: Two Ways to Auto-Water
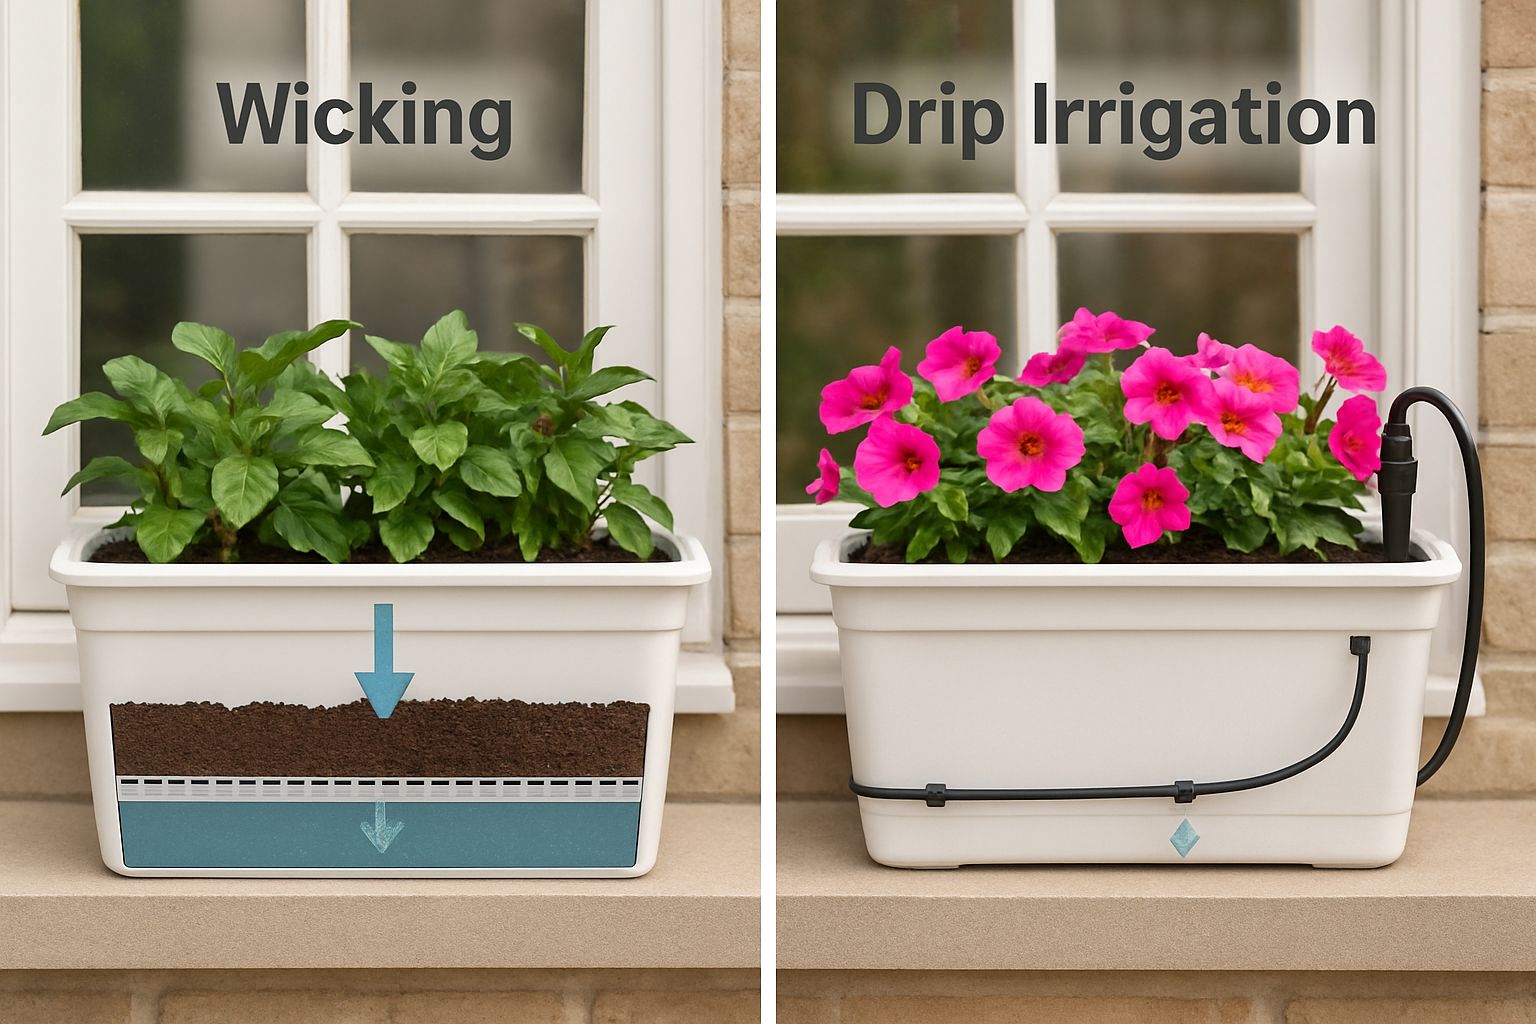
Wicking systems rely on a physical wick — usually a strip of absorbent fabric or a specially shaped soil column — that pulls water from the reservoir into the root zone. They’re passive, require no power or timers, and work well for smaller boxes with modest plant loads. The limitation is output: a wick can only move so much water per hour, which makes it less reliable during peak summer heat for thirsty plants like tomatoes or large flowering annuals. For those interested in low-maintenance options, consider exploring low-maintenance garden plant kits to complement your wicking system.
Drip irrigation takes a completely different approach. A ¼-inch micro tubing line runs from a main water source — typically a garden hose with a timer attached — directly into each window box. The line terminates at one or more drip emitters buried just below the soil surface. The timer handles the rest, delivering a set volume of water at a set time each day. This is the method that gardeners like Melissa Griffiths at Longbourn Farm have championed for DIY setups, and for good reason: it’s highly reliable, scalable across multiple boxes, and far more effective than even the best passive reservoir systems in hot or windy conditions.
Water Level Indicators: Why They Matter
For reservoir-based systems, a water level indicator isn’t optional — it’s essential. Without one, you’re guessing whether the reservoir is full, half-empty, or completely dry. Most indicators are simple float mechanisms that display a visible marker through a clear tube on the side of the planter. When the marker hits the minimum line, it’s time to refill. Some newer systems integrate digital moisture sensors, but the analog float design remains the most reliable and requires zero maintenance.
DIY vs. Store-Bought Self-Watering Window Boxes
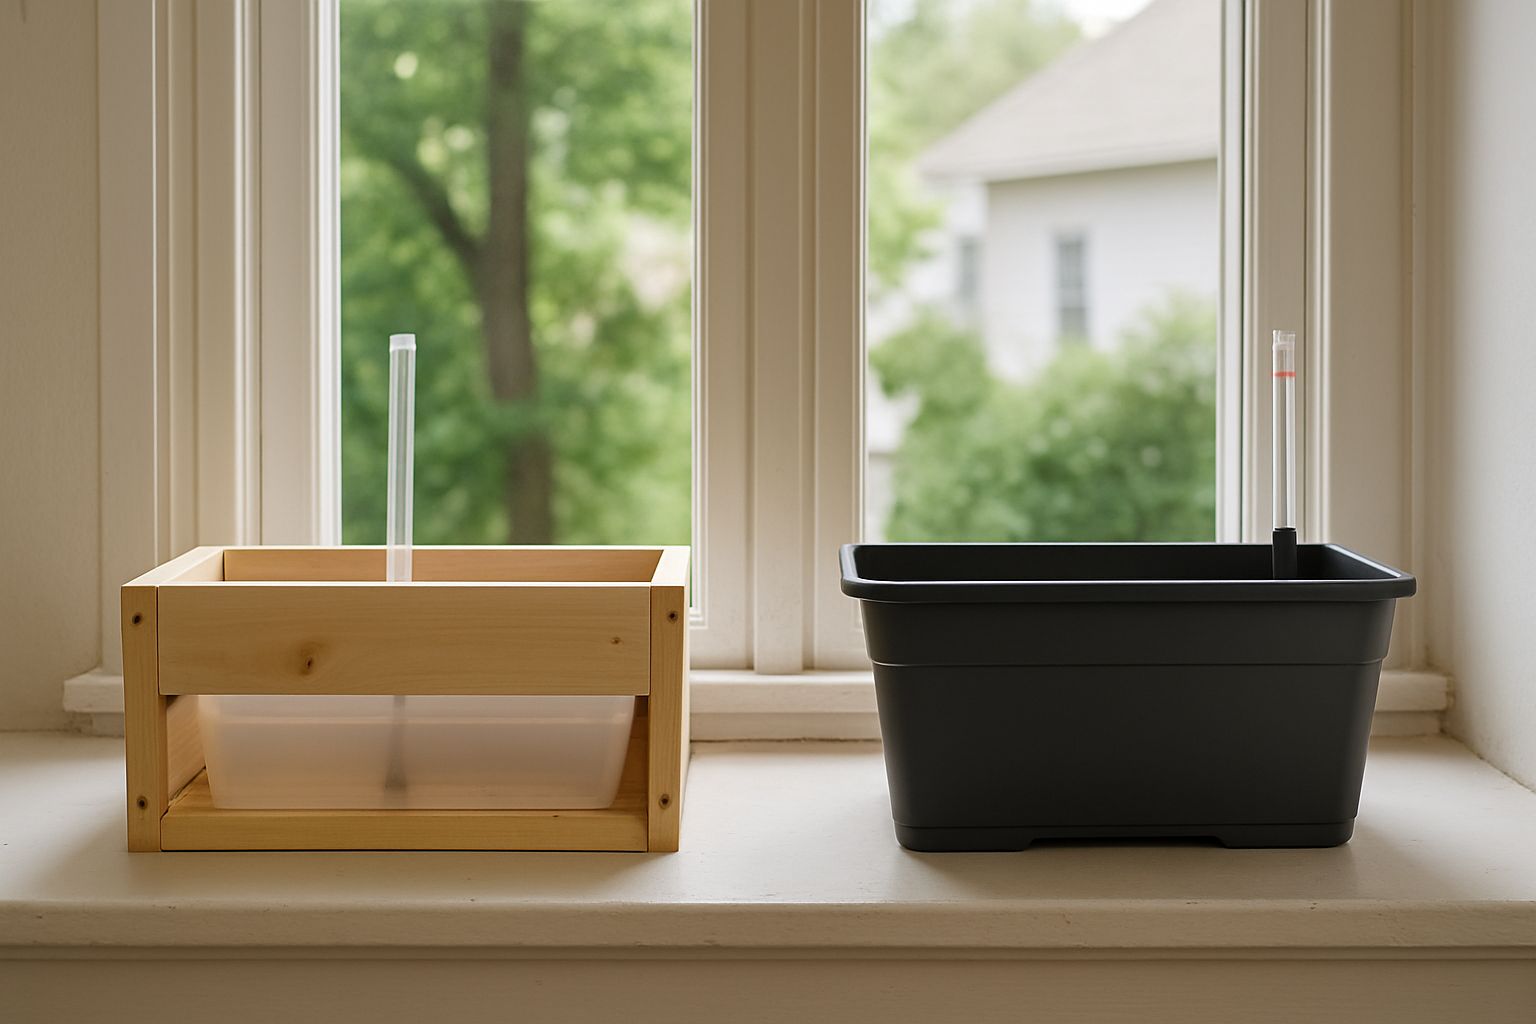
Walk into any garden center, and you’ll find self-watering window boxes ranging from $30 to well over $200. The price jump usually reflects materials — powder-coated steel, UV-resistant resin, or decorative finishes — rather than any meaningful improvement in the watering mechanism itself. Before you spend big, it’s worth knowing what you’re actually getting.
Why Even $200+ Commercial Planters Fall Short
The core problem with most commercial self-watering window boxes is reservoir size. Even premium models typically hold only 0.5 to 1.5 liters of water. In a fully planted box sitting in direct afternoon sun during a July heat wave, that reservoir can be completely depleted in 24 to 36 hours. That means you’re still checking and refilling every single day — which defeats the entire purpose of buying a self-watering planter in the first place.
Gardeners who have tested high-end options consistently report the same frustration: the marketing promises several days of hands-free watering, but real-world performance in hot climates rarely matches those claims. The wick diameter, reservoir depth, and soil-to-water ratio all interact in ways that manufacturers tend to optimize for temperate, mild conditions — not the punishing heat that most urban south-facing window boxes actually experience.
What a DIY Drip Irrigation Setup Actually Costs
A complete DIY drip irrigation system for two to four window boxes can be assembled for roughly $40 to $80 in total materials. If you’re looking for a low-maintenance solution, consider checking out our best low-maintenance garden plant kits. Here’s what a typical parts list looks like:
- Hose timer (such as the Orbit 56082 Single-Outlet Hose Timer): $25 to $35
- ¼-inch poly micro tubing (25-foot roll): $6 to $10
- Drip emitters (adjustable 0–10 GPH, pack of 10): $5 to $8
- Tubing stakes and connectors: $4 to $6
- Barbed tee fittings and end caps: $3 to $5
Compare that to buying two commercial self-watering window boxes at $80 to $100 each, and the DIY system pays for itself immediately — while actually delivering more reliable hydration. The drip system also scales effortlessly: adding a third or fourth window box is just a matter of running additional ¼-inch tubing from the main line, with no additional timer or water source required.
When a Pre-Made Self-Watering Box Makes More Sense
There are genuine scenarios where a commercial self-watering window box is the right call. If you’re renting and can’t run tubing along an exterior wall, or if you only have one or two boxes in a mild climate with moderate sun exposure, a quality reservoir planter handles the job without any installation. The Lechuza Balconera Color 80 is one of the better options in this category — it holds 5.7 liters in its reservoir, significantly more than most competitors, and its sub-irrigation design genuinely performs in moderate conditions. For gardeners who want simplicity over scalability, that’s a reasonable trade-off.
How to Build Your Own Self-Watering Window Box System
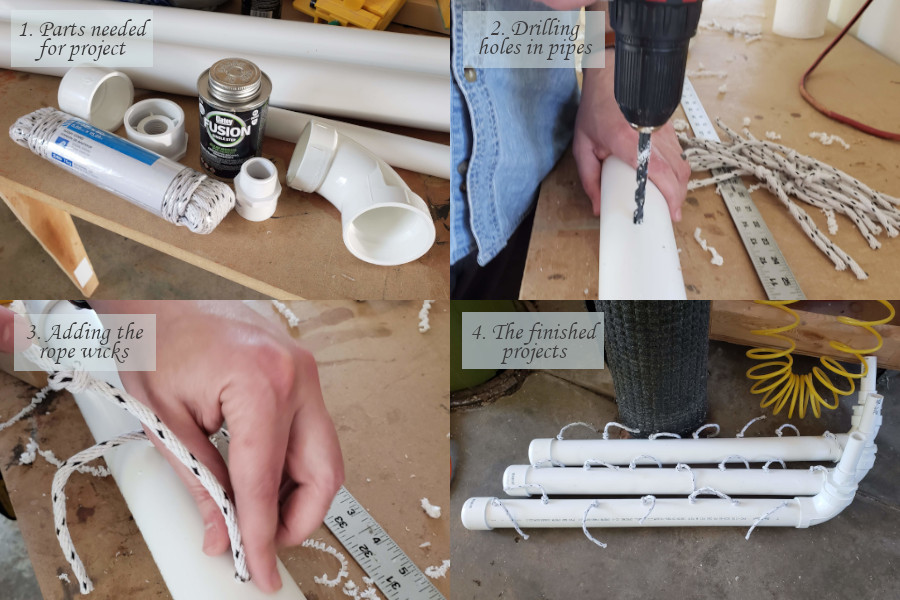
“DIY Self-Watering Window Boxes: Never …” from longbournfarm.com and used with no modifications.
Building a DIY drip irrigation system for your window boxes isn’t a weekend project — it’s an afternoon project. The actual installation time for two to three boxes runs about two to three hours, including measuring, cutting tubing, and testing the system. For more tips on urban gardening, check out our urban gardening recycling filters guide. Once it’s done, it runs itself.
Before you buy a single piece of hardware, spend ten minutes walking the exterior of your home and mapping out exactly where each window box sits relative to your nearest outdoor spigot. The route your tubing takes matters for both aesthetics and function — you want the shortest path possible while keeping the line protected from foot traffic and out of sight where you can manage it.
1. Assess Your Water Source and Plan Your Tubing Route
Start at your outdoor spigot and work outward. Attach a hose timer directly to the spigot — this is your control center for the entire system. From the timer, run a standard garden hose to the base of the wall where your window boxes are mounted. The ¼-inch micro tubing will branch off from a hose-end adapter at this point and travel up the wall to each box. Use tubing clips or small adhesive cable holders to keep the line flush against the siding — this keeps the setup looking clean and prevents the tubing from sagging or kinking over time.
2. Measure and Cut Tubing for Each Window Box Location
Measure the vertical distance from your hose adapter at ground level to the base of each window box, then add 12 inches of slack. Cut one length of ¼-inch poly tubing per box. If you’re running multiple boxes side by side along the same wall, use barbed tee fittings to split the main line and send a branch to each box. Always cut tubing with a sharp pair of scissors or a dedicated tubing cutter — a clean cut ensures a watertight connection at every barbed fitting and prevents drip inconsistencies down the line.
3. Mount the Window Box and Run the Drip Line
With your window box securely mounted — brackets rated for at least 30 lbs when the box is fully loaded with wet soil — thread the ¼-inch tubing up through one of the drainage holes in the bottom of the box. If your box doesn’t have a conveniently placed hole, a ¼-inch drill bit solves that in seconds. Pull about 3 inches of tubing above the soil line so you can attach the drip emitter after filling.
Fill your box with a high-quality potting mix — not garden soil, which compacts too densely in containers and restricts water movement. A mix containing perlite or coco coir keeps the growing medium loose enough for water to distribute evenly from the emitter outward. Fill to about 2 inches below the rim, leaving room for plants and a small water buffer at the surface.
Once the soil is in place, press a 0-to-10 GPH adjustable drip emitter onto the end of the tubing and bury it just below the soil surface near the center of the box. For longer boxes — anything over 24 inches — use two emitters spaced evenly apart, connected with a short length of tubing, to ensure the full length of the box receives consistent moisture.
4. Set Your Timer and Test the System
Program your hose timer to run once daily in the early morning — between 5:00 AM and 7:00 AM is ideal. Morning watering reduces evaporation loss and gives foliage time to dry before nightfall, which reduces the risk of fungal issues. Start with a 10-minute run time and observe the soil moisture over the first three to five days. For additional tips on maintaining a low-maintenance garden, check out our guide on plant kits.
After your first test cycle, dig a finger about 2 inches into the soil in several spots across the box. The moisture should be consistent — damp but not waterlogged throughout. If one end of the box is noticeably drier, adjust your emitter placement or add a second emitter. If the soil is soggy, reduce the run time by two minutes and recheck after another two days. For more tips on maintaining your garden, check out these low-maintenance garden plant kits.
Fine-tuning a drip system takes a few days of observation, but once it’s dialed in, it runs reliably for the entire season with minimal adjustment. Here’s a quick reference for common timer settings by season:
- Spring (mild temperatures, moderate sun): 8 minutes daily
- Early summer (warming temps, increasing sun): 10 to 12 minutes daily
- Peak summer (heat waves, full sun exposure): 12 to 15 minutes daily, consider twice daily for heat-sensitive plants
- Late summer to early fall (cooling nights): Reduce back to 8 to 10 minutes daily
- Fall (cool temps, less evaporation): 5 to 7 minutes daily or every other day
These are starting points, not rules. Every window box setup is different depending on sun exposure, plant density, and local climate — so always let the soil moisture be your final guide.
Best Plants for Urban Self-Watering Window Boxes
Consistent moisture opens up a much wider plant palette than traditional window boxes allow. When roots are never stressed by drought cycles, plants put more energy into flowering and foliage growth rather than survival. That said, matching plants to your specific light conditions still makes or breaks the display. For a curated selection, consider exploring this guide to low-pollen plants that thrive in various conditions.
Full Sun Performers for South and West-Facing Windows
South and west-facing window boxes are the most demanding environments in the urban garden — intense afternoon sun, reflected heat from walls and pavement, and high evaporation rates. The plants that thrive here are the ones that love heat and can handle occasional dry spells, though with a properly calibrated drip system, they’ll put on a show all season without breaking a sweat.
Petunias are the undisputed champions of the full-sun window box. Wave Petunia varieties like ‘Easy Wave Red’ or ‘Tidal Wave Silver’ cascade beautifully over box edges and bloom continuously from late spring through first frost. They respond visibly to consistent moisture — with a drip system, the difference in bloom density compared to hand-watered boxes is striking. Pair them with Superbells Calibrachoa for a finer-textured complement that handles heat with equal toughness.
Zonal geraniums (Pelargonium x hortorum) are another reliable full-sun staple, particularly the Pinto and Maverick series, which are bred specifically for container performance. They tolerate short dry periods but absolutely reward consistent irrigation with dense, long-lasting flower heads. For a vertical filler element, consider Salvia farinacea ‘Victoria Blue’ — its upright spikes add structure to the arrangement and attract pollinators even at urban elevations.
Shade-Tolerant Picks for North-Facing Boxes
North-facing window boxes get little to no direct sun, but that doesn’t mean they have to be boring. The shade plant palette has expanded dramatically in recent years, and several performers rival their sun-loving counterparts for color and visual impact.
- Impatiens walleriana (standard impatiens) — the classic shade annual, available in every color imaginable; thrives with consistent moisture from a drip system
- Begonia × semperflorens (wax begonia) — compact, tidy, and blooms non-stop; the ‘Cocktail’ series handles low light exceptionally well
- Fuchsia ‘Gartenmeister Bonstedt’ — stunning tubular orange-red flowers on dark foliage; requires consistent moisture and rewards it with continuous bloom
- Lysimachia nummularia ‘Aurea’ (golden creeping Jenny) — a trailing foliage plant that adds a waterfall of chartreuse color over the box edge; remarkably easy in shade
- Torenia fournieri (wishbone flower) — an underused gem with snapdragon-like blooms in purple, pink, and white that performs beautifully in low-light urban conditions
For north-facing boxes, reduce your drip timer run time by 20 to 30 percent compared to full-sun settings — these plants absorb water more slowly without intense sun driving transpiration, and consistently wet soil in low light can lead to root rot in even the most moisture-tolerant species.
Keeping Your System Running All Season
A drip irrigation system is low maintenance by design, but it’s not zero maintenance. Spending five minutes every couple of weeks checking the system keeps everything running smoothly and catches small problems before they become plant-killing failures.
How Often to Refill or Check the Water Reservoir
For reservoir-based systems, a quick visual check every three to four days is all it takes during spring and fall. In peak summer — particularly during heat waves or extended dry stretches — bump that up to every 48 hours. The water level indicator on most planters makes this a five-second task: glance at the tube, and if the float marker is sitting at or near the minimum line, it’s time to refill. Don’t wait until the reservoir is bone dry before acting, because most systems need at least a small water column present to maintain capillary wicking action.
Flushing and Winterizing Drip Lines Before Cold Weather
When nighttime temperatures start dropping consistently below 40°F, it’s time to think about winterizing your drip system. Water left inside poly tubing during a freeze will expand, crack the line, and destroy fittings — a frustrating and entirely preventable problem. The winterizing process takes about 20 minutes and protects your entire investment in hardware.
Start by disconnecting the ¼-inch tubing from the main hose line. Remove the drip emitters from the soil and store them in a small zip-lock bag so they don’t get lost over winter. Blow any remaining water out of each tubing length using a can of compressed air, or simply hold the line vertical and let gravity drain it completely. Coil the tubing loosely — never wrap it tightly around anything, as tight coiling causes permanent kinks in poly tubing that restrict flow the following season.
- Disconnect tubing from the hose adapter and all window box fittings
- Remove drip emitters and store indoors in a labeled bag
- Drain all tubing using compressed air or gravity drainage
- Coil tubing loosely and store in a shed, garage, or basement away from freezing temperatures
- Remove the hose timer battery to prevent corrosion over winter storage
- Empty reservoir-based planters completely and bring them indoors if temperatures will drop below freezing, as frozen soil expands and can crack planter walls
Reinstalling the system in spring takes less than 30 minutes once you’ve done it once. Everything reconnects exactly where it left off — cut new tubing only if you find cracks or brittleness when uncoiling in spring, which can happen with lower-quality poly tubing exposed to UV degradation over a long season.
Signs Your System Needs a Quick Fix
The most obvious warning sign is wilting plants despite a full reservoir or a timer that’s still running on schedule. If plants are drooping mid-morning even though the system ran at 6:00 AM, the first thing to check is whether water is actually reaching the soil. Pull the drip emitter slightly out of the soil and run the timer manually — you should see a steady, slow drip from the emitter tip within 30 seconds of the cycle starting. No drip usually means a clog.
Drip emitter clogs are the most common maintenance issue in any micro-irrigation system. Mineral deposits from hard water, algae growth inside tubing exposed to sunlight, and fine soil particles that work back into the emitter tip are all typical culprits. Soak a clogged emitter in white vinegar for 30 minutes, then flush it with clean water — this resolves the vast majority of blockages without needing a replacement. For tubing that has algae growth inside, flush the entire line by disconnecting the emitter end and running the timer for a full cycle to push the buildup out.
If one section of a window box consistently shows drier soil than the rest despite a functioning emitter, the issue is usually soil compaction. Over a full growing season, potting mix settles and can develop dry channels where water moves around rather than through the root zone. Top-dress the affected area with a thin layer of fresh potting mix and use a chopstick or thin stake to gently aerate the soil in a grid pattern — this reopens the pathways and restores even moisture distribution within a day or two.
A Self-Watering Window Box Turns Any Urban Window Into a Low-Maintenance Garden
Every window in your home is a missed opportunity until it has a thriving, well-watered planter hanging from it. Self-watering window boxes — whether you build a DIY drip system for a few dollars in micro tubing or invest in a quality reservoir planter like the Lechuza Balconera — fundamentally change the relationship between urban gardeners and their plants. You stop reacting to drought stress and start simply enjoying the display. The system does the daily work; you get the color, the fragrance, and the satisfaction of a living garden at every window, all season long. If you’re ready to build yours, Longbourn Farm’s DIY guide is a practical place to start. For more inspiration, check out this self-watering system for window boxes.
Frequently Asked Questions
Urban gardeners switching to self-watering systems tend to run into the same handful of questions. Here are clear, direct answers to the most common ones.
How long can self-watering window boxes go without being refilled?
It depends entirely on the reservoir size, the plant load, and your local weather conditions. A large-reservoir planter like the Lechuza Balconera Color 80 — which holds 5.7 liters — can realistically go five to seven days between refills in mild spring or fall conditions with a moderate plant load. In peak summer heat with thirsty annuals like petunias running at full bloom, that same reservoir might be depleted in two to three days.
A properly calibrated drip irrigation system connected to your home’s outdoor spigot eliminates the refill question entirely, since the water source is unlimited and the timer handles delivery automatically. For most urban gardeners dealing with hot summers, a drip system is the only approach that genuinely delivers the set-it-and-forget-it experience that reservoir planters promise but often can’t deliver through the hottest months.
Can self-watering window boxes work on second-story windows?
Absolutely — and this is actually one of the strongest use cases for a DIY drip irrigation system. Running ¼-inch poly tubing up an exterior wall to a second-story window box is straightforward, and the height creates no meaningful pressure loss in a gravity-fed or hose-connected system. Use tubing clips rated for exterior use and space them every 12 to 18 inches along the wall to keep the line clean and secure. Painting the tubing to match your siding color makes the installation nearly invisible from the street.
The bigger challenge at height is actually the window box mounting hardware, not the irrigation. Second-story boxes need heavy-duty steel brackets rated for a minimum of 40 to 50 lbs when loaded with wet soil and plants — never rely on the window frame itself as a structural support. Lag-bolt brackets directly into wall studs wherever possible. Once the mounting is solid, the irrigation side is no more complicated than a ground-floor installation.
Do self-watering window boxes work for vegetables and herbs?
Yes, and herbs in particular absolutely love the consistent moisture that self-watering systems provide. Basil, parsley, cilantro, and mint are notorious for bolting or wilting the moment soil dries out, and a drip system keeps them in the ideal moisture range that maximizes leaf production. Cherry tomatoes and compact pepper varieties like ‘Lunchbox’ work well in larger window boxes — 10 inches deep minimum — with drip emitters adjusted to deliver higher volumes during fruiting. The one exception is Mediterranean herbs like rosemary, thyme, and oregano, which prefer drier conditions between waterings; group these together in a separate box with a more conservative timer setting rather than mixing them with moisture-hungry plants.
What type of soil works best in a self-watering window box?
Soil Performance Comparison for Self-Watering Window Boxes
Soil Type Drainage Water Retention Best Use Case Standard potting mix Good Moderate General annuals and perennials Potting mix + 20% perlite Excellent Moderate-low Succulents, Mediterranean herbs, dry-preference plants Potting mix + coco coir Good High Vegetables, moisture-loving annuals, basil Garden soil (in-ground) Poor Very high (compacts) Not recommended for window boxes Moisture Control Miracle-Gro® mix Moderate High Annuals in hot, sunny locations
Never use garden soil or topsoil in a window box — in a container environment, it compacts into a dense, poorly draining mass within a single season and actively prevents the even moisture distribution that a self-watering system depends on. The goal is a growing medium that stays loose, allows water to move laterally from the drip emitter outward, and provides enough aeration at the root zone to prevent rot even with consistent moisture input.
For most urban window box gardeners, a quality bagged potting mix like Miracle-Gro® Moisture Control Potting Mix or FoxFarm Ocean Forest® Potting Soil hits the right balance right out of the bag. If you’re growing vegetables or moisture-loving annuals, blend in 10 to 15 percent coco coir by volume to boost water retention. For Mediterranean herbs or succulents, add 15 to 20 percent perlite to increase drainage and prevent the consistently moist conditions these plants dislike. For more information, check out this self-watering system for window boxes.
Refresh the top two to three inches of potting mix each spring by removing the old surface layer and topping up with fresh mix. Over a full growing season, potting mix breaks down and loses its structure — replenishing it annually keeps drainage and aeration performance where it needs to be, and adds a small nutrient boost that gets the new season off to a strong start without requiring heavy fertilization right away.
One additional note: if you’re using a reservoir-based sub-irrigation planter, the soil choice is even more critical because the capillary wicking action depends entirely on the growing medium having the right pore structure. Overly dense or compacted soil breaks the wicking chain, leaving the reservoir full while the upper root zone dries out. Most manufacturers of quality sub-irrigation planters recommend their own branded potting mixes — and while that can feel like an upsell, there’s genuine technical reasoning behind it that’s worth considering for your first season.
Can I convert a regular window box into a self-watering one?
The drip irrigation conversion is the simpler and more effective of the two approaches. Drill a ¼-inch hole through the bottom or side wall of your existing box near the soil line, thread your micro tubing through, connect a drip emitter, and you’re done. The box itself doesn’t need any internal modification — the drip system works independently of the container’s structure. This approach works on any window box regardless of material, size, or age, and it’s the method most DIY gardeners land on after trying other options.
Converting to a true sub-irrigation reservoir system is more involved. The classic DIY approach uses a second, shorter container nested inside the main box to create a water reservoir at the base, connected to the soil above through a wicking column of growing medium. You’ll need to drill an overflow hole at the reservoir’s maximum fill level to prevent overwatering, and install a fill tube — typically a length of PVC pipe — that runs from the surface down into the reservoir so you can add water without disturbing the roots. This setup genuinely works, but requires more precise construction to function reliably. For additional tips, explore our urban gardening recycling tips.
The easiest retrofit for gardeners who want reservoir-style performance without building from scratch is inserting a self-watering liner insert into an existing decorative box. Products like the Bloem Saturn Self-Watering Insert are designed to drop into standard rectangular planters, adding a reservoir and wicking tray without any drilling or construction. They’re limited by the insert’s reservoir volume, but for mild climates or partially shaded boxes, they perform well and cost far less than replacing the box entirely.