- Pollinator exclusion nets let you control exactly what enters your garden beds — keeping pests out while giving you the option to manage pollination on your own terms.
- Urban gardens face unique challenges that make exclusion nets more valuable in cities than in traditional rural growing spaces, from inconsistent pollinator populations to tight growing conditions.
- Mesh size is everything — choosing the wrong size can block beneficial insects, reduce airflow, or let pests slip through undetected.
- Manual pollination inside exclusion nets is easier than most gardeners think, and certain techniques can actually improve fruit set beyond what nature alone delivers.
- Keep reading to learn the most common mistakes urban gardeners make when setting up exclusion nets — and exactly how to avoid them.
Pollinator Exclusion Nets Are a Game-Changer for Urban Gardens
“Exclusion Insect Netting …” from fedcoseeds.com and used with no modifications.
Most urban gardeners lose crops not from poor soil or bad seeds, but from the constant, invisible war happening just above ground level.
Pollinator exclusion nets are fine-mesh barriers placed over garden beds or individual plants to physically block insects, birds, and other animals from reaching your crops. They work by creating a controlled micro-environment around your plants — one where you decide what gets in. For city gardeners working with limited space, every single plant counts, making that level of control incredibly valuable. Urban gardening experts at resources like Urban Organic Yield highlight how physical barriers consistently outperform reactive pest control methods in small-space growing scenarios.
What Pollinator Exclusion Nets Actually Do
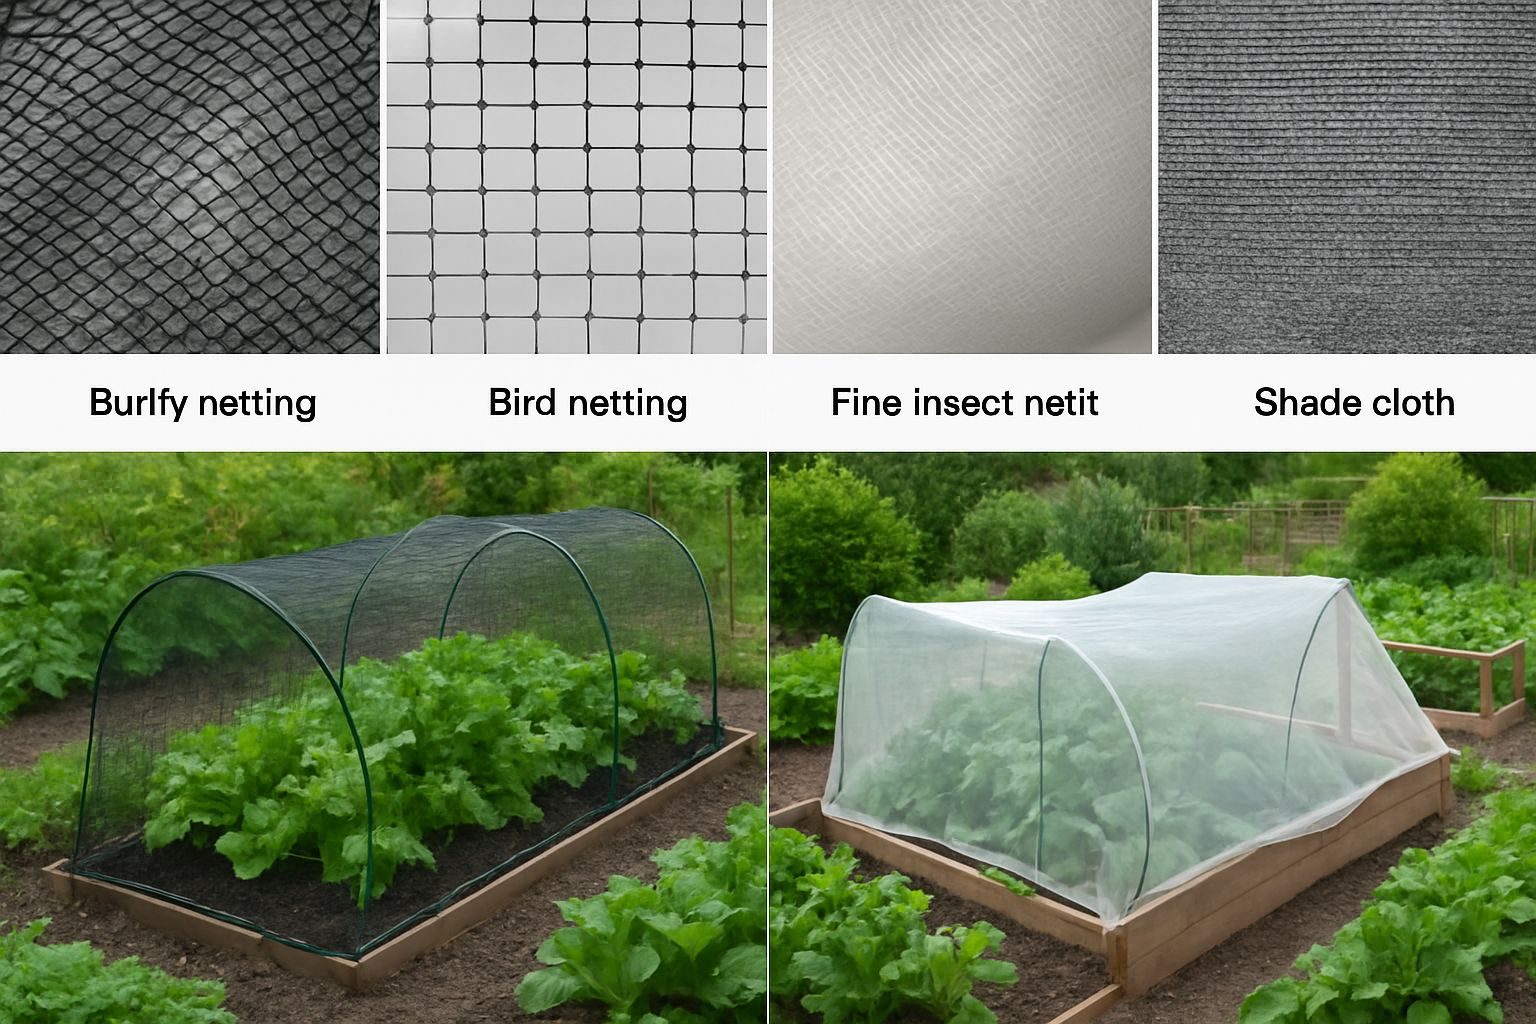
At their core, exclusion nets do exactly what the name suggests — they exclude. But the practical applications go much deeper than just keeping bugs away. A properly installed exclusion net creates a physical shield against flying insects, crawling pests, cabbage moths, aphid infestations, and even birds that target ripening fruit. They also act as a microclimate buffer, slightly moderating temperature and humidity around sensitive crops.
The key distinction between exclusion nets and regular row covers is mesh specificity. Exclusion nets are engineered with precise aperture sizes — typically ranging from 0.8mm to 1.6mm — allowing airflow and light transmission while denying entry to specific pest categories. Some ultra-fine variants like the Veggiemesh 0.8mm Insect Exclusion Netting block even thrips and whitefly, which are notoriously difficult to manage organically in dense urban plantings. Learn more about allergy-resistant soil covers and other innovations in urban gardening.
- Blocks flying insects, including cabbage white butterflies, moths, and leek moths
- Prevents crawling pests from accessing plant stems and leaves
- Deters birds and larger wildlife in open rooftop or balcony gardens
- Reduces wind stress on fragile seedlings and young transplants
- Creates a stable microclimate that can extend your growing window
What exclusion nets do not do is handle pollination for you. Self-pollinating crops like tomatoes and peppers can manage with some manual assistance or wind movement through the mesh, but cross-pollinating crops like squash and cucumbers need deliberate intervention when pollinators are excluded. That trade-off is worth understanding before you net anything.
Why Urban Gardens Need Them More Than Rural Gardens
Rural gardens can absorb losses. An acre of brassicas losing 10% to cabbage moths is frustrating, but it’s manageable. A rooftop garden with twelve kale plants losing 10% is a genuinely significant hit to your harvest.
Urban environments also present a paradox: cities are increasingly recognized as pollinator refuges due to reduced pesticide use and diverse flowering plants, yet the density of human activity, artificial lighting, and fragmented green corridors creates wildly inconsistent pollinator access. Your garden might be perfectly pollinated one week and completely neglected the next, depending on which way the wind blows and whether the colony three blocks over is having a productive foraging day. Exclusion nets let you stop depending on that unpredictability and start managing your crops with intention.
The Real Problems Urban Gardeners Face Without Exclusion Nets
Before talking solutions, it’s worth being honest about what’s actually at stake when you leave your crops unprotected in an urban environment.
Pest Damage That Destroys Yields Before Harvest
Cabbage white butterflies (Pieris rapae) can lay eggs on brassica leaves within hours of a plant being set out. The larvae that hatch — small, green, and nearly invisible — can skeletonize a full-grown kale plant in under a week. In a compact raised bed garden, that kind of damage isn’t just cosmetic; it can wipe out an entire crop before you even realize the infestation has started. Without a physical barrier, you’re relying entirely on inspection vigilance and reactive spraying, both of which are imperfect at best. For effective solutions, consider exploring allergy-resistant soil covers and other innovations in pest management.
Cross-Pollination Ruining Seed Purity
Urban gardeners who save seeds face a specific and frustrating challenge: cross-pollination from neighboring gardens, community plots, or ornamental plantings. Brassicas are especially promiscuous — a flowering kale plant will readily cross with nearby ornamental cabbages, wild mustard, or a neighbor’s broccoli going to seed. The result is seed stock that produces unpredictable plants the following season. For anyone growing heritage or open-pollinated varieties with the goal of maintaining genetic integrity, exclusion nets are the only reliable non-chemical solution.
Unpredictable Pollinator Access in City Environments
Urban pollinator fact: Research has shown that urban bee populations can be highly localized, with foraging activity varying dramatically between city blocks based on green corridor connectivity, local pesticide use by neighbors, and proximity to suitable nesting habitat. A garden that received abundant bee visits one season may see dramatically reduced activity the next — entirely outside the gardener’s control.
This inconsistency creates a real dilemma for urban food growers. Relying on ambient pollination means accepting variable fruit set from season to season with no reliable way to improve it. Exclusion nets flip this dynamic — by managing pollinator access deliberately, you can hand-pollinate at the optimal time in the flower’s development cycle, often achieving higher fruit set rates than you’d get from random insect visits.
The combination of pest pressure, seed purity risks, and pollinator unpredictability means urban gardeners who skip exclusion nets are essentially gambling with every planting. The nets remove most of that gamble entirely.
Top Benefits of Pollinator Exclusion Nets
Once you understand the problems, the benefits of exclusion nets become immediately obvious — but there are a few that regularly surprise even experienced urban growers.
1. Full Pest Control Without Chemicals
This is the headline benefit, and it delivers exactly what it promises. A correctly sized and secured exclusion net eliminates the need for insecticide sprays on the covered crops, as long as the net is installed before pest populations establish. Research from the Organic Research Centre has documented that physical exclusion barriers reduce pest damage on brassica crops more effectively than standard organic spray programs when applied preventatively.
Pest Type Recommended Mesh Size Effectiveness Cabbage White Butterfly 1.6mm or smaller Very High Leek Moth 1.6mm or smaller High Aphids 0.8mm or smaller High Thrips 0.8mm (ultra-fine) Moderate to High Whitefly 0.8mm (ultra-fine) Moderate Birds Any exclusion net Very High The chemical-free aspect matters even more in urban contexts where gardens often exist close to living spaces, children’s play areas, and pet zones. Removing spray applications from your routine isn’t just better for the environment — it makes your growing space safer for everyone who uses it.
It’s also worth noting that exclusion nets protect your soil biology. Repeated pesticide applications, even organic-approved ones like pyrethrin, affect beneficial ground-dwelling insects and microorganisms. A garden bed under an exclusion net develops a healthier, more complex soil ecosystem over time simply because it’s no longer being chemically disrupted.
2. Protection From Wind and Weather Damage
In rooftop and balcony gardens, especially, wind is a serious and underappreciated threat. Fine mesh exclusion nets act as a windbreak, reducing airspeed at the plant canopy level and preventing the stem micro-fractures, leaf tearing, and desiccation that high urban wind exposure causes. Products like the Harrod Horticultural Ultra-Fine Insect Mesh are specifically tested for wind resistance ratings suitable for exposed rooftop conditions.
3. Controlled Pollination for Better Crop Quality
When you exclude wild pollinators and take over pollination yourself, you gain something unexpected: precision. Hand-pollinating tomatoes by vibrating the flower cluster with an electric toothbrush — mimicking the sonication or buzz pollination that bumblebees perform naturally — consistently produces better fruit set and larger fruits than passive open-pollination in many trial studies.
The same principle applies to seed saving. By controlling exactly which plants contribute pollen, you can select for the traits you want — flavor, size, disease resistance — over multiple generations. This kind of intentional breeding is normally the domain of plant scientists, but exclusion nets put it within reach of any urban gardener with the patience to follow through.
Cucumbers and squash benefit from controlled pollination as well, though they require a more hands-on approach since they have separate male and female flowers. Transferring pollen with a small paintbrush at the right time in the morning — when female flowers are fully receptive — produces straighter, more uniform fruits compared to relying on whatever insect happens to be nearby.
4. Extended Growing Seasons in Small Spaces
The microclimate effect of exclusion nets is genuinely underestimated. By moderating wind chill, retaining a small amount of warmth overnight, and protecting against early frost events, fine mesh nets can extend your effective growing season by two to four weeks on either end of the calendar — a meaningful gain when you’re trying to maximize output from a 4×8 raised bed.
5. Reusable and Cost-Effective Long-Term
A quality exclusion net, properly stored between seasons, will last five to ten years with minimal degradation. Products like the Veggiemesh 1.35mm Insect Netting and Harrod Horticultural Fine Mesh are UV-stabilized and designed specifically for repeated seasonal use. Compare that lifespan against the ongoing cost of organic sprays, replacement transplants lost to pest damage, and failed harvests — the economics of exclusion netting become very clear, very fast. For more insights, check out the Growing Better Facebook Group, where gardeners share their experiences.
The per-season cost of a good exclusion net system breaks down to just a few dollars once you factor in a five-year useful life. For an urban gardener growing food seriously, that’s one of the best returns on investment available in the entire growing toolkit. Even budget-friendly options like Dalen Easy Gardener Floating Row Cover hold up well over multiple seasons when folded and stored away from UV exposure during winter months.
Choosing the Right Exclusion Net for Your Garden
Not all exclusion nets are the same, and picking the wrong one is one of the most common and costly mistakes urban gardeners make. The right net depends on what you’re protecting against, where your garden is located, and how much airflow and light transmission your crops need to thrive.
Three variables matter most when selecting an exclusion net: mesh aperture size, material composition, and structural compatibility with your specific growing setup. Get all three right and the net practically manages itself. Get one wrong, and you’ll be fighting the consequences all season.
Mesh Size Matters: What Numbers to Look For
Mesh aperture — the size of the individual holes in the netting — is the single most important specification to check. Most manufacturers list this in millimeters. A 1.6mm mesh is the standard starting point for blocking butterflies and moths, which covers the majority of flying pest threats to brassicas, leafy greens, and root vegetables. Drop to 0.8mm, and you start excluding smaller threats like aphid adults and whitefly, though at a cost to airflow that needs to be managed more carefully in warm urban environments.
For most urban growers, a 1.35mm to 1.6mm aperture hits the sweet spot — fine enough to stop the most damaging common pests while still allowing sufficient air circulation to prevent fungal disease buildup inside the net tunnel. If thrips or virus-carrying aphids are a known problem in your area, stepping down to 0.8mm ultra-fine mesh is worth the extra attention to ventilation that comes with it.
Best Materials for Urban Rooftop vs. Ground-Level Gardens
Rooftop and balcony gardens face significantly harsher physical conditions than ground-level beds — higher UV exposure, stronger and more consistent wind, and more extreme temperature swings. For these environments, look for exclusion nets made from UV-stabilized high-density polyethylene (HDPE), which resists degradation from prolonged sun exposure. The Lumite BioNet Insect Exclusion Netting is a widely used option in commercial urban farming settings, specifically because of its rated UV resistance and structural stability under wind load.
Ground-level raised bed gardens in more sheltered urban courtyards or community garden plots have more flexibility. Standard polypropylene spunbond fabrics and woven polyethylene nets both perform well at ground level, and lighter fabrics are easier to handle when you’re frequently accessing the bed for harvesting and maintenance. The Agribon AG-15 Floating Row Cover is a popular lightweight option that doubles as a light frost protector while still providing meaningful pest exclusion in sheltered conditions.
Frame and Support Systems That Work in Tight Spaces
The net is only half the system — how you hold it above your plants determines whether it actually works in practice. In tight urban growing spaces, the support structure needs to be compact, adjustable, and easy to remove for access without dismantling the entire setup.
- Wire hoop tunnels: 9-gauge galvanized wire bent into arches and pushed directly into bed soil — affordable, flexible, and easy to relocate between seasons
- PVC conduit hoops: Lightweight, UV-resistant when painted or sleeved, and available in standardized diameters that fit most raised bed widths from 60cm to 120cm
- Modular net cage systems: Pre-built frame kits like the Gardman Fruit and Vegetable Cage or Harrod Horticultural Fruit Cage that clip together and are designed specifically for urban bed dimensions
- Bamboo pole and clamp systems: Inexpensive and completely customizable for irregular or oddly shaped rooftop growing areas
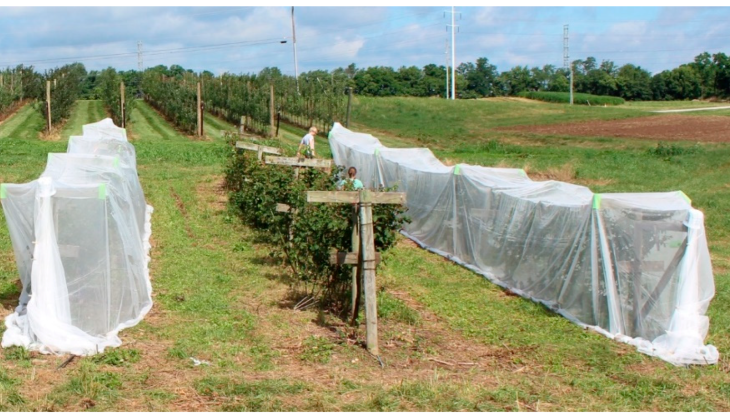
Whatever support system you choose, make sure the net drapes all the way to the soil surface and is secured at the base with ground pegs, sandbags, or a weighted border. A gap of even two centimeters at ground level is all a cabbage white butterfly needs to get inside and lay eggs undisturbed. For more on effective gardening techniques, explore our urban gardening tips.
How to Set Up Pollinator Exclusion Nets Correctly
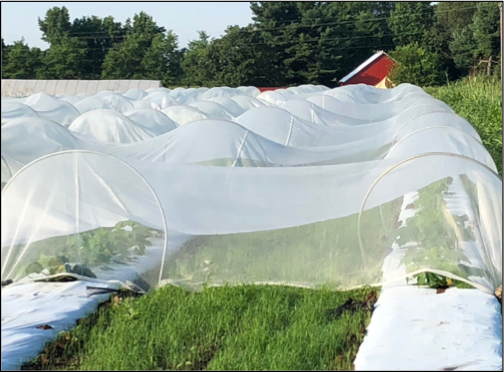
Installation is straightforward once you approach it systematically. The most important rule: install the net before pests arrive, not after. Exclusion is a preventative strategy, and trying to use it as a reactive one after an infestation has started is a losing battle.
Step 1: Measure and Prepare Your Garden Bed
Start by measuring the full length, width, and anticipated plant height of your bed at maturity — not at planting time. Tomatoes that are six inches tall today will be four feet tall in eight weeks. Your support hoops and net need to accommodate that final height with at least ten centimeters of clearance above the plant canopy to prevent foliage from pressing against the mesh, which creates contact points where pests can reach leaves from outside. For more tips on maximizing your urban garden space, explore our urban gardening tricks and tips.
Before installing anything, inspect the soil surface and remove any visible pest eggs, larvae, or adults that might already be present. Check the underside of any transplants you’re about to put in the ground, particularly brassica starts, which are frequently carrying cabbage white eggs when purchased from garden centers. Installing a net over an already-infested planting is one of the most frustrating mistakes a gardener can make — and completely avoidable with a two-minute inspection.
Step 2: Build or Install a Support Structure
Push hoops, poles, or frame components into the soil at regular intervals — typically every 60 to 90 centimeters along the bed length. For wire hoops, bury at least 15 centimeters of each hoop end into the soil to ensure the structure can handle wind load without collapsing onto your plants. The finished frame should be rigid enough that the net, when draped over it, doesn’t sag down and contact the plant canopy in the middle of the tunnel.
Step 3: Secure the Net Without Damaging Plants
Drape the net over the support structure from one end to the other, making sure it overhangs the bed edges evenly on all sides. Secure the perimeter at ground level using galvanized ground staples, clip-on bed rail clamps, or by tucking the excess mesh under paving stones or a wooden bed frame. Check every edge and corner for gaps — these are the entry points that undermine the entire system. Running a secondary pass around the perimeter with binder clips or wooden clothes pegs on the frame makes the seal noticeably more reliable without adding complexity.
Step 4: Create Access Points for Manual Pollination
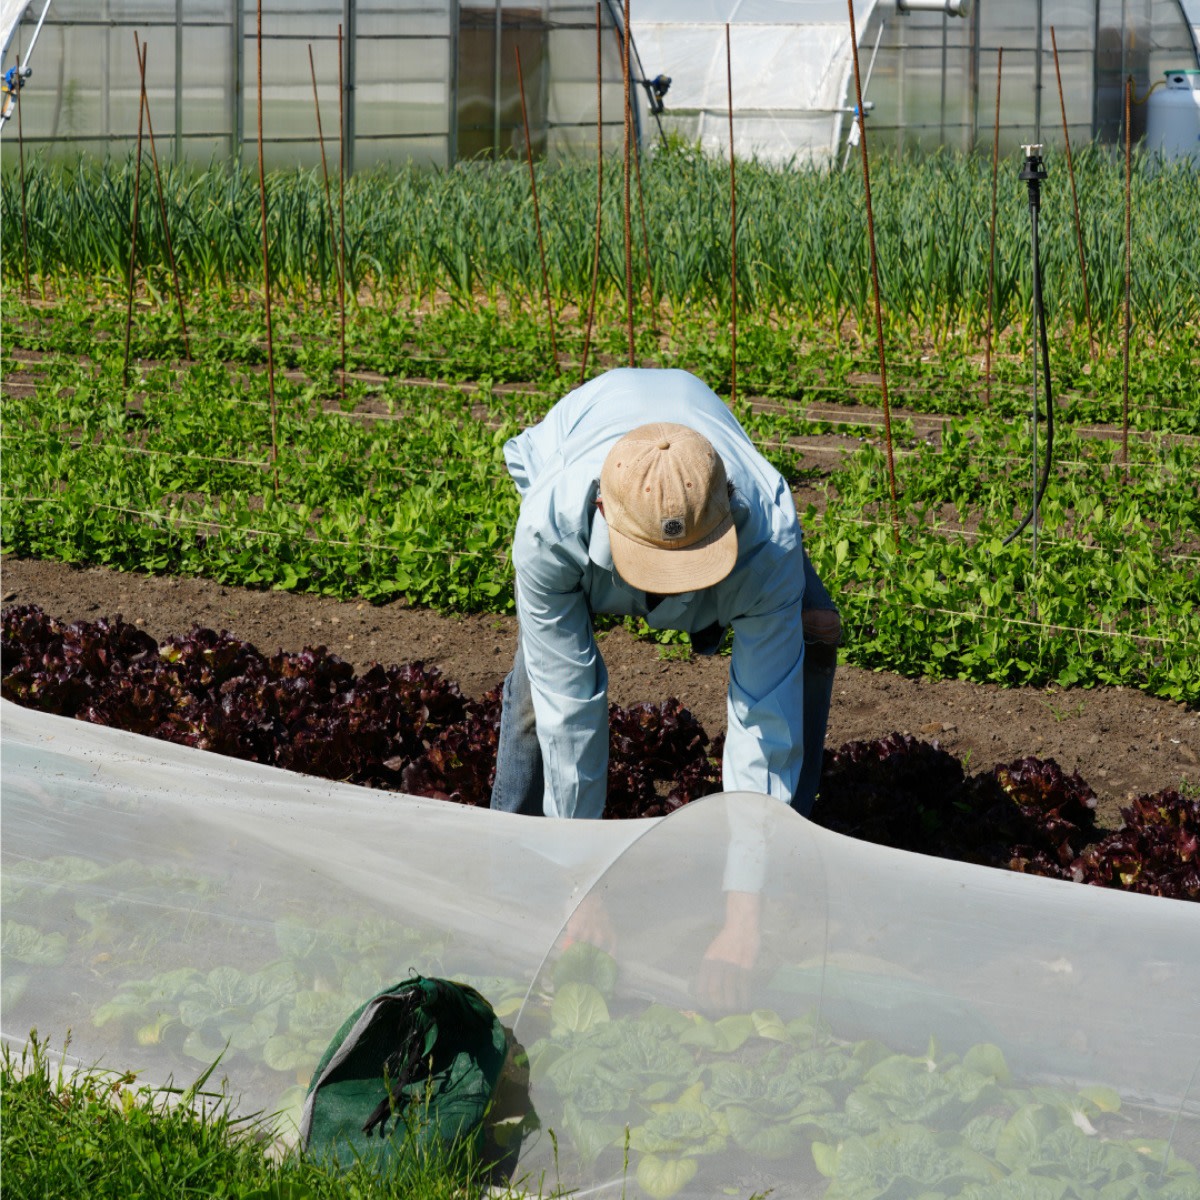
Plan at least one dedicated access point to the net before you finalize the installation. For tunnel-style setups, leaving one end unsealed with a fold-over flap that can be pegged shut is the simplest approach. For cage-style systems, a zippered access panel — available as a feature on premium models like the Harrod Horticultural Premium Fruit Cage — makes daily access dramatically easier. The easier you make it to get inside the net, the more consistently you’ll hand-pollinate and inspect your crops, which is where the real results come from.
Manual Pollination Inside Exclusion Nets
“Balancing pollination and pest control …” from www.cucurbit.plantpath.iastate.edu and used with no modifications.
Excluding pollinators doesn’t mean excluding pollination — it means taking that job on yourself for crops that need it. For many gardeners, this sounds intimidating, but the actual technique takes about sixty seconds per plant once you know what you’re doing. Learn more about urban gardening techniques to enhance your gardening skills.
Which Crops Require Manual Pollination
Not every crop needs hands-on pollination help when under a net. Self-fertile crops with enclosed flower structures — like tomatoes, peppers, and eggplant — can often achieve adequate pollination through gentle physical disturbance of the plant, wind movement through the mesh, or the vibration technique described earlier. Crops that definitely require active manual pollination under exclusion nets include:
- Cucumbers — separate male and female flowers, require pollen transfer between them
- Zucchini and summer squash — same separate flower structure as cucumbers, very time-sensitive pollination window
- Winter squash and pumpkins — larger flowers make manual pollination easy, but the timing must be precise
- Melons — highly dependent on pollinator activity; hand pollination significantly improves fruit set in enclosed environments
- Corn — wind-pollinated but requires good air movement or manual tassel-to-silk transfer in enclosed beds
The Easiest Manual Pollination Methods for Beginners
The simplest method for tomatoes and peppers is the electric toothbrush technique — press the vibrating head gently against the back of a fully open flower cluster for two to three seconds. This replicates the high-frequency buzz that bumblebees naturally produce when visiting flowers, releasing pollen that would otherwise remain trapped inside the anther cone. Do this once daily during peak flowering, ideally between 10 am and 2 pm when pollen release is highest, and you’ll see fruit set that rivals or exceeds open-garden results. For more tips and advice, consider joining the Growing Better Facebook group.
For cucumbers, zucchini, and squash, the process is even more direct. Identify a fully open male flower — recognizable by its straight stem with no swelling behind the petals — and either remove it entirely or use a small artist’s paintbrush to collect pollen from its center. Transfer that pollen directly onto the stigma of an open female flower, which sits at the center of the bloom and has a tiny, immature fruit visible at its base. Female squash flowers are only receptive for a single morning, so check your plants every day during flowering and don’t skip a morning if you want consistent fruit production.
Common Mistakes Urban Gardeners Make With Exclusion Nets
The most damaging mistake is installing the net too late — after pests have already arrived and laid eggs. From that point, the net actually works against you by trapping larvae inside with your plants and concentrating the damage. Install exclusion nets at transplanting time or immediately after direct sowing, before any pest pressure begins. The second most common error is leaving gaps at the base of the net, which completely negates the protection above. Beyond timing and sealing, gardeners frequently choose mesh that’s too coarse for their actual pest problem, skip manual pollination on crops that need it, and forget to account for plant growth height when sizing their support frames — ending up with foliage pressed hard against the mesh within weeks of installation, creating direct contact points for outside pests.
Exclusion Nets Paired With Companion Planting
Using exclusion nets and companion planting together creates a layered defense system that outperforms either strategy alone. Think of it this way: the net handles the direct physical threats to your protected crops, while companion plants positioned around and between your netted beds do the ecological work — drawing in beneficial predatory insects, confusing pest navigation with mixed scent signals, and building a thriving pollinator habitat right at the perimeter where you actually want it.
This pairing also solves one of the philosophical tensions that many urban gardeners feel about exclusion nets — the concern that blocking pollinators harms the broader garden ecosystem. When you surround netted beds with deliberately chosen companion plants, you’re not reducing pollinator habitat. You’re concentrating it exactly where it benefits the garden most, while keeping your most vulnerable crops physically protected.
Plants That Attract Pollinators Around the Net Perimeter
Plant selection around the outside of your exclusion net tunnels and cages should prioritize high-value pollinator plants with long bloom windows. Borage (Borago officinalis) is one of the best choices for urban gardens — it blooms continuously from early summer through frost, produces flowers bees visit with exceptional frequency, and self-seeds reliably in beds and containers. Phacelia tanacetifolia, often called blue tansy or scorpion weed, is a lesser-known annual that ranks among the highest-rated plants for attracting both honeybees and solitary bees in European agricultural research, making it ideal for placing along the sunny edge of raised bed systems. For more tips on urban gardening, check out this urban gardening guide.
Other strong performers for the net perimeter include sweet alyssum (Lobularia maritima), which stays compact enough for container edges and attracts hoverflies whose larvae are voracious aphid predators; calendula, which provides ground-level nectar access for smaller native bee species; and buckwheat (Fagopyrum esculentum), a fast-growing annual that produces dense clusters of small white flowers beloved by parasitic wasps that prey on common garden caterpillars. Planting these in dense clusters rather than scattered single specimens produces better results dramatically — pollinators respond to the scent and visual signal of a mass planting far more reliably than to individual flowers. For more ideas on selecting plants, check out this low-pollen plants guide.
How to Balance Protection and Pollinator Habitat in Small Spaces
In a tight urban garden, every square centimeter has to justify its presence. The practical solution is to designate roughly 20 to 30 percent of your total growing area as open, pollinator-accessible planting — flowers, herbs going to bloom, and companion plants — while keeping the remaining space under exclusion net protection for your highest-value food crops. This ratio creates a functional ecosystem in miniature: pollinators have enough habitat to establish regular foraging routes through your garden, and your netted beds benefit from the pest predator populations those flowers support, even without direct pollinator access inside the nets.
Start Small, See Big Results With Exclusion Nets
You don’t need to net your entire garden on day one. Start with the crop that costs you the most every season — whether that’s brassicas destroyed by cabbage whites, squash lost to vine borers, or seedlings that repeatedly disappear to unseen pests. Net that single bed, do it properly with the right mesh size and a sealed perimeter, and track what happens over the season. The results from even one well-managed exclusion net bed are usually enough to convince any skeptical urban gardener to scale the approach across their entire growing space the following year.
The learning curve is genuinely short. After one season of working with exclusion nets — adjusting access points, timing manual pollination, observing which pests were actually present — most gardeners find the system becomes second nature. The nets come out at planting time, go back in storage at season’s end, and in between they simply work quietly, delivering the kind of consistent, predictable harvests that make urban food growing genuinely satisfying rather than a constant exercise in damage control.
Frequently Asked Questions
These are the questions that come up most often from urban gardeners encountering exclusion nets for the first time — answered directly and practically.
Can Pollinators Still Access Plants Through an Exclusion Net?
No — that is the point of the net. A properly sized and installed exclusion net with apertures of 1.6mm or smaller will prevent bees, butterflies, hoverflies, and other pollinating insects from reaching the flowers inside. This is by design for crops where you want complete pest exclusion and are prepared to handle pollination manually.
For crops you want open-pollinated, simply leave them unnetted or use a coarser mesh with openings large enough for bee access — though this significantly reduces pest exclusion effectiveness. The practical approach most urban gardeners settle on is netting brassicas, leafy greens, and root vegetables that don’t require insect pollination, while leaving tomato, squash, and cucumber beds on a manual pollination schedule during the critical flowering period. For more tips, explore our urban gardening tricks and tips.
What Is the Best Mesh Size for Keeping Out Common Garden Pests?
For most urban gardens, a 1.35mm to 1.6mm aperture mesh handles the majority of flying pest threats including cabbage white butterflies, leek moths, carrot fly, and most beetles. If whitefly, aphids, or thrips are persistent problems in your area — common in warmer urban microclimates and in gardens near infested community plots — step down to a 0.8mm ultra-fine mesh like the Veggiemesh 0.8mm Insect Exclusion Netting for those specific beds, and manage the reduced airflow with careful spacing between plants inside the net.
Do Exclusion Nets Reduce Sunlight and Harm Plant Growth?
Standard woven polyethylene and HDPE exclusion nets transmit 85 to 90 percent of available light, which is not enough reduction to meaningfully affect the growth of full-sun crops in most urban growing conditions. In heavily shaded urban gardens that are already light-limited, ultra-fine 0.8mm nets — which have slightly lower light transmission — should be used selectively only where pest pressure genuinely requires them. For most beds in reasonable sun exposure, the microclimate benefits of the net, including wind reduction and moisture retention, typically more than offset any minor light reduction.
How Long Do Pollinator Exclusion Nets Last Before Needing Replacement?
A UV-stabilized HDPE exclusion net stored properly between seasons — folded or rolled loosely and kept away from prolonged sun and moisture exposure — will realistically last five to eight years for most urban gardeners. Products like the Harrod Horticultural Ultra-Fine Insect Mesh and Lumite BioNet Insect Exclusion Netting are manufactured for repeated seasonal use and hold their aperture size and structural integrity well over that period. The most common cause of premature failure is not UV degradation but physical tearing from being dragged over rough frame edges or compressed under heavy objects during storage — both completely preventable with careful handling.
Can Exclusion Nets Be Used Year-Round in an Urban Garden?
Yes, though the purpose shifts with the seasons. During the main growing season, exclusion nets function as pest barriers and pollination management tools. In autumn and early winter, the same nets provide frost protection for cold-hardy crops like kale, spinach, and overwintering brassicas, effectively extending harvest well past the point when unprotected plants would have been damaged. The microclimate buffering effect of fine mesh netting can keep air temperatures around plants two to four degrees Celsius warmer than ambient overnight temperatures during mild frost events. For more tips on maintaining an urban garden, explore our low-maintenance garden plant kits.
In peak summer in warmer urban climates, monitor temperatures inside the net on hot days — the reduced airflow of finer mesh nets can create heat buildup that stresses heat-sensitive crops like lettuce and spinach. In these conditions, partially lifting the net edges during the hottest part of the day and re-securing them in late afternoon is a simple management step that keeps temperatures in the acceptable range without sacrificing pest protection during the high-risk morning and evening hours when most flying insects are most active.