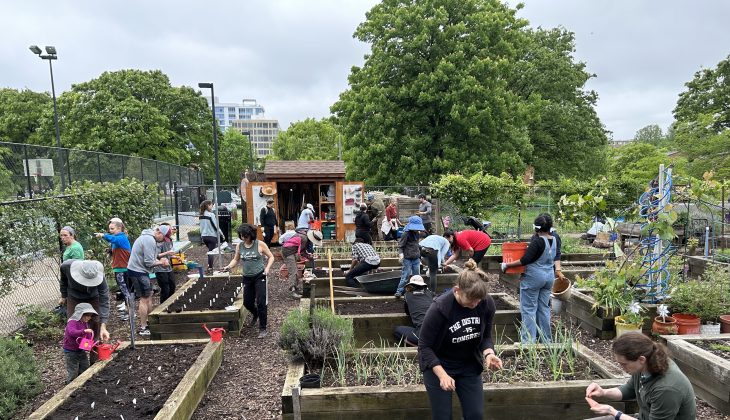
- You don’t need a lot of money or land to start a community garden — you need the right people, a clear plan, and a willingness to start the conversation.
- Most successful community gardens begin with just one organized meeting and a small steering committee of three to five committed people.
- Land access, liability insurance, and written gardener agreements are the three most overlooked legal essentials that can make or break a new garden.
- Plot design, soil preparation, and shared space rules need to be decided before a single seed goes in the ground — skipping this step causes the most common conflicts.
- Funding a community garden is more accessible than most people think — from municipal grants to local business sponsorships, this guide covers exactly where to look.
One well-placed flyer and a single neighborhood meeting is all it took for hundreds of thriving community gardens to get their start.
Starting a community garden sounds like a big undertaking, but the process is far more straightforward than most people expect. The real work isn’t digging beds or sourcing soil — it’s organizing people. Once you have a committed group and a clear framework, the physical garden almost builds itself. Whether you’re a first-timer with a vision or a local agency with land already available, this guide walks you through every stage, from that first conversation to opening day and beyond.
For gardeners looking to deepen their knowledge before breaking ground, resources from experienced community garden builders can save you from the most common early mistakes — especially around land agreements and leadership structure.
Key Takeaways
- Community support comes before everything else — gauge interest before you scout a single location.
- A steering committee of three to five people is the backbone of every well-run community garden.
- Written rules and gardener agreements aren’t bureaucracy — they’re what keeps neighbors from becoming adversaries.
- Costs can be kept surprisingly low with the right mix of grants, donations, and volunteer labor.
- The setup checklist at the end of this guide gives you a phase-by-phase action plan you can start using today.
Start Here: What You Need to Know Before Digging In
Community gardens come in more shapes than most people realize. Some are divided into individual family plots where each gardener tends their own space. Others operate as collective gardens where everyone works the land together and shares the harvest. There are also educational gardens tied to schools or nonprofits, urban farms focused on food production, and hybrid models that blend all of the above. Knowing which model fits your community’s needs before you start recruiting members will save you significant confusion later.
The most important mindset shift to make early on is this: a community garden is a community project first and a gardening project second. The plants, the beds, and the tools all matter — but the relationships between gardeners, and the systems you build to support those relationships, are what determine whether a garden thrives for decades or folds after one season. Go in with that understanding and you’re already ahead of most new organizers.
Build Community Support First
Before you look at a single plot of land, you need to know whether your neighbors actually want a garden. This sounds obvious, but many well-intentioned garden projects skip straight to logistics and then struggle to find participants once the beds are built. Interest-building is its own phase of the process and it deserves real attention.
Start by spreading the word through channels your community already uses — a Facebook group, Nextdoor, a flyer at the local coffee shop or library, or a quick conversation after a school meeting. You’re not launching anything yet. You’re just listening. Ask simple questions: Do you want to grow your own food? Would you use a shared garden space nearby? Even informal responses will tell you whether the appetite is there. For those interested in urban gardening, exploring urban rooftop tomato gardens might provide additional inspiration.
How to Gauge Neighborhood Interest
A simple sign-up sheet or online form is enough at this stage. You’re looking for two things: the number of people interested and the depth of that interest. Someone who says “sure, sounds fun” is different from someone who says “I’ve been wanting this for three years.” Track both, because your core organizing group will come from that second category.
How to Run Your First Interest Meeting
Keep your first meeting short, focused, and low-pressure — sixty to ninety minutes maximum. Choose a neutral, accessible location like a community center, library meeting room, or even someone’s backyard. The agenda doesn’t need to be complicated.
Open with a quick introduction of the concept, leave plenty of time for people to ask questions and share what they’re hoping for, and close with a clear next step. That next step should be identifying who is willing to meet again and take on a small task before the next gathering. Don’t try to solve everything in one meeting — your job is to build momentum, not make every decision on day one. For those looking to maximize their space, consider exploring space-saving options like portable greenhouses.
A few things worth covering in that first meeting include discussing common drip irrigation kit issues and solutions for gardens.
- What type of garden does the group want — individual plots, collective, or hybrid?
- What does everyone hope to grow?
- How much time can people realistically commit each week?
- Are there any potential land sites already on people’s radar?
- Who has skills or connections that could help — landscaping, legal, grant writing?
How to Form a Steering Committee That Actually Works
After your first meeting, identify three to five people who showed up with energy and left with a task. That’s your steering committee. This doesn’t need to be formalized yet — it just needs to exist. These are the people who will keep the project alive between meetings, make the early decisions, and divide the workload so no one burns out. Assign clear roles from the start, even loosely, and you’ll avoid the all-too-common situation where everyone assumes someone else is handling things.
How to Find and Secure the Right Land
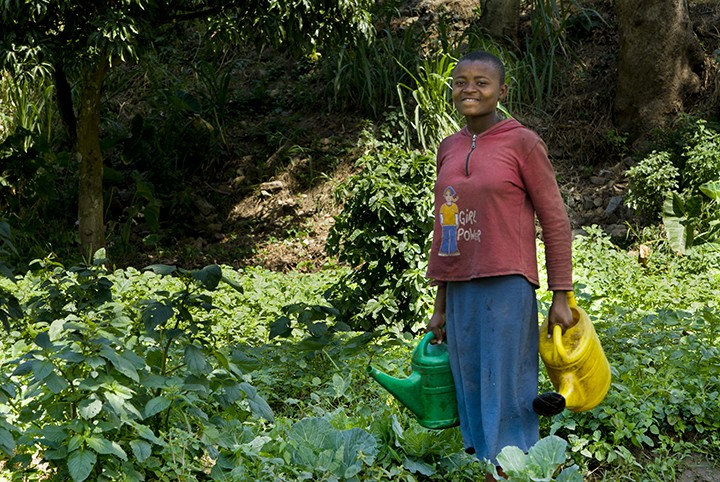
“10 Ways Secure Land Rights Make a …” from www.landesa.org and used with no modifications.
Land is usually the first real obstacle new garden organizers face, but there’s more available than most people assume. Vacant lots, underused municipal land, church grounds, school fields, and even corporate-owned parcels have all been successfully converted into community gardens. The key is knowing what you’re looking for before you start approaching landowners. For additional insights, consider exploring urban garden lease tips to better understand space rental options.
What to Look for in a Garden Site
The ideal community garden site gets at least six hours of direct sunlight per day — that’s the non-negotiable baseline for growing most vegetables. Beyond sunlight, look for access to a water source, reasonably level ground, and proximity to the people who will be using it. A beautiful half-acre plot that’s a forty-minute drive from your neighborhood will sit empty. A modest sunny lot two blocks from where people live will get used every single day. For more tips on optimizing your garden space, consider these urban garden lease tips.
Other practical factors to assess during a site visit include evaluating potential urban garden lease tips to ensure a successful setup.
- Soil quality: Is there existing contamination from prior industrial use? A basic soil test costs under $30 and can reveal lead, arsenic, or other contaminants that would require raised beds instead of in-ground planting.
- Drainage: Does water pool after rain? Poor drainage leads to root rot and ongoing frustration.
- Accessibility: Can people with limited mobility access the space? Are there paths wide enough for wheelbarrows and carts?
- Security: Is the site visible enough to deter vandalism, or will it need fencing?
How to Approach Landowners and Local Agencies
When approaching a landowner — whether that’s a private individual, a city parks department, or a faith organization — come prepared with a one-page summary of your garden plan. Include who’s involved, what the garden will look like, how the land will be maintained, and what the landowner gets out of the arrangement (community goodwill, potential tax benefits for donated land use, or simply a well-maintained property). Most landowners who say no do so because they don’t understand what they’re being asked to agree to. Clarity and professionalism go a long way. For more tips, check out our urban garden lease tips.
Lease Agreements and Legal Considerations
Never garden on land without a written agreement, even if the landowner is a friendly neighbor who says not to worry about it. A simple lease or land use agreement protects both parties and should specify the duration of the arrangement, what improvements can be made to the land, who is responsible for liability, and what happens if the agreement ends. Many community garden organizations use a one to three year renewable lease as a starting point. Your group should also look into whether liability insurance is required — many municipalities and landowners will insist on it, and umbrella policies for community gardens are available and typically affordable.
Set Up Your Garden Leadership Structure
“Leadership Gardens – by Melissa George” from melissageorge.substack.com and used with no modifications.
A garden without clear leadership is a garden headed for conflict. This doesn’t mean you need a rigid hierarchy — most community gardens operate with a fairly flat, collaborative structure — but it does mean that specific responsibilities need to be attached to specific people. When everyone is in charge, no one is.
The leadership structure you set up early will shape the culture of your garden for years. Take time to think through not just who fills which role, but how decisions get made, how disputes get resolved, and how new members get brought into the governance process over time. Writing this down — even in a simple one-page document — makes everything easier when disagreements arise.
Key Roles Every Community Garden Needs
Even the smallest community gardens benefit from having a few defined roles. These don’t have to be formal titles, but the responsibilities they cover need to be owned by someone specific:
- Garden Coordinator or Chair: Oversees the overall operation, runs meetings, and serves as the primary point of contact for the landowner or municipal partners.
- Plot Manager: Handles plot assignments, tracks which plots are active, and follows up with gardeners who aren’t maintaining their space.
- Treasurer: Manages dues collection, tracks expenses, and reports on the garden’s financial health at regular intervals.
- Communications Lead: Manages the group’s email list, social media presence, or bulletin board — however your group communicates.
- Maintenance Coordinator: Organizes work days, manages shared tools and equipment, and ensures common areas stay clean and functional.
Bylaws, Articles of Incorporation, and Gardener Agreements
If your community garden is forming as a standalone nonprofit or an incorporated organization, you’ll need bylaws and articles of incorporation. Bylaws outline how your organization operates — how decisions are made, how officers are elected, and how the group can amend its own rules over time. Articles of incorporation are the legal documents filed with your state to establish the organization as a formal entity. Many community gardens start informally and incorporate later as they grow, which is perfectly reasonable. What’s not optional, even for informal groups, is a written gardener agreement.
A gardener agreement is the document each plot holder signs when they join the garden. It outlines their responsibilities, confirms they’ve read and agreed to the garden rules, and provides a paper trail if issues arise later. Without it, enforcing any rule becomes an uphill battle. Keep it simple — one to two pages is enough — but make sure it covers the essentials.
What a Basic Gardener Agreement Should Include:
• Plot number and assigned gardener name
• Annual dues amount and payment due date
• Minimum maintenance requirements (e.g., plot must be weeded and actively planted between May and October)
• Confirmation that the gardener has read and agrees to all garden rules
• Policy on plot abandonment and what happens to unpicked produce
• Acknowledgment of liability and safety responsibilities
• Signature and date
Once your agreements are signed and filed, revisit them annually. Gardens evolve, rules get refined, and your agreements should reflect the current reality of how the garden actually operates. For more on this topic, check out our urban garden lease tips.
Plan Your Garden Layout and Plot Design
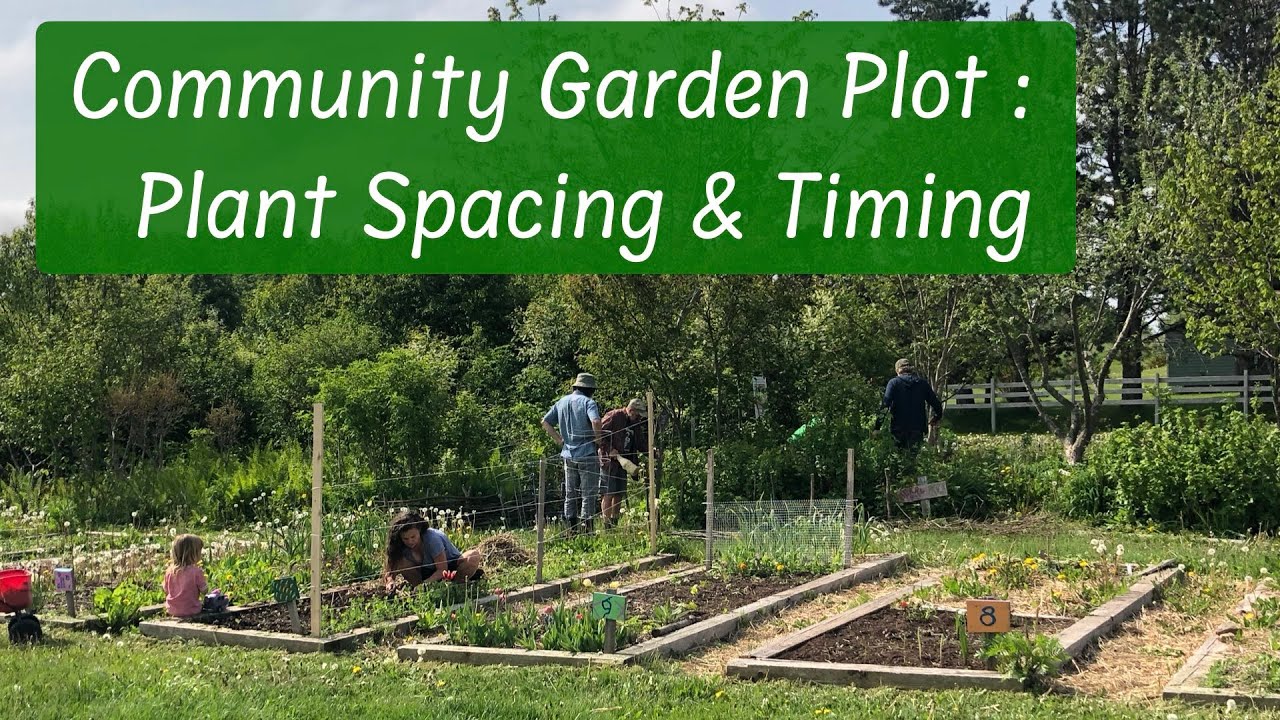
“Designing Your Community Garden Plot …” from www.youtube.com and used with no modifications.
A well-designed garden layout prevents a surprising number of future conflicts. When plot boundaries are clear, access paths are wide enough to navigate with a wheelbarrow, and shared infrastructure like water spigots and tool storage is logically placed, the garden runs smoothly. When the layout is improvised, you end up with disputes over encroaching plants, blocked pathways, and plots that get skipped over during watering because no one can reach them easily. For more insights, check out this guide on starting a garden.
How to Divide Plots Fairly
Standard individual plots in community gardens typically range from 100 to 400 square feet, with 10×10 and 10×20 being the most common sizes. Smaller plots work well for beginners and for gardens with high demand and limited space. Larger plots suit experienced gardeners or families who plan to grow a significant portion of their food.
When dividing plots, prioritize consistency over customization. Plots that are roughly the same size and receive similar sun exposure are easier to assign fairly and harder to argue over. If your site has naturally better and worse areas — one corner gets more shade, another sits near a drainage issue — consider offering those spots at a reduced fee or reserving them for perennial plantings and shared use rather than individual assignments. For more on managing water issues, explore common drip irrigation solutions for gardens.
Shared Space vs. Individual Plots
Most community gardens benefit from reserving at least 20 to 30 percent of the total space for shared use. This can include a communal seating area, a tool shed, a compost station, a children’s garden, a pollinator bed, or herb and flower borders along pathways. Shared spaces give the garden a sense of identity beyond individual plots and create natural gathering points that strengthen the community feel. They also provide flexibility — if a plot goes unoccupied for a season, shared space absorbs the visual gap and keeps the garden looking intentional.
Soil Preparation and Raised Bed Basics
Soil is the foundation of everything that grows in your garden, and it deserves more attention than most startup guides give it. Before planting a single seed, get a soil test done. Your local cooperative extension office typically offers them for $15 to $30, and the results will tell you your soil’s pH, nutrient levels, and whether any amendments are needed. Most vegetables thrive in soil with a pH between 6.0 and 7.0 — slightly acidic to neutral.
Raised Bed Soil Mix (Per 4×8 Bed):
• 60% topsoil
• 30% compost (aged, not fresh)
• 10% coarse perlite or aged wood chips for drainageThis mix provides excellent drainage, strong nutrient content, and a loose texture that most vegetable root systems thrive in. For a standard 4×8 bed filled to 12 inches deep, you’ll need approximately 32 cubic feet (roughly 1.2 cubic yards) of total mix.
If your site has contaminated or unknown soil history — particularly former industrial land, gas stations, or older urban lots — skip in-ground planting entirely and go straight to raised beds. Line the bottom of each bed with hardware cloth to block burrowing pests and a layer of cardboard to suppress weeds before filling with your soil mix.
For gardens on tight budgets, sourcing compost from a municipal composting program is often free or very low cost. Many cities offer bulk compost pickups for community organizations, and some will even deliver. It’s worth a single phone call to your local parks or public works department to find out what’s available before you spend money on bagged products.
Pathways between beds are just as important as the beds themselves. A minimum width of 24 inches between beds allows two people to pass each other comfortably. If your garden will accommodate wheelchairs or garden carts, bump that to 36 inches. Covering pathways with wood chip mulch, gravel, or landscape fabric keeps weeds down and mud manageable — two things that make the difference between a garden that feels pleasant to visit and one that feels like a chore.
Draft Your Garden Rules and Guidelines
Garden rules aren’t about control — they’re about protecting everyone’s experience. A gardener who neglects their plot doesn’t just affect their own harvest; their weeds seed into neighboring plots, their pests spread, and their absence creates extra work for everyone around them. Clear, written rules set expectations from day one and give garden leadership a fair, documented way to address problems when they arise.
What Your Rules Must Cover
Your rules document should be thorough without being overwhelming. A well-structured set of community garden rules typically covers the following core areas: plot maintenance standards (how often the plot must be tended, what constitutes neglect), water use guidelines, policies on pesticide and herbicide use — many community gardens prohibit synthetic chemicals entirely — rules around shared tools and equipment, guest and children policies, harvest etiquette for shared crops, and the process for resolving disputes between gardeners. Post the rules visibly at the garden entrance and include them in your gardener agreement so there’s no claim of not knowing.
How to Handle Rule Violations
Even the friendliest community gardens occasionally deal with rule violations. The key is having a consistent, documented process so that enforcement feels fair and impersonal rather than like a personal attack. A standard approach that works well in most settings:
- First notice: A friendly written or verbal reminder with a clear deadline to correct the issue.
- Second notice: A formal written notice with a specific correction deadline and a note that the matter is on record.
- Third notice: A meeting with garden leadership to discuss the situation, potential plot reassignment, or membership review.
- Final action: Plot forfeiture with a refund of any unused portion of annual dues.
Document every step. A simple log that records the date, the issue, the notice given, and the outcome protects the garden and its leadership from accusations of unfair treatment. It also creates a paper trail that makes the rare difficult conversation much easier to have.
One thing worth emphasizing: most rule violations in community gardens come from confusion or life circumstances, not bad intentions. A gardener who stops showing up in July is often dealing with a job change, a family illness, or just a loss of enthusiasm they didn’t anticipate. Build some human flexibility into your process — a quick check-in call before you send a formal notice will resolve the majority of issues before they escalate.
Fund Your Community Garden
“Community Garden Grants — Food Well …” from www.foodwellalliance.org and used with no modifications.
Money is almost always one of the first concerns raised in early planning meetings, and it’s a legitimate one. Startup costs for a community garden can range from a few hundred dollars for a very modest plot to $10,000 or more for a full buildout with raised beds, fencing, irrigation, a tool shed, and signage. The good news is that most of those costs don’t have to come out of anyone’s pocket — there are more funding pathways available to community gardens than most organizers realize.
Common Funding Sources for New Gardens
Municipal and county grants are often the most accessible starting point. Many cities have dedicated community greening or urban agriculture programs that offer small grants specifically for neighborhood garden projects. Your local parks department, community development office, or food policy council is the right place to start asking. Applications are usually straightforward and the amounts — typically $500 to $5,000 — are well-matched to startup needs.
Beyond municipal sources, community gardens have successfully secured funding through various methods, including innovative solutions like urban space greenhouse solutions.
- Local community foundations: Many offer small grants for neighborhood improvement projects with relatively simple applications.
- Corporate sponsorships: Hardware stores, garden centers, and grocery chains often sponsor community gardens in exchange for signage and community goodwill.
- Crowdfunding campaigns: Platforms like GoFundMe or Patronicity work well for community gardens because the project has natural visual appeal and a built-in local audience.
- Annual plot dues: Even modest dues of $25 to $75 per plot per season add up quickly and cover ongoing maintenance costs.
- Service club donations: Rotary clubs, Lions clubs, and similar organizations frequently support tangible community improvement projects.
How to Keep Costs Low From the Start
Before you spend a dollar, make a list of everything you need and then ask what can be donated, borrowed, or sourced for free. Tool donations from retiring gardeners are common and often just require a social media post asking for them. Lumber for raised beds can sometimes be sourced from construction site offcuts or habitat for humanity ReStores. Compost, as mentioned earlier, is often available free from municipal programs.
Prioritize spending on the things that genuinely can’t be improvised: soil testing, liability insurance, water infrastructure, and secure fencing if your site requires it. Everything else — signage, seating, decorative elements, tool storage — can be added incrementally as the garden generates its own revenue through dues and donations. A garden that opens simply and grows over time is far more sustainable than one that tries to launch perfectly and runs out of money before the first season ends.
Community Garden Setup Checklist
Breaking the startup process into phases makes it manageable. Each phase builds on the one before it, and having a clear checklist means nothing important gets forgotten in the excitement of moving forward. Use this as your running reference from the first meeting to opening day. For those interested in urban gardening, consider these urban garden lease tips to ensure you have the right space for your community garden.
The checklist below covers all four phases of community garden startup — from initial community building through to ongoing management after launch. Check off each item as you complete it, and don’t rush from one phase to the next before the previous one is solid. A garden built on a shaky foundation of informal agreements and unclear roles will face problems that a garden built carefully and deliberately simply won’t encounter.
Phase 1: Community and Planning
Start by confirming that real interest exists in your neighborhood before committing to anything. Post on local social media, put up flyers, and have direct conversations. Once you have a list of interested people, hold your first meeting, identify your steering committee, and assign clear roles. Don’t move to Phase 2 until you have at least three to five committed people who have agreed to take ownership of specific tasks.
- ☐ Post interest-gauging announcements on Nextdoor, Facebook, and community boards
- ☐ Hold first interest meeting with a clear agenda
- ☐ Identify and confirm steering committee members (3–5 people)
- ☐ Assign roles: coordinator, treasurer, communications lead, plot manager, maintenance lead
- ☐ Decide on garden type: individual plots, collective, or hybrid
- ☐ Set a realistic timeline for the remaining phases
- ☐ Create a basic communication channel for the group (email list, group chat, or newsletter)
This phase is also the right time to research what already exists in your area. Are there established community gardens nearby you can visit and learn from? Are there Extension Master Gardeners, community organizers, or local nonprofits who have done this before and would share their experience? You don’t have to build the knowledge base from scratch — tap into what’s already there, such as exploring small urban portable greenhouses for inspiration.
Phase 2: Land and Legal
Once your steering committee is in place, shift your focus to securing land and getting your legal foundation right. This phase requires the most patience — land negotiations take time, and legal documents take longer than people expect to get right. Resist the urge to rush it.
- ☐ Identify and evaluate at least two to three potential sites
- ☐ Conduct a site visit and assess sunlight, water access, drainage, and soil condition
- ☐ Order a soil test from your cooperative extension office ($15–$30)
- ☐ Approach landowner with a one-page garden proposal
- ☐ Negotiate and sign a written land use agreement or lease (minimum one year)
- ☐ Research liability insurance requirements and obtain a policy if needed
- ☐ Draft bylaws and gardener agreements
- ☐ Decide whether to incorporate as a nonprofit (required for most grant applications)
- ☐ Open a dedicated bank account for garden finances
Phase 3: Physical Setup
Now the work becomes visible. Phase 3 is where your garden starts to take physical shape — and where volunteers will show up most enthusiastically. Organize at least two to three structured work days rather than trying to do everything at once. Shared physical work is one of the fastest ways to build community bonds, so make these days social as well as productive. Provide water, snacks, clear task lists, and the right tools, and people will come back for more.
- ☐ Finalize garden layout and plot design on paper before breaking ground
- ☐ Mark plot boundaries and pathway widths (minimum 24 inches, 36 inches for accessibility)
- ☐ Clear vegetation and prepare the ground
- ☐ Install fencing if required for the site
- ☐ Set up water infrastructure — spigot access, hose bibs, or drip irrigation
- ☐ Build or install raised beds if in-ground planting is not suitable
- ☐ Fill beds with tested, amended soil mix (60% topsoil, 30% compost, 10% perlite)
- ☐ Cover pathways with wood chip mulch, gravel, or landscape fabric
- ☐ Set up compost station in a designated shared area
- ☐ Install tool storage (a lockable shed or secure cabinet)
- ☐ Add signage — garden name, rules board, and plot numbers
Phase 4: Ongoing Management
A well-run community garden doesn’t manage itself, but it shouldn’t require heroic effort from its leadership either. The systems you put in place — regular meetings, seasonal work days, annual plot renewals, and a clear process for handling issues — are what allow the garden to run smoothly year after year with a modest investment of time from its coordinators. Plan for at least one full-group meeting per season, a spring and fall work day, and a simple annual review where rules, dues, and plot assignments are revisited. Gardens that build these rhythms in early rarely struggle with the operational burnout that derails gardens that wing it.
- ☐ Collect signed gardener agreements and annual dues before plots are assigned
- ☐ Assign plots and distribute garden keys or gate codes
- ☐ Hold a seasonal orientation for new members
- ☐ Schedule spring and fall community work days
- ☐ Conduct monthly plot checks and document findings
- ☐ Send regular communications to keep members engaged (newsletter, email, or notice board)
- ☐ Review and update rules annually before the new season begins
- ☐ Renew land use agreement before expiration
- ☐ Report on finances at least twice per year to the full membership
- ☐ Celebrate the garden — host a harvest potluck, a seed swap, or a seasonal gathering
Your Garden Starts With One Conversation
Every thriving community garden in existence right now started exactly where you are — with an idea, a little uncertainty, and one person willing to ask the people around them if they were interested. You don’t need a perfect plan, a large budget, or a guaranteed piece of land to begin. You need to start the conversation, find your people, and take the process one phase at a time. The checklist above gives you a clear path forward. The rest is just showing up and doing the work — which, as any gardener knows, is the most rewarding part.
Frequently Asked Questions
Starting a community garden raises a lot of practical questions, especially for first-time organizers who have gardening experience but not necessarily community organizing experience. The questions below cover the most common sticking points that come up during the planning and launch phases.
The answers here are intentionally direct and specific. Community gardening has been done successfully in thousands of cities and towns across the country, in widely varying conditions — from dense urban neighborhoods with postage-stamp lots to rural communities with acres of available land. The core answers hold across all of them.
If your specific situation throws up a question that isn’t covered here, your local cooperative extension office, a nearby established community garden, or a regional community gardening network will almost always be able to point you in the right direction. These resources exist specifically to support new gardens and are underused by most organizers. For example, understanding common issues like drip irrigation kit problems can be crucial for maintaining a successful garden.
How Many People Do You Need to Start a Community Garden?
You need a minimum of three to five committed people to form a functional steering committee and move the project forward. For the garden itself, a viable first season typically requires enough plot holders to cover basic operating costs through dues — which usually means 10 to 20 active gardeners depending on your budget. That said, many successful gardens have launched with fewer than ten members and grown organically from there. Start with who you have and build as the garden becomes visible in the community.
Who Owns a Community Garden?
Ownership depends on your specific structure. In most community gardens, the land is owned by a third party — a municipality, a private landowner, a church, or a school — and the garden group operates on it under a lease or land use agreement. The garden organization itself may own the infrastructure: the raised beds, the tool shed, the fencing, and the equipment. If your group incorporates as a nonprofit, the organization becomes the legal entity that holds assets and agreements. It’s important to clarify ownership of both land and improvements in your lease before building anything permanent on a site you don’t own.
How Much Does It Cost to Start a Community Garden?
A minimal community garden — a few in-ground plots, basic water access, simple signage, and a shared tool set — can be launched for as little as $500 to $1,000 if you source materials creatively and rely on volunteer labor. A more complete setup with raised beds, fencing, irrigation, a tool shed, and professional soil amendments typically runs $5,000 to $15,000 for a garden with 20 to 30 plots. Municipal grants, corporate sponsorships, and annual dues are the most reliable ways to cover these costs without asking individuals to contribute large amounts of money.
Annual operating costs after the initial build are much more manageable. Most established community gardens with 20 to 40 plots operate on annual budgets of $1,000 to $3,000 — covering water, insurance, tool replacement, compost, and occasional infrastructure repairs. Plot dues of $30 to $75 per season are usually sufficient to cover these ongoing expenses with a modest reserve left over.
What Vegetables Grow Best in a Community Garden?
The most consistently successful crops in community garden settings are ones that produce abundantly, are relatively forgiving of variable care, and are widely enjoyed. Tomatoes, zucchini, green beans, cucumbers, kale, Swiss chard, lettuce, peppers, and herbs like basil and parsley are perennial community garden favorites for exactly these reasons. Root vegetables like carrots and beets work well in raised beds with loose, deep soil. What grows best in your specific garden will ultimately depend on your climate zone, your soil, and how much direct sunlight your plots receive — which is why that soil test and site assessment in Phase 2 are so important before gardeners start planting.
How Do You Handle Conflicts Between Community Garden Members?
Conflicts in community gardens almost always fall into a few predictable categories: plot encroachment, neglect, disagreements over shared resource use, and personality clashes between neighboring gardeners. The best prevention is clear written rules and a gardener agreement signed before the season begins — when expectations are explicit, most conflicts don’t escalate because there’s nothing to argue about.
When conflicts do arise, the garden coordinator should act as a neutral mediator rather than a judge. Start by talking to both parties separately to understand each perspective, then bring them together for a direct conversation focused on resolving the specific issue rather than assigning blame. In the vast majority of cases, a calm, facilitated conversation between two neighbors who both care about the garden is enough to reach a workable resolution. Document the conversation and the outcome regardless of how it’s resolved.
For conflicts that can’t be resolved through mediation — which is genuinely rare but does happen — your written rules and enforcement process provide the escalation path. Follow the documented steps consistently and impartially, and the outcome will be defensible regardless of how unhappy one party might be. A community garden that enforces its rules consistently and fairly is one where the vast majority of members feel safe, respected, and motivated to keep showing up season after season.