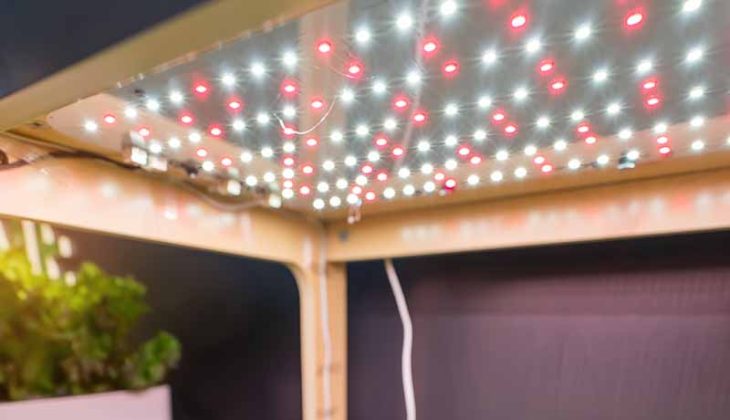
Article-At-A-Glance: Grow Light Basics Every Urban Gardener Needs to Know
- Full-spectrum LED grow lights are the most energy-efficient and versatile option for indoor gardens, supporting every growth stage from seedling to harvest.
- The 20 to 50 watts per square foot rule is the single most important calculation you need before buying any indoor lighting kit.
- Most herbs and leafy greens need 14 to 16 hours of light daily — but skipping the dark period is one of the most common mistakes that silently kills indoor plants.
- Pairing your grow light with a hydroponic kit dramatically amplifies results, especially in small urban apartments where soil space is limited.
- Amazing Garden offers a wide selection of premium grow lights, hydroponic kits, and indoor garden tools — all in one place for urban growers at every skill level.
The difference between a thriving indoor garden and a shelf full of struggling plants almost always comes down to one thing: light.
Most urban apartments simply do not get enough natural sunlight to grow anything beyond a few shade-tolerant houseplants. North-facing windows, tall surrounding buildings, and seasonal changes in sun angle all cut into the usable light your plants receive each day. Even a south-facing window in a city high-rise might only deliver two to four hours of direct light — far below what herbs, vegetables, or flowering plants actually need to grow well.
That gap is exactly where indoor gardening lighting kits step in. Whether you are growing basil on a kitchen shelf, running a vertical herb wall in your living room, or setting up a dedicated grow tent, the right lighting kit closes the gap between what your plants need and what your space naturally provides. For urban growers looking to get started or level up their setup, Amazing Garden brings together grow lights, hydroponic systems, and gardening tools with expert guidance built in.
The Right Grow Light Changes Everything
Choosing a grow light is not just about buying something bright. Plants use specific wavelengths of light to drive photosynthesis, and getting those wavelengths right determines whether your plants just survive or actually thrive. The wrong light means slow growth, pale leaves, and plants that never quite reach their potential.
Why Natural Light Fails Most Indoor Spaces
Natural sunlight delivers a full spectrum of wavelengths, from ultraviolet through infrared, at intensities that indoor spaces simply cannot replicate through a window. Glass filters out UV light, and the angle of sunlight through a window changes dramatically across seasons. In winter months, many cities see fewer than five hours of usable daylight, which is not nearly enough for productive plant growth. Indoor Garden growers seeking to optimize plant growth indoors, can explore the best indoor grow lights as an effective alternative.
Beyond intensity, consistency is a major problem. Plants need reliable, predictable light cycles to regulate their internal clocks. When light levels fluctuate based on weather and cloud cover, plants respond with uneven growth patterns and delayed flowering. Indoor grow lights solve both problems by delivering consistent, full-spectrum light on a programmable schedule every single day.
- Window light loses up to 50% intensity just a few feet from the glass
- City buildings and overhangs can block direct sunlight for most of the day
- North and east-facing windows rarely deliver enough intensity for fruiting plants
- Seasonal sun angle changes reduce effective light hours significantly in winter
- Cloudy days can drop indoor light levels below the minimum threshold for photosynthesis
What Full-Spectrum LED Light Actually Does for Plants
Full-spectrum LED grow lights mimic the complete wavelength range of natural sunlight, but with precision targeting. Blue wavelengths in the 400 to 500 nanometer range drive vegetative growth, keeping stems compact and leaves wide and dark green. Red wavelengths in the 620 to 700 nanometer range trigger flowering and fruiting. A quality full-spectrum LED delivers both simultaneously, which means you can use one light from seed to harvest without swapping bulbs. For more space-saving options, set aside some time to explore small urban portable greenhouses.
The 20 to 50 Watts Per Square Foot Rule Explained
This is the most practical calculation in indoor growing. Low-light plants like herbs and lettuces grow well at 20 to 30 watts per square foot. Medium-demand plants like tomatoes and peppers need 30 to 40 watts. High-demand fruiting plants and dense canopy setups require the full 40 to 50 watts per square foot to perform at their best.
Getting this number right before you buy prevents two of the most common and costly mistakes: underpowered lights that produce spindly, stretching plants, and overpowered setups that burn leaves and waste electricity.
| Plant Type | Watts Per Sq Ft | Daily Light Hours |
|---|---|---|
| Herbs & Lettuces | 20–30W | 14–16 hrs |
| Tomatoes & Peppers | 30–40W | 16–18 hrs |
| Flowers & Tropicals | 25–35W | 12–14 hrs |
| Dense Fruiting Plants | 40–50W | 16–18 hrs |
Types of Indoor Grow Lights Worth Buying
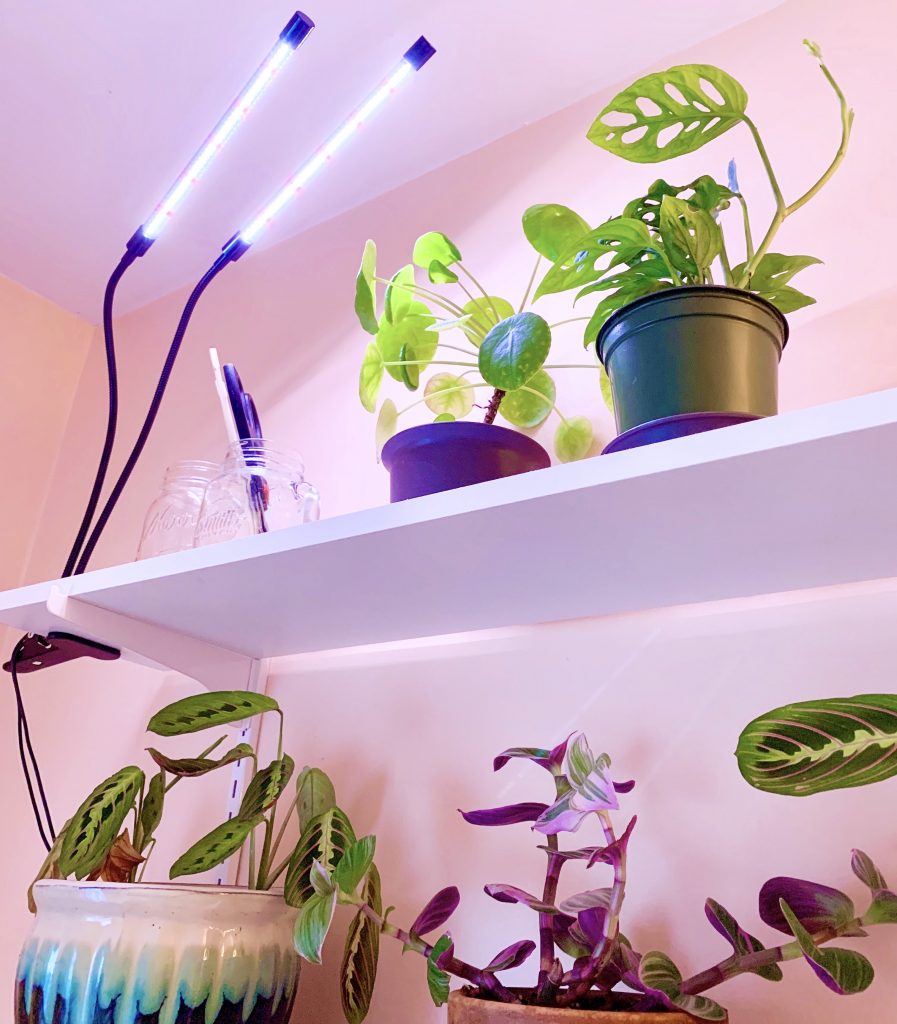
“The Best Grow Lights for Houseplants …” from sproutsandstems.com and used with no modifications.
Not every grow light is built for the same purpose, and understanding the core differences saves you from buying something that works against your setup rather than for it.
LED Grow Lights: The Best All-Around Choice
LED grow lights run cooler, consume less electricity, and last significantly longer than any other type — often 50,000 hours or more. Modern full-spectrum LEDs have closed the performance gap with more powerful light types while remaining practical for apartments and small spaces. For most urban gardeners, LED is the clear starting point.
Fluorescent and T5 Lights for Seedlings and Low-Light Plants
T5 fluorescent fixtures are still a solid choice for seed starting and propagation trays. They run cool, sit close to plants without burning them (as close as 12 inches), and produce a gentle, even light spread that works well for shallow trays of seedlings or low-demand herbs. They are not powerful enough for fruiting plants at full maturity, but as part of a multi-stage lighting system, they earn their place.
HID and HPS Lights for Serious Greenhouse Growers
High-intensity discharge (HID) and high-pressure sodium (HPS) lights deliver raw power that LEDs are still catching up to at the highest output levels. They produce significant heat and consume more electricity, which makes them impractical for apartments. However, in a dedicated greenhouse or large grow room with proper ventilation, HPS lights produce exceptional yields for fruiting crops like tomatoes, cucumbers, and cannabis.
The heat output from HPS fixtures actually serves a secondary purpose in cooler climates — it helps maintain greenhouse temperatures during winter months, reducing the need for separate heating systems. For urban greenhouse growers in northern climates, this dual function can make HPS a surprisingly practical choice.
How to Match Your Lighting Kit to Your Space
Your grow space determines everything about which lighting kit will actually work for you. A compact LED panel that performs brilliantly on a kitchen shelf would be woefully underpowered in a 4×4 grow tent. Getting this match right from the start saves money and prevents a lot of frustration. For more details, be sure to look at the beginner’s guide to choosing and using grow lights.
Apartments and Small Urban Spaces: Compact LED Panel Kits
For apartment growers, the priority is efficiency in a tight footprint. Compact LED panel kits like the Mars Hydro TS-600 or the Spider Farmer SF-1000 deliver enough output for a 2×2 foot grow area while drawing under 100 watts from the wall — barely more than a standard light bulb. These panels hang from adjustable cables, making height adjustment simple as plants grow taller. As an indoor Gardener, interested in maximizing space, explore the space-saving greenhouse options.
For a kitchen herb setup or a small countertop garden, clip-on or desk-mounted LED grow lights with built-in timers offer the most convenient entry point. Models with gooseneck arms let you direct light exactly where it is needed without taking up floor or shelf space.
Vertical Gardens and Shelving Setups
Vertical shelving systems multiply your grow space without expanding your floor footprint. Each shelf level needs its own dedicated light source, typically a T5 fluorescent strip or a slim LED bar mounted directly under the shelf above. The standard spacing for shelf-mounted grow lights is 6 to 12 inches above the plant canopy, depending on the light type and intensity. For more space-saving options, take into account, exploring small urban portable greenhouses.
A four-tier shelving unit with T5 or LED strip lights on each level can support 16 to 24 herb plants in a floor space of roughly 2 by 4 feet. That is a meaningful amount of fresh food production in an apartment living room or spare bedroom.
Vertical Shelf Lighting Quick Reference:
• T5 fluorescent strips: mount 6–12 inches above canopy
• LED bar lights: mount 4–8 inches above canopy
• Compact LED panels: mount 12–18 inches above canopy
• Recommended shelf spacing: 18–24 inches between levels to accommodate plant height plus light fixture
Dedicated Grow Rooms and Tent Systems
Grow tents create a fully controlled environment inside an apartment or spare room. Reflective interior walls bounce light back onto plants, improving efficiency by up to 30% compared to an open room setup. Standard tent sizes start at 2×2 feet for a single LED panel and scale up to 4×8 feet for larger harvests.
Ventilation becomes critical inside a grow tent. An inline fan paired with a carbon filter manages heat and humidity while keeping odors contained. For LED setups in a 4×4 tent, a 4-inch inline fan running at low speed is typically sufficient to maintain optimal temperature and airflow. Anyone building a healthier home setup may also want to focus on how indoor gardening choices affect air quality. Consequently, include space-saving greenhouse options as part of your decision-making process..
The complete tent system — tent, light, fan, filter, and timer — is the most self-contained indoor growing environment available to urban growers. Everything is contained, controllable, and scalable.
Greenhouse Lighting for Year-Round Growth
Residential greenhouse kits attached to a home or set up in a backyard extend the growing season dramatically, but they still need supplemental lighting during winter months when daylight hours drop below plant requirements. HPS or high-output LED fixtures mounted overhead fill the gap that shortened winter days create, keeping production consistent year-round.
Daily Light Hours by Plant Type
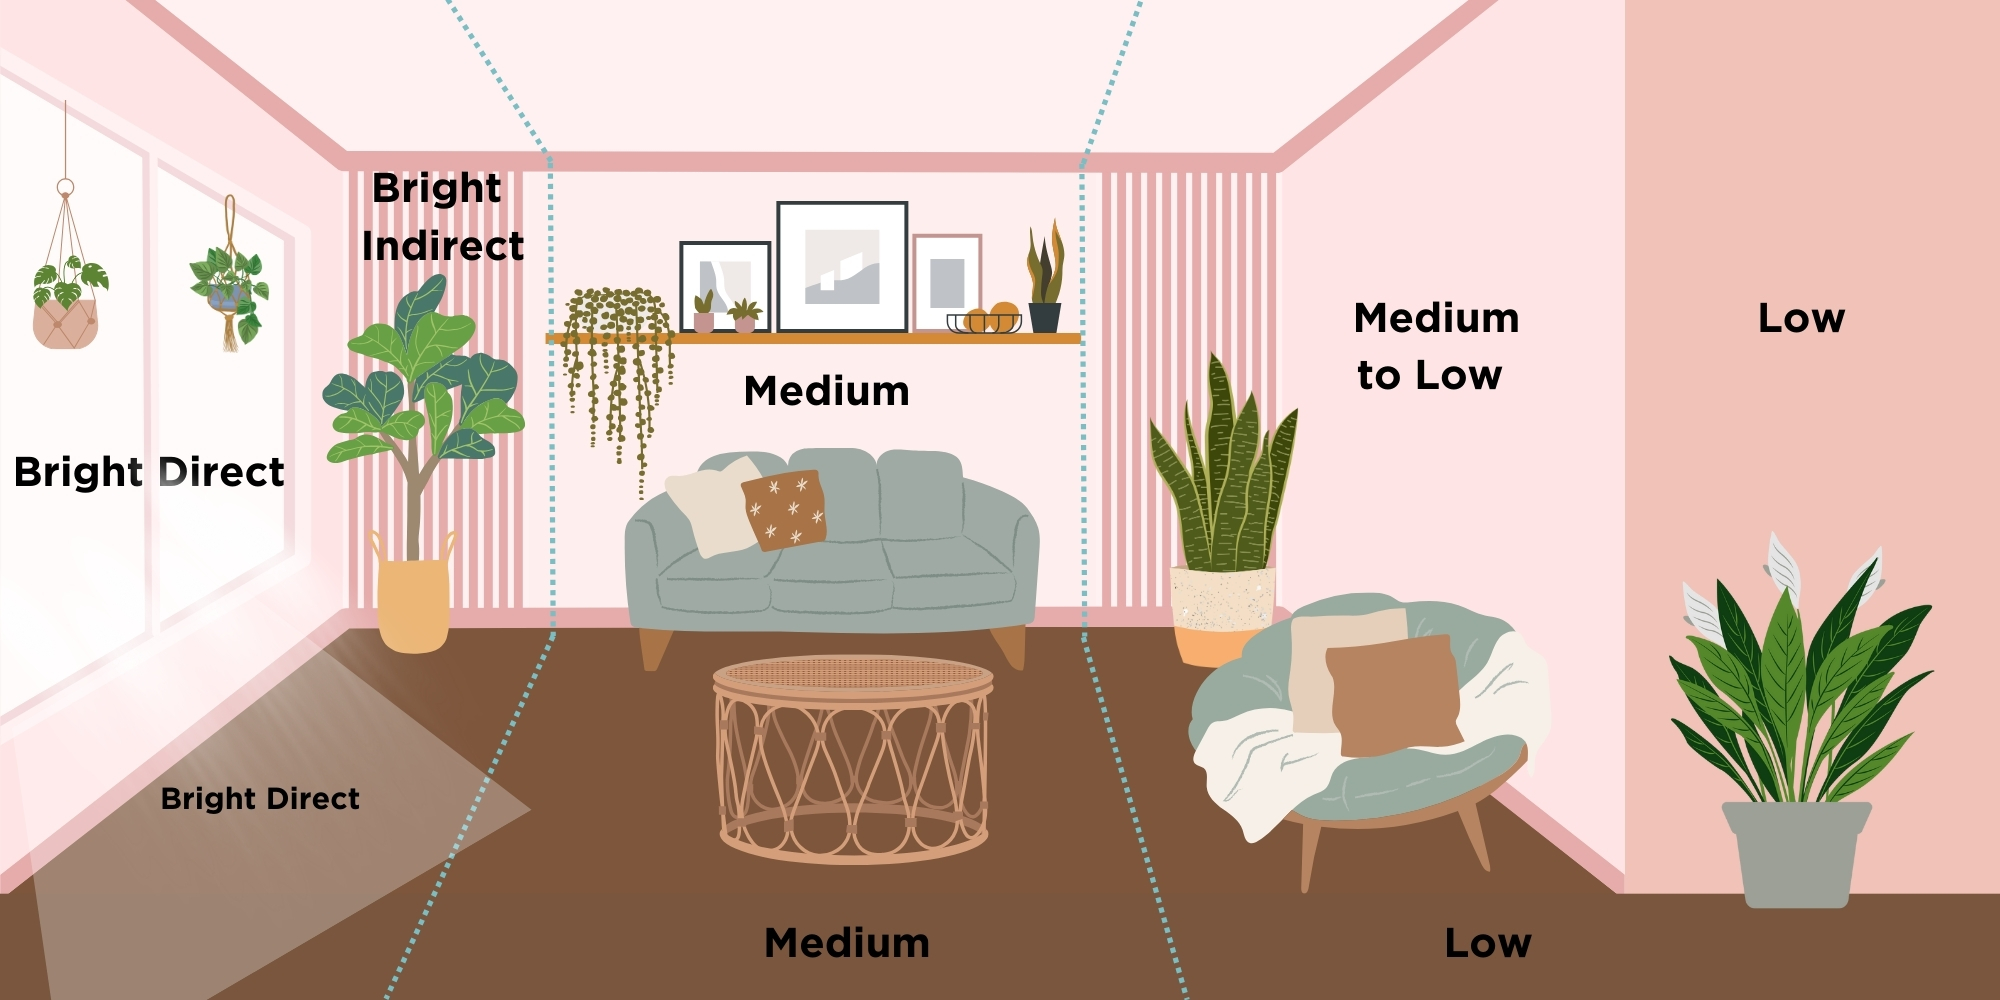
“Houseplant Lighting Guide – Oakridge …” from www.oakridgenurseryinc.com and used with no modifications.
Light duration is just as important as light intensity. Plants use the length of the light and dark periods to regulate flowering, fruiting, and dormancy cycles. Running lights for the wrong number of hours — in either direction — disrupts these cycles and reduces yields.
Herbs and Leafy Greens: 14 to 16 Hours
Herbs like basil, cilantro, and parsley along with leafy greens like lettuce, spinach, and kale are the most forgiving plants for indoor lighting schedules. They perform best with 14 to 16 hours of light per day, making them ideal starter plants for anyone new to grow lights. Set your timer to run lights from early morning through early evening, and these plants will reward you with fast, consistent growth. For more tips on growing herbs, browse the herb garden transformation guide.
Fruiting Plants and Vegetables: 16 to 18 Hours
Tomatoes, peppers, cucumbers, and strawberries are heavy light users. They need 16 to 18 hours of light daily during vegetative and fruiting stages to produce the energy required for fruit development. Cutting this short results in smaller fruits, longer time to harvest, and plants that look healthy on the surface but underperform when it counts. Keep the remaining 6 to 8 hours completely dark to allow proper metabolic rest.
Flowers and Tropicals: 12 to 14 Hours
Many flowering plants and tropical varieties are photoperiod-sensitive, meaning the ratio of light to dark directly triggers their blooming cycle. Most do best at 12 to 14 hours of light. Dropping below 12 hours signals the plant to enter dormancy, while exceeding 14 hours can delay or prevent flowering entirely in certain species. Getting this balance right is what separates growers who get blooms from those who just get leaves.
Hydroponic Kits and Grow Lights Work Best Together
If grow lights are the engine of your indoor garden, hydroponics is the fuel system that makes the engine run at full power. Together, they create a growing environment that consistently outperforms soil-based setups in speed, yield, and space efficiency.
Why Hydroponics Amplifies Your Lighting Investment
In a soil-based system, plants spend a significant portion of their energy developing root systems to search for water and nutrients. In a hydroponic system, those resources are delivered directly to the roots in precise concentrations. The plant redirects that saved energy straight into above-ground growth — which means faster vegetative development, earlier fruiting, and denser canopies that make better use of every photon your grow light produces.
The growth rate difference is measurable. Hydroponic lettuce, for example, can reach harvest size in 30 days compared to 45 to 60 days in soil under the same lighting conditions. That difference comes entirely from nutrient efficiency, not light intensity. Your grow light investment goes further when the plant is primed to use it.
Hydroponic systems also eliminate soil-borne pests and fungal issues that commonly plague indoor soil gardens. Fewer plant health problems mean fewer disruptions to your light schedule, and a consistent light schedule is what drives consistent yields. The two systems reinforce each other in a way that neither achieves alone. For more information on optimizing your indoor garden, be sure to reference this guide to prevent cross-contamination in garden kits.
Best Compact Hydroponic Kits for Apartments
For apartment growers, deep water culture (DWC) and nutrient film technique (NFT) systems offer the best balance of performance and compact footprint. The AeroGarden Harvest Elite handles up to six plants in a countertop unit with a built-in LED light system, making it the simplest all-in-one entry point. For growers ready to scale up, the VIVOSUN 6-Site DWC Hydroponic Bucket System paired with a dedicated LED panel gives significantly more output while still fitting comfortably in a closet or small room. Both approaches eliminate the need for soil entirely, which is a major practical advantage in an apartment setting.
Greenhouse Solutions for Urban Growers
A greenhouse changes what is possible for urban growers who have access to outdoor space, even a small balcony or backyard. It extends your growing season by weeks or months on both ends, creates a protected microclimate for cold-sensitive plants, and when paired with supplemental grow lights, becomes a year-round production space regardless of outdoor weather conditions.
The key is understanding that a greenhouse is not a passive structure. It requires active management of temperature, humidity, ventilation, and light to perform at its potential. Urban growers who treat a greenhouse as a set-it-and-forget-it solution typically see mediocre results. Those who dial in the environmental controls consistently outgrow their outdoor counterparts by a significant margin.
Residential Greenhouse Kits: What to Look For
The most important features in a residential greenhouse kit are frame durability, panel light transmission, and ventilation design. Aluminum frames resist rust and hold up in wind and snow loads better than powder-coated steel over time. Roof vents and side louvers are non-negotiable — without active ventilation, greenhouse temperatures spike to plant-damaging levels within minutes of direct sun exposure on a warm day. With limited space, small urban portable greenhouses are viable options.
Size selection matters more than most first-time buyers anticipate. A 6×8 foot greenhouse feels spacious before it is filled, but with benching on both sides and a central walkway, usable growing space drops quickly. If your footprint allows, choosing one size larger than you think you need is almost always the right decision. The Palram Nature Series Mythos 6×8 and the Juliana Compact 8×6 are well-regarded entry-level options that balance build quality and price for urban residential use.
Environmental Controls That Maximize Light Efficiency
Light efficiency inside a greenhouse is directly tied to how well you manage the other environmental variables. Temperature, humidity, and CO2 levels all affect how effectively your plants convert light energy into growth. A plant stressed by heat or low humidity absorbs less of the light hitting its leaves, making even the best grow light partially wasted.
Automatic vent openers that respond to temperature changes are one of the highest-impact upgrades you can add to a basic greenhouse kit. They require no electricity and prevent heat buildup during the day without any manual intervention. Pairing them with shade cloth rated at 30 to 50 percent light reduction for summer months keeps temperatures in the optimal 65 to 85°F growing range even during peak heat.
Greenhouse Environmental Target Ranges for Maximum Light Utilization:
Environmental Factor Optimal Range Impact on Light Use Daytime Temperature 65–85°F (18–29°C) Peak photosynthesis efficiency Night Temperature 55–65°F (13–18°C) Supports metabolic rest and repair Relative Humidity 50–70% Prevents stomata closure that blocks CO2 uptake CO2 Concentration 400–1500 ppm Directly fuels photosynthesis conversion rate Air Circulation Continuous gentle movement Strengthens stems, prevents hot and cold spots
Humidity management is equally important during winter months when heating systems dry the greenhouse air significantly. A simple ultrasonic humidifier running on a humidity controller keeps levels in the productive range without manual monitoring. The investment in basic environmental automation pays back quickly in healthier plants and faster growth cycles. For more insights, here is a beginner’s guide to choosing and using grow lights.
CO2 supplementation is an advanced step that experienced greenhouse growers use to push yields further. At ambient outdoor levels of around 400 ppm, plants are not CO2-limited. But in a sealed winter greenhouse with high-output LED lighting, supplementing CO2 to 800 to 1,200 ppm can increase photosynthesis rates and accelerate growth noticeably. This is not a beginner upgrade, but it is a powerful one for growers who have already mastered the basics.
Polycarbonate Panels vs. Glass: Light Transmission Compared
Twin-wall polycarbonate panels transmit approximately 80 to 83 percent of available light while providing far better insulation than glass. The twin-wall structure traps an air layer between panels, giving an R-value of roughly 1.5 compared to standard single-pane glass at R-0.9. For year-round growing in climates with cold winters, that insulation difference translates directly into lower heating costs and more stable overnight temperatures. Polycarbonate also handles hail and impact without shattering, which matters for urban rooftop and balcony installations.
Glass greenhouses transmit slightly more light at 85 to 90 percent, and single-pane glass maintains superior visual clarity over decades compared to polycarbonate, which can yellow and scratch with age. However, for most residential urban growers, the safety, insulation, and weight advantages of polycarbonate outweigh the modest light transmission advantage of glass. The exception is a permanent, professionally installed structure where longevity and aesthetics are primary concerns.
AI-Assisted and Automated Grow Systems Are Here
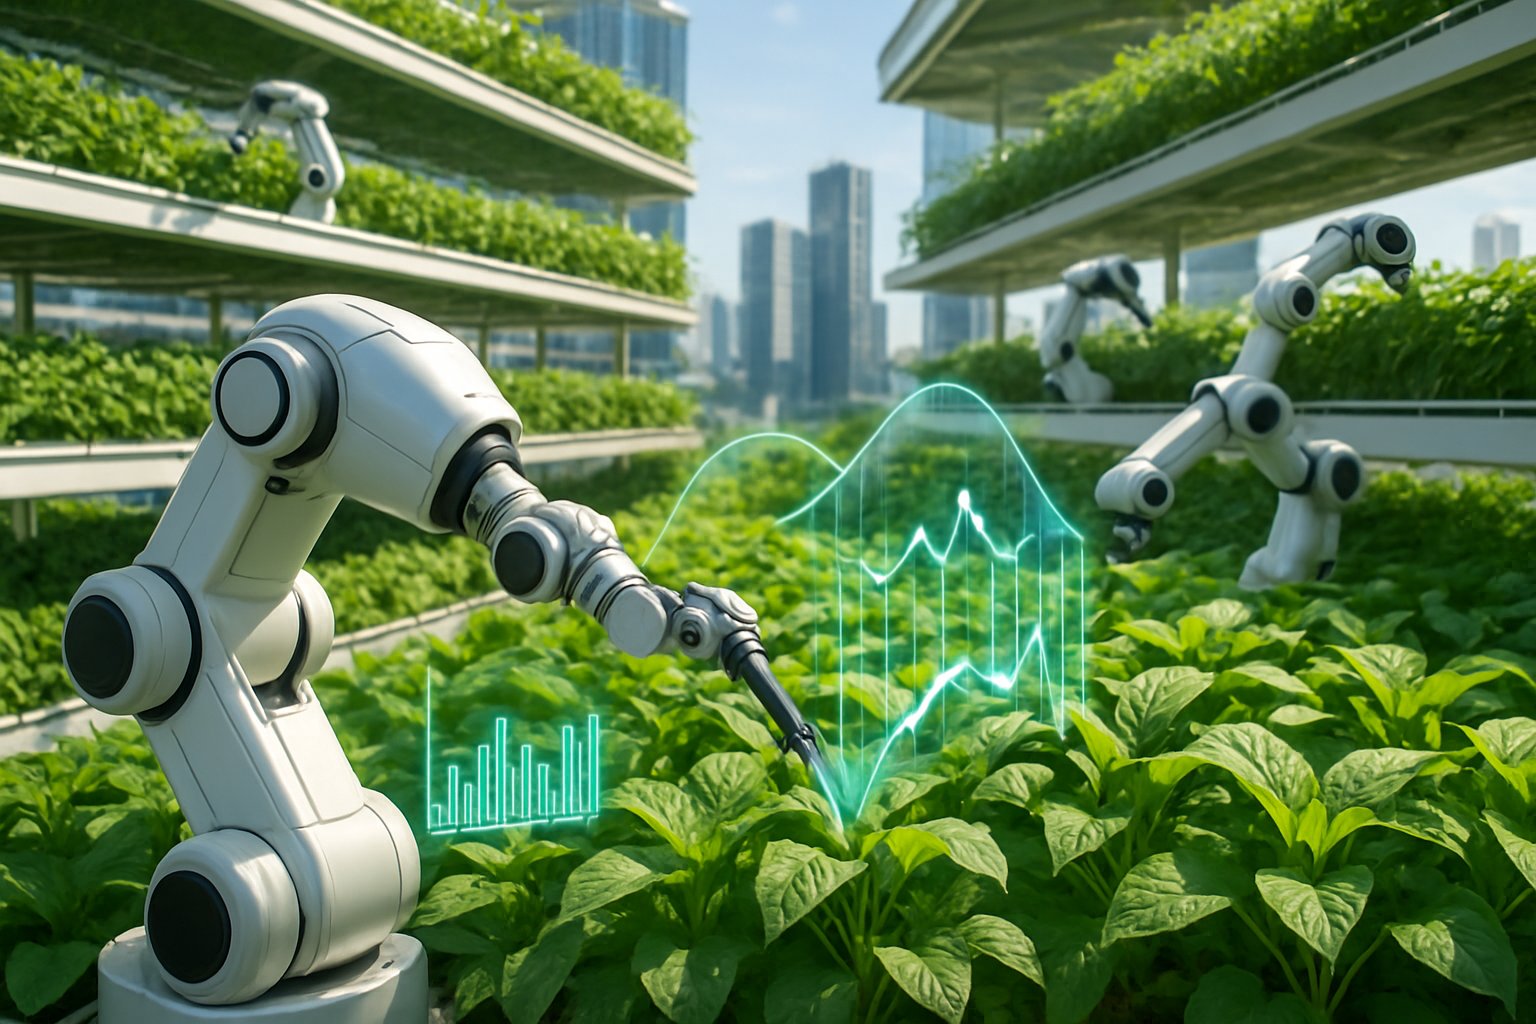
“AI Pruning in Sky Farms: Augmented …” from www.evsint.com and used with no modifications.
Automated growing systems have moved from commercial greenhouses into affordable consumer products in a short span of time. VIVOSUN’s Smart Grow system, for example, connects grow lights, fans, and environmental sensors through a single app, allowing growers to monitor and adjust conditions remotely. These systems track temperature, humidity, and light cycles in real time and can automatically adjust settings based on preset plant profiles. For urban growers managing a setup in a closet or spare room while living a busy city life, automation removes the daily maintenance burden that causes most indoor gardens to eventually fail.
5 Common Grow Light Mistakes That Kill Plants
Most indoor garden failures trace back to a short list of lighting errors that are entirely preventable. Understanding these mistakes before they happen is the fastest path to consistent results.
The damage from these errors is often slow and subtle — plants do not die overnight from a miscalibrated light setup. Instead, they gradually weaken over weeks, showing signs that are easy to misread as nutrient deficiencies or watering problems. Identifying the actual cause saves both the plants and the time spent chasing the wrong fix.
1. Hanging Lights Too Close and Causing Light Burn
Light burn looks a lot like heat stress — yellowing or bleaching at the tops of leaves closest to the fixture, while lower leaves remain green and healthy. The key diagnostic difference is that light burn affects the upper canopy even when temperatures are within the normal range. It happens most often when growers lower lights to compensate for what they think is insufficient intensity, not realizing the fixture is already close enough.
The minimum safe hanging distances vary by light type: high-output LEDs generally need to stay 18 to 24 inches above the canopy during vegetative growth, while T5 fluorescents can safely hang as close as 6 inches. Always start at the maximum recommended distance and lower gradually while monitoring for stress signs. Most LED manufacturers publish a hanging distance chart in their product documentation — using it is far easier than diagnosing light burn after the damage is done.
2. Using Single-Spectrum Bulbs for All Growth Stages
A common budget mistake is buying a blue-spectrum light for seedlings and then keeping it through flowering and fruiting. Blue light drives vegetative growth efficiently, but it does not trigger the hormonal responses plants need to flower and set fruit. Without adequate red spectrum light in the 620 to 700 nanometer range, fruiting plants stay in perpetual vegetative mode — growing lots of leaves but producing nothing worth harvesting. Full-spectrum LEDs solve this entirely by delivering both wavelength ranges simultaneously throughout the plant’s entire life cycle.
3. Running Lights 24 Hours With No Dark Period
It seems logical that more light means faster growth, but plants require darkness for critical biological processes. During the dark period, plants convert the sugars produced during photosynthesis into structural growth, repair cellular damage, and regulate the hormonal cycles that govern flowering. Running lights continuously disrupts these processes, leading to slowed growth, weakened stems, and in photoperiod-sensitive plants, a complete failure to flower. The minimum effective dark period for most plants is 6 hours, and 8 hours is the widely recommended standard for consistent results. If you want to maximize your indoor gardening setup, exploring space-saving greenhouse options can be beneficial.
4. Ignoring Heat Output in Small Spaces
Heat buildup in a small apartment grow space is a silent yield killer. Even LED lights, which run far cooler than HID or HPS alternatives, generate enough heat in an enclosed closet or grow tent to push temperatures above the 85°F threshold where plant stress begins. When ambient room temperatures are already high in summer months, the added heat load from a grow light can push conditions into damaging territory quickly. Always account for your light’s heat contribution when selecting a setup for a small, enclosed space.
5. Buying Wattage That Does Not Match the Grow Area
Underpowered lights produce stretching, leggy plants that lean toward the fixture and never develop the dense canopy structure that supports high yields. Overpowered lights in a small space waste electricity, generate excess heat, and often produce light burn at the canopy. Neither extreme is productive. Apply the 20 to 50 watts per square foot rule before purchasing, calculate your exact grow area, and match your fixture accordingly. A 200-watt LED panel is the right tool for a 4 to 6 square foot space — not a 4×8 tent, and not a single pot on a windowsill.
Build Your Complete Indoor Garden Kit in Under 30 Minutes
Setting up a functional indoor garden does not require hours of assembly or technical expertise. With the right components selected in advance, the physical setup from unboxing to first light takes less than 30 minutes. The time investment is in the planning — the execution is straightforward.
Step 1: Measure Your Grow Space
Start with a tape measure and write down the exact dimensions of your grow area: length, width, and ceiling height. Calculate the square footage by multiplying length by width. This single number drives every other decision in your kit selection. A 2×3 foot shelf space is 6 square feet; at 25 watts per square foot for herbs, you need a fixture that delivers 150 watts to that canopy. Know your number before you shop.
Step 2: Choose Your Light Type and Wattage
For most urban apartment setups, a full-spectrum LED panel is the correct starting point. Match wattage to your calculated grow area using the 20 to 50 watts per square foot guide based on what you plan to grow. Herbs and leafy greens sit at the lower end; tomatoes, peppers, and fruiting plants at the upper end. Choose a fixture with an adjustable hanging system and a built-in timer or timer compatibility — these two features alone eliminate two of the most common setup mistakes.
If you are setting up a vertical shelf garden, LED bar lights or T5 strips mounted under each shelf level are more practical than panel-style fixtures. For a dedicated grow tent, choose a panel or quantum board LED sized specifically for your tent’s footprint. The Mars Hydro FC-E3000 handles a 3×3 tent efficiently, while the Spider Farmer SF-4000 is well-matched for a 4×4 space. If you are dedicated to building a sustainable garden, think about using biodegradable planter bags to reduce environmental impact.
Step 3: Pair With a Hydroponic or Soil Kit
Once your light is selected, choose a growing medium that fits your space and experience level. For beginners, a pre-configured all-in-one kit like the AeroGarden Bounty Elite removes most of the setup complexity by integrating the light, reservoir, and nutrient delivery into a single countertop unit. For growers ready to manage their own nutrient schedule, a standalone DWC or NFT hydroponic system paired with a quality LED panel gives more control and significantly higher output potential.
Soil-based setups remain a practical option, particularly for growers who prefer a more familiar growing medium. Use a high-quality peat or coco coir mix rather than standard potting soil, which is often too dense for indoor containers and can harbor fungus gnats. Fabric grow pots improve aeration and prevent the root-circling that limits growth in standard plastic containers.
Step 4: Set Your Timer and Light Schedule
Plug your grow light into a programmable digital timer before turning on the system. Set the schedule based on your plant type: 14 to 16 hours for herbs and leafy greens, 16 to 18 hours for fruiting vegetables, and 12 to 14 hours for flowering plants. For more details on optimizing your lighting setup, don’t for get the beginner’s guide to choosing and using grow lights. Confirm the timer cycles correctly through one full on-off cycle before leaving the system unattended. From this point forward, your light schedule runs automatically without any daily input required.
Your Urban Garden Is Ready to Grow
The gap between wanting an indoor garden and actually growing one consistently comes down to having the right lighting kit matched to your space and plant goals. Every decision — light type, wattage, daily hours, grow medium — connects back to a straightforward set of principles that any urban grower can apply from day one. Get the light right, and everything else in your indoor garden has a foundation to build on. For more tips, explore our space-saving greenhouse options.
Frequently Asked Questions
The most common questions about indoor gardening lighting kits tend to cluster around the same practical concerns: cost, compatibility, and setup logistics. The answers are more straightforward than most beginners expect.
Whether you are setting up your first countertop herb garden or planning a dedicated grow tent for year-round vegetables, these questions cover the ground-level details that make the difference between a setup that performs and one that disappoints. To maximize space, view the space-saving greenhouse options to enhance your gardening efforts.
Can I Use One Grow Light for Different Plant Types at the Same Time?
Yes — a full-spectrum LED grow light can support multiple plant types growing simultaneously in the same space. The key is grouping plants with similar light hour requirements together under the same timer zone. Running herbs that need 16 hours alongside flowering plants that need 12 hours under a single timer creates a conflict that will either prevent flowering or underfeed your herbs.
The practical solution is to organize your grow space into light zones based on daily hour requirements rather than plant species. Zone one runs 14 to 16 hours for herbs and greens. Zone two runs 12 to 14 hours for flowering plants. If your space only supports a single light and timer, prioritize the plants that share the closest light schedule and keep the exceptions in a separate location.
Light intensity compatibility across species is less of a problem than schedule compatibility. Most full-spectrum LEDs can be positioned at different heights above different plant types to adjust the effective intensity each receives, giving you reasonable flexibility without needing multiple fixtures.
Multi-Plant Light Compatibility Quick Guide:
Plant Group Daily Light Hours Can Share Timer With Herbs (basil, cilantro, parsley) 14–16 hrs Leafy greens, microgreens Leafy Greens (lettuce, spinach) 14–16 hrs Herbs, kale, arugula Fruiting Vegetables 16–18 hrs Strawberries, dwarf tomatoes Flowering Plants 12–14 hrs Tropicals, orchids, peace lilies Seedlings & Propagation 16–18 hrs Cuttings, microgreens
How Far Should LED Grow Lights Hang Above My Plants?
LED grow lights should hang 18 to 24 inches above the plant canopy during vegetative growth and can be lowered to 12 to 18 inches during flowering and fruiting stages when plants can handle higher light intensity. High-output quantum board LEDs like the Spider Farmer SF-2000 or HLG 200 Rspec perform best at the higher end of these ranges to prevent light bleaching at the canopy. Always start at the maximum recommended distance and adjust downward gradually while monitoring leaves for stress signs. When in doubt, check the manufacturer’s specific hanging distance chart for your fixture model.
Are Grow Light Kits Expensive to Run on an Apartment Electric Bill?
A modern full-spectrum LED grow light running at 200 watts for 16 hours a day consumes 3.2 kilowatt-hours (kWh) per day. At the U.S. average residential electricity rate of approximately $0.16 per kWh, that works out to roughly $0.51 per day, or about $15.50 per month. For most urban apartment growers, the monthly electricity cost of a single LED grow light is comparable to running a small kitchen appliance. For additional tips on managing your urban garden, take a look at our pest management guide.
Scaling up to a 400-watt LED for a larger grow tent approximately doubles that cost to around $31 per month — still a modest expense relative to the value of fresh produce grown year-round. The real cost comparison to keep in mind is the value of what you grow against the electricity cost to grow it. A single basil plant from a grocery store costs $3 to $4. A well-lit indoor basil planter producing continuous harvests over six months pays back its electricity cost many times over. Exploring self-watering planter tools can be a valuable addition, if you desire to maximize your indoor gardening setup.
Older HID and HPS systems are significantly more expensive to run. A 600-watt HPS fixture running on the same 16-hour schedule consumes 9.6 kWh per day — nearly three times the operating cost of a comparable LED setup. This electricity cost gap is one of the primary reasons urban apartment growers overwhelmingly favor LED technology over legacy lighting systems.
Monthly Electricity Cost Estimate by Grow Light Type:
Light Type Wattage Daily Hours Monthly Cost* Compact LED Panel 100W 16 hrs ~$7.68 Mid-Range LED Panel 200W 16 hrs ~$15.36 High-Output LED 400W 16 hrs ~$30.72 T5 Fluorescent (4-tube) 160W 16 hrs ~$12.29 HPS 600W 600W 16 hrs ~$46.08 *Estimated at $0.16/kWh U.S. average residential rate
What Is the Difference Between a Grow Tent and a Greenhouse Kit?
A grow tent is a self-contained indoor growing environment designed to be used inside your home. It is made from a metal frame covered in thick, lightproof fabric with a reflective interior lining. Everything inside the tent — light, temperature, humidity, and airflow — is entirely artificial and user-controlled. Grow tents are ideal for apartment growers who need a contained, odor-managed, light-controlled space within an existing room.
A greenhouse kit is a semi-permanent or permanent outdoor structure that uses natural sunlight as its primary light source, supplemented by artificial lighting as needed. Greenhouses create a protected microclimate that extends the growing season and shields plants from frost, wind, and pests, while still relying on outdoor environmental conditions as their baseline. They require outdoor space — a backyard, patio, or rooftop — and involve more structural installation than a grow tent.
The right choice depends entirely on your available space and growing goals. For apartment dwellers with no outdoor access, a grow tent is the clear answer. For urban homeowners or those with balcony or rooftop access, a small greenhouse kit delivers more growing volume with lower artificial lighting costs. Many experienced urban growers eventually use both — a greenhouse for warm-season crops and a grow tent for year-round herb and microgreen production indoors.
- Grow Tent: Indoor use, fully artificial environment, lightproof, ideal for apartments
- Greenhouse Kit: Outdoor or semi-outdoor, uses natural light as primary source, extends growing season
- Grow Tent Sizes: Start at 2×2 ft, scale to 4×8 ft for larger harvests
- Greenhouse Sizes: Residential kits typically start at 6×6 ft, scaling to 8×12 ft and beyond
- Lighting Requirement: Grow tents need 100% artificial lighting; greenhouses need supplemental lighting only in low-light seasons
- Best For Beginners: A 2×2 or 2×4 grow tent with a single LED panel is the lowest-barrier complete growing environment available
Do Hydroponic Kits Come With Grow Lights Included?
Some hydroponic kits include integrated grow lights, while others are sold as standalone growing systems designed to be paired with a separate light source. All-in-one countertop units like the AeroGarden Harvest Elite and the Click & Grow Smart Garden 9 include built-in LED lighting systems calibrated for the included plant pods. These integrated systems are the simplest entry point for beginners because every component is pre-matched and requires no additional purchases to start growing.
Larger modular hydroponic systems — such as deep water culture buckets, NFT channels, or ebb-and-flow tables — are almost always sold without lights. These systems are designed to be paired with the grower’s choice of grow light, which allows more flexibility in light selection and easier upgrades as the grow operation scales. For these setups, select your grow light based on the footprint of the hydroponic system and the light requirements of the crops you plan to grow. To enhance your gardening experience, take a moment to explore the best self-watering planter tools for optimal growth and convenience.
When evaluating any hydroponic kit that includes lighting, check the actual LED wattage of the included fixture against the system’s grow area. Budget all-in-one units sometimes include underpowered lights that limit plant performance, particularly for fruiting crops. If the included light draws less than 20 watts per square foot of grow area, make the decision to either upgrading the light or choosing a modular system where you can select a properly rated fixture from the start.