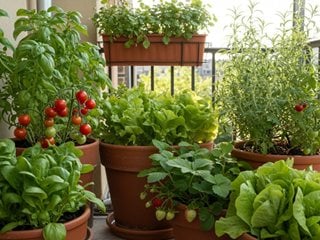
- A single rooftop tomato plant grown in a container can yield close to 50 tomatoes in one season — proof that you don’t need a backyard to grow your own food.
- Choosing the right tomato variety for container growing is the single most important decision you’ll make before planting.
- Rooftop conditions — wind, heat reflection, and limited soil volume — create unique challenges that standard gardening advice doesn’t always cover.
- Watering consistency is non-negotiable; skip a day in peak summer and container tomatoes will show it fast.
- Further in this guide, we break down the full tomato plant lifecycle stage by stage — so you know exactly what to expect and when to act.
Key Takeaways: What You Need to Know Before Growing Rooftop Tomatoes
You don’t need a farm, a backyard, or even a garden bed to grow a serious harvest of tomatoes — just a rooftop, a large enough pot, and a commitment to showing up consistently. Urban rooftop tomato gardens are one of the most rewarding ways city dwellers can reconnect with their food, reduce grocery costs, and make productive use of underutilized space.
This guide is built for urban gardeners who want real results, not just a decorative plant on the terrace. Whether you’re starting from seed or picking up a seedling from a nursery, everything you need to grow confidently — from variety selection to end-of-season care — is covered here. For more urban growing inspiration and practical guidance, Red Ripe Tomatoes is a go-to resource for rooftop gardeners navigating container growing for the first time.
One Potted Plant Can Yield 50 Tomatoes on a Rooftop
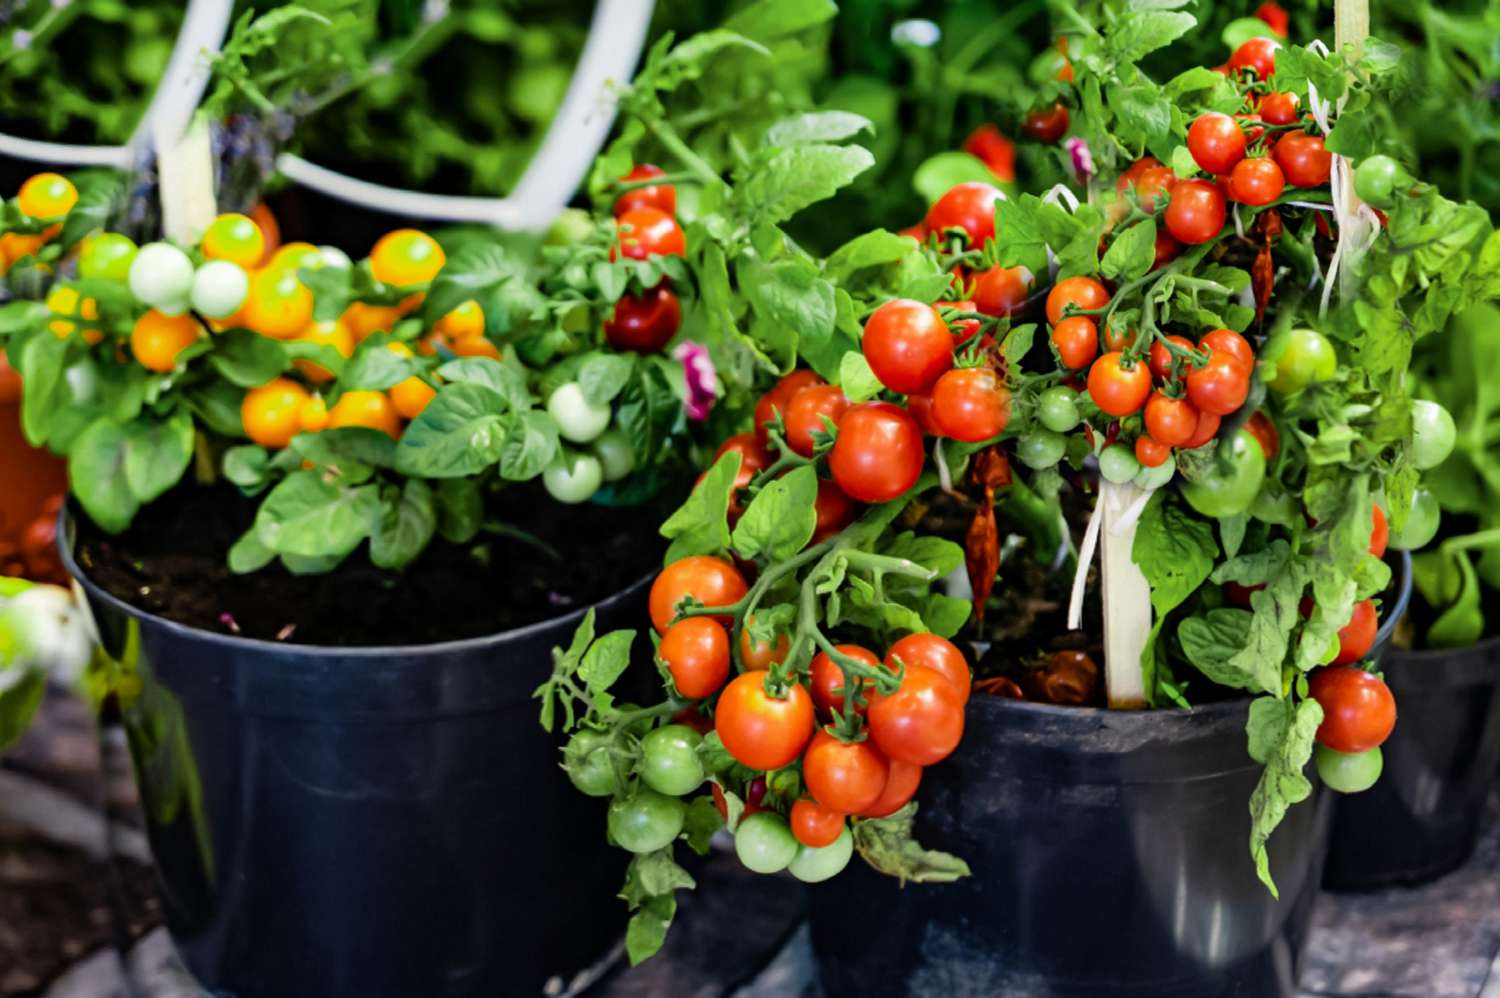
“Growing Terrific Tomatoes in Pots” from www.thespruce.com and used with no modifications.
It sounds ambitious, but it’s entirely achievable. Gardener Anita Kumar documented her rooftop container tomato experience and came away with nearly 50 tomatoes from a single potted plant — far more than she ever anticipated. The key wasn’t luck. It was the right variety, consistent watering, proper feeding, and a willingness to learn what the plant needed at each stage of its growth.
Rooftop growing does come with its own set of demands. Container soil dries out faster than ground soil, wind exposure can stress the plant, and heat reflected off concrete or tar surfaces can push temperatures beyond what tomatoes prefer. But once you understand those variables and work with them rather than against them, a rooftop can actually be an excellent growing environment — often with more direct sun than a shaded backyard would offer.
Pick the Right Tomato Variety for Container Growing
Not all tomato varieties are suited for life in a pot. Some grow aggressively tall, develop massive root systems, and need more soil volume than any practical container can provide. Picking the wrong variety is one of the most common reasons rooftop tomato attempts fail before the season even gets going.
- Compact or dwarf varieties are ideal — they stay manageable in size and produce well in confined spaces.
- Cherry and grape tomatoes generally outperform large beefsteak types in containers due to their smaller root systems and faster fruit set.
- Bush varieties require less staking and stay within a predictable size range, making rooftop management much easier.
- Avoid heirloom giants like Brandywine unless you’re using an extremely large container (30+ litres) and have strong structural support below.
Determinate vs. Indeterminate Varieties
Determinate tomatoes grow to a set height, produce their fruit in a concentrated window, and then stop. Indeterminate varieties keep growing and producing all season until frost or disease ends them. For rooftop container growing, determinate varieties are generally more manageable — they’re predictable in size, easier to stake, and won’t overwhelm a small rooftop setup. Indeterminate types can work, but they’ll need larger containers, more aggressive pruning, and sturdier support structures.
Best Compact Varieties for Rooftop Pots
Choosing the right variety comes down to your container size, how much sun your rooftop gets, and how hands-on you want to be with pruning and staking.
| Variety | Type | Container Size | Notes |
|---|---|---|---|
| Tumbling Tom | Determinate | 10–15 litres | Cascading habit, great for deep pots or hanging planters |
| Patio F1 | Determinate | 10–12 litres | Bred specifically for container growing, compact and productive |
| Sweet Million | Indeterminate | 20+ litres | Cherry type, extremely high yield, needs staking |
| Tiny Tim | Determinate | 5–8 litres | Very compact, suits small rooftop spaces or windowsill overflow |
| Roma VF | Determinate | 15–20 litres | Paste tomato, disease resistant, dense fruit set |
Cherry and grape types like Tumbling Tom and Sweet Million tend to be the most forgiving for first-time rooftop growers. They’re faster to fruit, more tolerant of inconsistent watering, and produce continuously throughout the season — keeping you motivated and your kitchen stocked.
The Right Container Makes or Breaks Your Harvest
“Harvest Bins, Totes & Lugs …” from unionjacktools.com and used with no modifications.
Even the best tomato variety will underperform in the wrong pot. Container choice directly affects root development, water retention, temperature regulation, and ultimately, how many tomatoes you’ll actually pick.
Minimum Pot Size for Healthy Root Growth
Tomatoes are heavy feeders with expansive root systems. For most varieties, a minimum of 15 to 20 litres of soil volume is required to support a full-sized plant. Cherry and compact varieties can manage in 10 to 12 litres, but larger indeterminate types need 25 to 30 litres or more. Undersized containers restrict root growth, leading to stunted plants, poor fruit set, and chronic water stress — no matter how well you water or feed.
Drainage Requirements to Prevent Root Rot
Standing water at the base of a container is one of the fastest ways to kill a tomato plant. Roots need oxygen, and waterlogged soil suffocates them within days. Every container you use must have multiple drainage holes at the base — not just one. Elevating pots slightly off the rooftop surface using pot feet or bricks also prevents drainage holes from becoming blocked and improves airflow under the container. For those looking to enhance their gardening setup, consider exploring self-watering planter tools that can help maintain optimal soil moisture levels.
If you’re using saucers to protect your rooftop surface, empty them after every watering session. Leaving water sitting in a saucer for more than an hour re-introduces the waterlogging problem you’re trying to avoid.
Why Coco Peat Works Better Than Regular Soil
Standard garden soil is too dense for container use — it compacts over time, reduces drainage, and becomes almost concrete-like in terracotta pots during hot weather. A mix built around coco peat (coconut coir) retains moisture more evenly, stays aerated, and is significantly lighter — an important factor on a rooftop where structural load matters. A good rooftop tomato mix typically combines coco peat, compost, and perlite in roughly equal parts to balance moisture retention, nutrition, and drainage.
Sunlight, Water, and Nutrients: The Non-Negotiables
“Need of Food, Sunlight, Air and Water …” from lms.eduqode.com and used with no modifications.
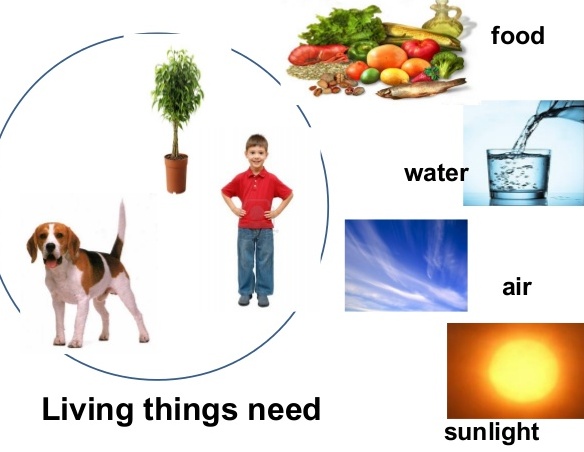
Rooftop environments often offer exceptional sun exposure — one of the biggest advantages over ground-level urban gardens blocked by buildings and fences. Tomatoes are sun-hungry plants, and a rooftop is often exactly the kind of open, south-facing space they thrive in.
How Many Hours of Sun Rooftop Tomatoes Need Daily
Tomatoes need a minimum of 6 to 8 hours of direct sunlight per day to produce well. On a rooftop, this is usually achievable — but it’s worth mapping your specific rooftop’s sun exposure before you commit to planting. Morning sun is gentler and ideal for leaf development, while afternoon sun drives fruit ripening. If your rooftop only gets 3 to 4 hours of direct sun, you can still grow tomatoes, but expect a slower plant with a reduced yield — cherry varieties handle lower light better than large-fruiting types.
How Often to Water Container Tomatoes
Container tomatoes on a rooftop will almost always need watering once a day during warm months, and sometimes twice during heat waves. The combination of direct sun, wind exposure, and limited soil volume means moisture evaporates far faster than it would in a ground bed. The simplest way to check: push your finger two inches into the soil. If it feels dry at that depth, water thoroughly until it drains freely from the bottom. Inconsistent watering — letting the soil swing between bone dry and waterlogged — is the leading cause of blossom end rot and cracked fruit in container tomatoes.
Feeding Schedule for Maximum Fruit Production
Tomatoes are heavy feeders, and container soil exhausts its nutrients much faster than garden beds. A structured feeding schedule makes the difference between a plant that struggles and one that produces fruit prolifically across the whole season.
The feeding needs of a tomato plant shift as it moves through its growth stages. Early on, nitrogen drives leafy, vigorous growth. Once flowering begins, phosphorus and potassium take over as the priority nutrients to support fruit development. Using the wrong fertilizer at the wrong stage — for example, continuing high-nitrogen feeding into flowering — pushes the plant to keep producing leaves instead of fruit.
- Seedling to early vegetative stage: A balanced NPK fertilizer (such as 10-10-10) applied every two weeks supports steady early growth.
- Pre-flowering: Begin transitioning to a lower nitrogen, higher phosphorus feed to encourage bud formation.
- Flowering and fruiting: Switch to a dedicated tomato fertilizer high in potassium — a feed around 4-18-38 ratio works well at this stage.
- Mid-season maintenance: Continue potassium-rich feeds every 10 to 14 days, supplementing with a diluted liquid seaweed feed for trace minerals.
- Late season: Reduce feeding as the plant directs energy toward ripening existing fruit rather than producing new growth.
Calcium is also critical for container tomatoes and is often overlooked. A calcium deficiency shows up as blossom end rot — a dark, sunken patch on the base of the fruit. Adding a calcium-magnesium supplement every few weeks, or mixing crushed eggshells into your potting mix at planting, helps prevent this common problem before it starts.
Whatever feeding schedule you follow, always water your plant before applying liquid fertilizer. Feeding into dry soil can burn the roots and shock the plant at exactly the stage when it needs to be thriving.
The Tomato Plant Lifecycle Stage by Stage
Understanding what your tomato plant is doing at each stage of its life removes the guesswork from growing. Each stage has distinct needs, and recognizing the visual signs of each phase helps you respond with the right care at the right time.
Germination and Seedling Stage
Stage 1 — Germination: Seeds typically germinate within 5 to 10 days when soil temperature sits between 21°C and 27°C (70°F–80°F). Keep the growing medium consistently moist but never waterlogged. A propagation tray with a clear lid helps maintain humidity. Do not place seeds in direct rooftop sun at this stage — indirect bright light is sufficient until the first true leaves appear.
Once the seedling pushes through the soil surface and the first set of true leaves (the second set of leaves, which look more like actual tomato leaves) appears, the plant is ready to begin its vegetative growth phase. At this point, light becomes critical. Seedlings that don’t get enough light stretch tall and thin — a condition called “leggy growth” — and these weak stems rarely recover into strong productive plants.
If you’re starting seeds indoors or in a sheltered rooftop area before transplanting, begin hardening off seedlings after they reach about 10 cm in height. This means gradually introducing them to outdoor conditions — sun, wind, and temperature variation — over 7 to 10 days before committing them to their permanent rooftop container.
Transplant shock is real and can set your plant back by two weeks or more. To minimize it, transplant on a cool, overcast day, water well immediately after repotting, and keep the plant in partial shade for two to three days before moving it to its full-sun position on the rooftop.
One important tip at this stage: when transplanting seedlings into their final container, bury the stem deeper than it sat in its nursery pot. Tomato stems develop roots along any buried section, creating a stronger, more established root system from day one.
Vegetative Growth and When to Stake Early
The vegetative stage is when your tomato plant puts all its energy into building the structure it will need to support a full fruit load. Leaves multiply rapidly, the main stem thickens, and the plant can double in height within two to three weeks under good conditions. This is the stage where consistent watering and balanced feeding pay off most visibly.
Staking should happen early in the vegetative stage — not after the plant has already grown tall and become top-heavy. Inserting a stake or tomato cage too late risks driving it through established roots, which can damage the plant’s ability to uptake water and nutrients just as it’s heading toward flowering. For most rooftop container plants, a 1.2 to 1.5 metre bamboo cane or metal stake inserted within the first two to three weeks after transplanting is ideal.
Tie the main stem to the stake loosely using soft garden twine or purpose-made tomato clips. As the plant grows, add new ties every 15 to 20 cm of new growth. The goal is to support the stem without constricting it — a tie that’s too tight can cut into the stem as it thickens, opening a wound that invites disease.
Flowering and Pollination on Rooftops
Rooftop environments are actually well-suited to pollination. The open exposure to wind and visiting insects — both key pollinators for tomatoes — means fruit set often happens naturally and reliably. Tomato flowers are self-fertile, meaning each flower carries both male and female parts, and a simple vibration from wind or a passing bee is enough to release pollen and trigger fertilization. If your rooftop is very sheltered or you notice flowers dropping without setting fruit, gently shake the plant or tap the flowering branches mid-morning every two to three days to manually encourage pollination.
Fruit Set to Full Ripeness
Once pollination occurs successfully, the base of the flower swells and the small green tomato begins to form — this is called fruit set. From fruit set to full ripeness, the timeline varies depending on variety and growing conditions, but most cherry tomatoes reach full ripeness within 45 to 65 days of fruit set, while larger varieties can take 70 to 85 days.
During the fruiting stage, consistent watering becomes even more critical than before. Irregular moisture at this stage is the primary cause of two of the most frustrating tomato problems: blossom end rot (caused by calcium deficiency triggered by inconsistent watering) and fruit cracking (caused by sudden heavy watering after a dry period). For more information on managing water issues, check out this guide on drip irrigation solutions.
- Keep soil moisture as even as possible — daily checks are essential in summer heat.
- Mulch the top of the container with straw or coconut coir to slow surface evaporation.
- Reduce but don’t eliminate feeding — shift fully to a high-potassium fertilizer to support ripening.
- Remove any leaves touching the soil surface to improve airflow and reduce disease risk.
- Harvest tomatoes as soon as they reach full color — leaving ripe fruit on the plant diverts energy away from ripening the remaining green tomatoes.
Color is your clearest ripeness indicator, but don’t wait for supermarket-perfect uniformity before picking. A tomato that has reached its full color and yields slightly to gentle pressure is ready to harvest. Picked at this stage and left on a kitchen counter (never in the refrigerator — cold destroys tomato flavor) it will complete its ripening beautifully within a day or two. For more tips on growing tomatoes, check out this rooftop tomatoes guide.
End of Season: When the Plant Begins to Wither
As days shorten and temperatures drop, even the most productive rooftop tomato plant will begin to slow down. Lower leaves yellow and drop, new growth slows, and the remaining fruit takes longer to ripen. This is a natural wind-down, not a sign that something has gone wrong. At this point, pinch off any new flowers that form — they won’t have time to develop into fruit before the season ends, and removing them redirects the plant’s remaining energy toward ripening the tomatoes already on the vine. Once the first frost threatens, harvest all remaining fruit — even green tomatoes ripen well indoors when placed in a single layer in a warm room away from direct sunlight.
Suckers, Staking, and Mulching Done Right
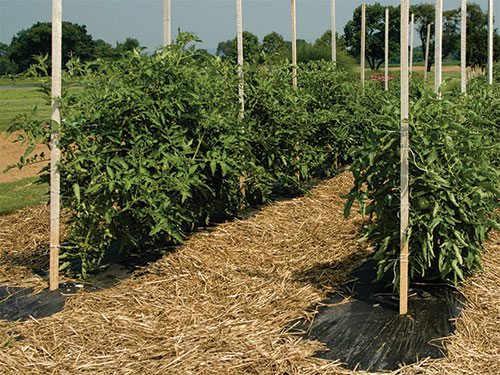
“Tomatoes in the Home Garden …” from njaes.rutgers.edu and used with no modifications.
Three of the most impactful maintenance tasks in rooftop tomato growing are also three of the most misunderstood. Getting suckers, staking, and mulching right doesn’t require expert skill — it just requires knowing what you’re looking at and why each task matters.
How to Identify and Remove Suckers
A sucker is a new shoot that grows from the junction between the main stem and a branch — called the leaf axil. Left alone, suckers develop into full branches, then into secondary stems, effectively turning your single-stem plant into a sprawling multi-stemmed bush. In a garden bed, that’s manageable. In a container on a rooftop, it creates a plant that’s competing with itself for limited soil nutrients and water, often at the cost of fruit production.
Suckers are easiest to remove when they’re small — under 2.5 cm long. At that size, you can pinch them off cleanly between your thumb and forefinger without tools. Once they grow beyond that, use a clean, sharp pair of pruning scissors to cut them off flush with the stem. Never tear suckers off by hand when they’re large — it leaves a jagged wound that takes longer to heal and invites disease.
- Where to look: Check every leaf axil on the main stem during your daily watering routine.
- How often to check: During active vegetative growth, new suckers can appear within 48 hours.
- Exception — the first sucker below the first flower cluster: Some experienced growers leave this one in place on indeterminate varieties to create a two-stem growing system, which can actually increase overall yield in larger containers.
- What to do with removed suckers: Healthy suckers over 10 cm long can be placed in a glass of water and will root within two weeks, giving you a free second plant.
For determinate varieties, heavy sucker removal is less critical — these plants have a fixed growth pattern and removing too many suckers can actually reduce yield. Focus sucker removal efforts primarily on indeterminate varieties where unchecked growth becomes a real management problem in container settings.
When to Stake and How to Avoid Damaging Roots
The single most important rule with staking is to do it early. Insert your stake or cage at the time of transplanting — or within the first week. The root system of a newly transplanted tomato is still establishing itself in the upper layers of the container, and a stake driven in at that point passes through largely unoccupied soil. Wait until the plant is 40 or 50 cm tall, and you risk driving the stake straight through a developed root zone. A damaged root system at the flowering or fruiting stage is one of the hardest setbacks to recover from mid-season.
Pests and Diseases to Watch For on Rooftop Gardens
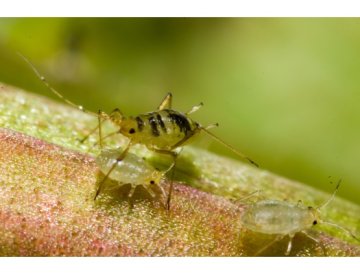
“Known Pests: Whiteflies, Aphids and …” from www.pestik.cz and used with no modifications.
Rooftop gardens sit above ground level, which does reduce exposure to some soil-borne pests and diseases — but it doesn’t eliminate the risk. Aphids, whiteflies, and spider mites are the most common insect threats to rooftop container tomatoes, and all three thrive in the warm, dry conditions a rooftop often creates. Check the undersides of leaves regularly — that’s where aphids and spider mites establish colonies before you notice any visible plant stress. A strong jet of water from a hose directed at the underside of leaves is the first line of defense and is surprisingly effective at knocking back early infestations.
On the disease front, early blight and leaf curl are the issues rooftop growers encounter most frequently. Early blight appears as dark brown spots with concentric rings on lower leaves and spreads upward in humid conditions. Remove affected leaves immediately and improve airflow around the plant by clearing any dense foliage. Leaf curl — where leaves roll inward — is often a physiological response to heat stress or inconsistent watering rather than a true disease, and it usually self-corrects once watering is stabilized. Keeping the soil surface mulched, avoiding overhead watering (water at the base of the plant instead), and spacing containers so air can circulate freely between plants goes a long way toward keeping disease pressure low throughout the season.
Rooftop Tomato Growing Is Worth Every Bit of Effort
There is something genuinely satisfying about picking a sun-warmed tomato from a plant you grew yourself, fifty feet above a city street. Urban rooftop tomato growing demands consistency and attention — it rewards both generously. Once you understand what the plant needs at each stage of its lifecycle, the process becomes less about problem-solving and more about maintenance and enjoyment. The first season teaches you more than any guide can, and every season after that gets easier, more productive, and more rewarding.
Start with one container, one compact variety, and one reliable watering routine. That’s the whole foundation. Everything else — the feeding schedules, the sucker removal, the staking technique — builds naturally on top of it once you’ve established that base habit. Fifty tomatoes from a single pot isn’t a fluke. It’s what happens when you show up for the plant consistently and let it do what it was designed to do.
Frequently Asked Questions
Here are answers to the most common questions urban gardeners ask when starting their first rooftop tomato container garden.
Can I grow tomatoes on a rooftop without a garden bed?
Yes — tomatoes grow extremely well in containers without any garden bed at all. All you need is a large enough pot (minimum 15 to 20 litres for most varieties), a well-draining potting mix, consistent watering, and adequate direct sun. Container growing is actually the standard method for rooftop tomato gardens, and many gardeners prefer it because it allows you to reposition plants to follow the sun across the rooftop as the season progresses.
How much sun does a rooftop tomato plant need each day?
Rooftop tomatoes need a minimum of 6 to 8 hours of direct sunlight daily to produce well. Compact cherry varieties like Tumbling Tom or Tiny Tim can manage with 4 to 5 hours and still produce a reasonable harvest, but full-size varieties will underperform significantly below 6 hours of daily direct sun.
What is the best pot size for growing tomatoes on a rooftop?
For compact and cherry tomato varieties, a 10 to 15 liter container is the practical minimum. For standard-sized indeterminate varieties, aim for 20 to 30 liters. The larger the container, the more soil volume available to the root system, which directly translates to a more vigorous plant and a more abundant harvest.
On a rooftop, weight is also a real consideration. Large plastic or fabric grow bags offer the soil volume you need without the structural load of a heavy ceramic or terracotta pot. Fabric grow bags also offer the added benefit of air pruning — when roots reach the bag’s edge, they self-prune rather than circling the container, which promotes a denser, healthier root structure overall.
How do I stop pests from destroying my rooftop tomato plants?
Prevention is more effective than treatment. Inspect the undersides of leaves during every watering session and deal with small infestations immediately before they establish. A diluted neem oil spray (2 to 3 ml of neem oil per liter of water with a few drops of dish soap as an emulsifier) applied every 7 to 10 days acts as both a deterrent and a treatment for aphids, whiteflies, and spider mites. Avoid applying neem oil in full midday sun — apply in the early morning or evening to prevent leaf burn.
What does removing suckers from a tomato plant actually do?
Removing suckers directs the plant’s energy toward producing fruit on the existing branches rather than growing new stems. Each sucker left in place becomes a full growing stem, and in a container with limited soil resources, that means more competition for the nutrients and water available — which typically results in more foliage and less fruit. For those managing limited space, consider using small urban portable greenhouses to optimize your growing environment.
For indeterminate varieties grown in containers, maintaining a single-stem or double-stem plant through consistent sucker removal is one of the most effective ways to maximize fruit production per plant. It also keeps the plant a manageable size on a rooftop where space and structural load are real constraints.
That said, sucker removal isn’t an all-or-nothing practice. Many experienced rooftop growers leave one sucker — specifically the one that grows just below the first flower cluster — to create a productive two-stem plant. This approach balances growth management with yield potential and works particularly well in larger containers where soil volume can support two active stems without compromising either one. If you’re working with rooftop space, understanding how tomatoes respond to sun exposure and airflow can make a noticeable difference in yield. check out this guide to growing tomatoes indoors.
For determinate varieties, aggressive sucker removal is generally not recommended. These plants grow to a predetermined size and set all their fruit within a defined window — removing too many growing points reduces the number of fruiting branches and can lower your total yield rather than improve it. With determinates, focus instead on removing only suckers that appear in the very lowest leaf axils to improve airflow at the base of the plant.
Urban rooftop tomato gardens offer a unique opportunity to maximize space while enjoying the benefits of fresh produce. By using innovative techniques and tools, such as self-watering planters, gardeners can maintain optimal growing conditions even in limited spaces. For those interested in improving their urban gardening setup, exploring self-watering planter tools can be a game-changer in ensuring consistent moisture levels for thriving plants.