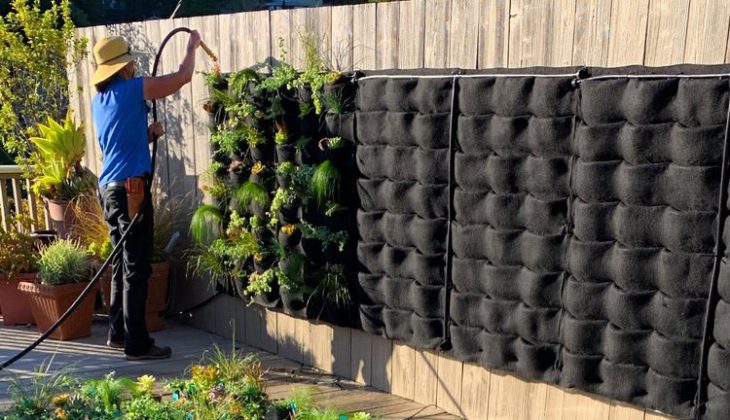
- Modular vertical garden panels are the most flexible and beginner-friendly way to build a living wall — they can be expanded, rearranged, and moved without starting over.
- Your wall’s load capacity, light exposure, and moisture resistance must be assessed before a single bracket goes in — skipping this step is the number one reason DIY green walls fail.
- The right frame material makes or breaks your garden’s lifespan — galvanized steel and treated timber outlast untreated wood by years in outdoor and humid conditions.
- Drip irrigation isn’t just for large installations — even a small six-panel indoor wall benefits from a basic timer-controlled drip line, especially during summer.
- One common mistake quietly kills more vertical gardens than any pest or disease — keep reading to find out what it is before you plant a single stem.
A blank wall is just an opportunity you haven’t acted on yet.
Vertical gardens — especially modular panel systems — have moved well beyond the niche gardening world. They show up in restaurants, living rooms, office lobbies, and on apartment balconies worldwide. The reason is simple: they work in spaces where traditional gardening doesn’t. Whether you’re dealing with a concrete courtyard, a rented flat with no outdoor space, or a long bare fence, a modular vertical wall garden gives you a growing surface where there wasn’t one before. Urban Oasis Contracting specializes in exactly this kind of transformation, turning underused walls into productive, living features for homes and businesses.
This tutorial walks you through every stage — from assessing your wall to choosing your irrigation method and selecting plants that will actually thrive. No hand-waving, no vague advice. Just a clear, step-by-step process for building a modular vertical garden wall that lasts.
Article At A Glance: DIY Vertical Garden Wall Modular Systems
|
Stage |
Key Action |
Difficulty |
|---|---|---|
|
Wall Assessment |
Check load capacity, light, and moisture |
Easy |
|
Frame Build |
Install brackets with airflow gap |
Moderate |
|
Panel Installation |
Slot modular panels into frame |
Easy |
|
Irrigation Setup |
Install drip line before planting |
Moderate |
|
Planting |
Group by light zone and water needs |
Easy |
|
Maintenance |
Monitor, feed, and adjust monthly |
Easy |
Modular Panels Are the Smartest Way to Start a Vertical Garden
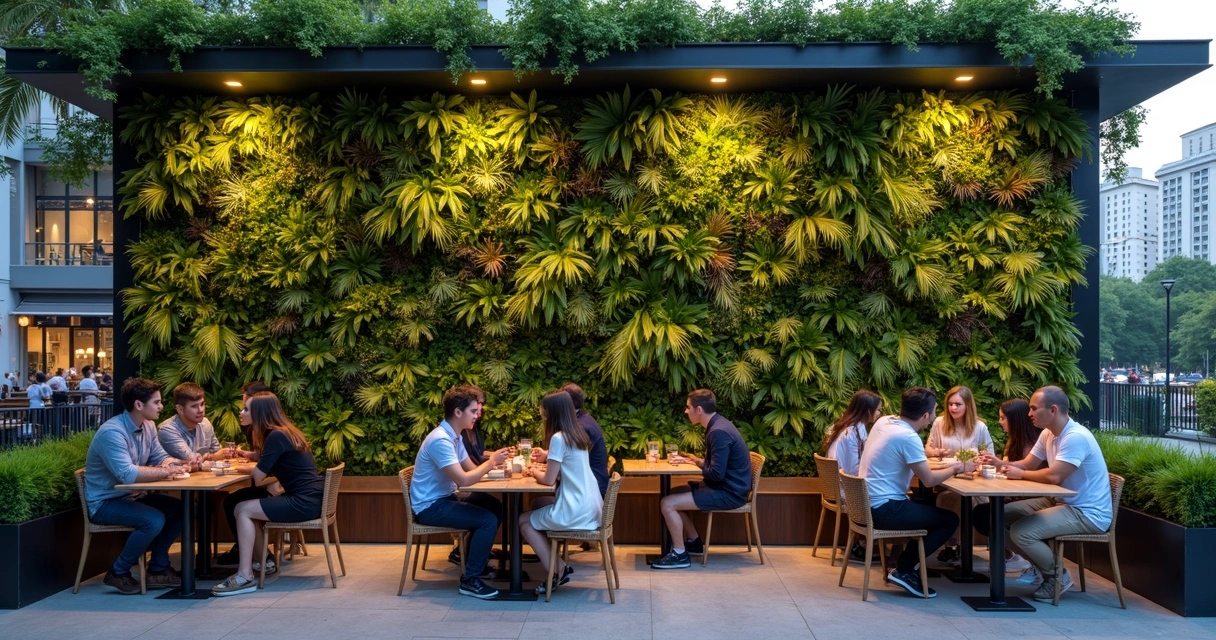
“Vertical Gardens: A Simple 7-Step Guide …” from urbanoasiscontracting.com and used with no modifications.
Not all vertical garden systems are created equal. Felt pocket systems are cheap to start but degrade quickly outdoors, especially in wet climates where the fabric retains moisture and breeds mold. Trellis systems are great for climbing plants but offer almost no flexibility once established. Modular panels — interlocking rigid units that slot into a wall-mounted frame — hit a different level entirely. You can start with six panels and expand to sixty. You can rearrange sections when a plant dies or a new one catches your eye. And critically, if you move house, you take the whole system with you.
According to research shared on ResearchGate, vertical gardens offer measurable benefits including noise reduction, air purification, and support for local biodiversity in urban environments. Modular systems make accessing all of those benefits more practical for the average homeowner. They’re the format that actually gets finished and maintained, rather than abandoned after the first season.
What You Need Before You Build
Jumping straight to panel shopping is tempting, but the preparation phase determines whether your vertical garden thrives or becomes an expensive eyesore. Three things need your attention before anything else: your wall’s structural capacity, its light conditions, and its exposure to moisture.
Wall Assessment: Load, Light, and Moisture
A fully planted and watered modular vertical garden panel can weigh significantly more than it looks. Soil-based panels with mature plants and saturated growing medium can reach 30kg per square metre or more. Before mounting anything, identify what your wall is made from — brick, timber stud, concrete, or rendered block — and confirm it can take the load. For stud walls, you’ll need to locate and fix into the studs directly, not just the plasterboard.
Light is the next variable. Take note of how many hours of direct sun your wall receives daily. A south-facing outdoor wall in full sun is a completely different environment from a north-facing interior wall near a window. Your plant selection — and in some cases your panel type — will depend on this. Moisture matters too: walls exposed to heavy rain or condensation need frames and fixings rated for outdoor or high-humidity use. A wall that traps moisture behind the panels will rot, regardless of how good your plants look upfront. For more information on creating vertical gardens, check out this vertical gardens guide.
Tools and Materials for a Modular System
You don’t need a fully kitted workshop, but a few specific tools make the job significantly cleaner. If you’re working on a small space, consider checking out these urban balcony garden kits to help transform your area efficiently.
- Stud finder (for interior timber-frame walls)
- Masonry drill bits and wall plugs rated for the panel weight
- Spirit level — non-negotiable for a straight final result
- Measuring tape and pencil for marking bracket positions
- Cordless drill and screwdriver bits
- Galvanized or stainless steel screws and brackets
- Drip irrigation tubing, timer unit, and micro-emitters (covered in detail later)
For the panels themselves, look at systems like the Woolly Pocket Living Wall Planter or the Naturi Modular Living Wall System — both designed specifically for residential DIY installation, with interlocking edges that keep the grid tight and even as it scales up. For more ideas on transforming small spaces, check out our urban balcony garden kits.
Rot-Proof Frame Materials That Actually Last
The frame is what holds everything up, so cutting corners here is a mistake you’ll pay for in eighteen months. Galvanized steel angle brackets are the gold standard for outdoor frames — they won’t rust, they carry serious load, and they’re low profile. Treated timber (specifically timber rated for ground contact, like tanalised pine) is a good option if you want a warmer aesthetic and are working in a sheltered outdoor or indoor setting. Avoid standard untreated pine or MDF entirely — they deteriorate fast when exposed to irrigation runoff and humidity.
Leave a gap of at least 25–50mm between the back of your frame and the wall surface. This airflow channel is not optional. It prevents moisture from sitting against your wall, dramatically reducing the risk of mold, damp patches, and long-term structural damage to both the garden system and your property.
How to Build Your Modular Vertical Garden Wall
With your assessment done and materials gathered, the build itself follows a logical sequence. Rushing any one of these steps creates compounding problems later — especially with irrigation, which is much harder to retrofit once panels are planted and full.
1. Mark and Prepare Your Wall Surface
Start by mapping out your full grid on the wall using a pencil and spirit level. Mark every bracket position before drilling a single hole. This gives you a chance to catch any alignment issues — an uneven top row, a bracket that lands between studs, or a layout that doesn’t centre correctly on the wall. Take your time here. A ten-minute prep saves an hour of corrections.
Once your marks are confirmed, drill pilot holes and insert the appropriate wall fixings for your surface type. For masonry, use Fischer or Rawlplug nylon wall plugs rated for the relevant load. For timber studs, screw directly into the stud with 75mm or 100mm structural screws. Avoid self-tapping into plasterboard alone — it will not hold the weight once panels are planted and watered.
2. Build or Attach the Frame with an Airflow Gap
Mount your horizontal support rails or bracket system to the wall, maintaining that 25–50mm standoff gap at every fixing point. If you’re using a timber frame, attach timber battens to the wall first, then fix your rails to the battens — this naturally creates the gap. For steel bracket systems, use brackets with a built-in offset or add spacers behind the fixing plate. For more tips on creating a vertical garden system, check out this guide.
Check for level at every row before moving to the next. A frame that’s off by even a few millimetres at the bottom will be visibly crooked by the time you reach the top. Use a long spirit level or a laser level for walls wider than 1.5 metres.
3. Slot in Your Modular Panels
With the frame secured, modular panels typically clip, hook, or slide into place along the rails. Follow the manufacturer’s sequence — most systems are designed to be installed top-down or left-to-right for structural reasons. Don’t plant yet. Get all panels into position first, confirm the grid sits flush and level, and identify any panels that need adjustment before the weight of soil and plants locks everything in.
4. Set Up Drip Irrigation Before Planting
This is the step most beginners skip — and it’s the one they regret most. Running drip lines through empty panels takes twenty minutes. Trying to thread tubing around established root systems and trailing foliage takes two frustrating hours and risks damaging plants you’ve spent months growing. Run your main supply line along the top of the frame, then drop micro-tubing down through each panel column using 4mm drip line and pressure-compensating emitters spaced to match your panel layout.
Connect the supply line to a battery-operated timer unit — the Orbit 56082 Single-Outlet Hose Watering Timer is a reliable budget option that handles basic scheduling without requiring a tap adaptor for indoor setups when paired with a small reservoir pump. Set your timer to water in short, frequent cycles rather than one long daily soak. Vertical systems drain faster than ground beds, so two or three short cycles spread across the day keep the growing medium evenly moist without waterlogging the lower panels.
5. Plant by Light Zone, Not Just Aesthetics
The single most common vertical garden mistake is choosing plants for how they look together rather than whether they’ll survive in the same conditions. A wall isn’t uniform — the top panels receive more light and dry out faster, the bottom panels stay cooler and retain more moisture, and side panels may be partially shaded depending on the time of day. Treat each zone as its own microclimate. For more tips on creating a sustainable garden, check out our ultimate DIY eco-friendly garden guide.
Map your wall into at least three zones before you buy a single plant: high-light upper panels, mid-range middle panels, and lower panels that may be shaded or cool. Then select plants to match each zone rather than forcing plants into conditions they weren’t built for. Grouping by water needs matters just as much — drought-tolerant succulents and herbs placed in the same drip zone as moisture-hungry ferns will result in one group always being over or underwatered.
- Top panels (high light, faster drying): Herbs like basil, thyme, and oregano; trailing nasturtiums; compact succulents
- Middle panels (moderate light and moisture): Spider plants, strawberries, dwarf mondo grass, compact lavender
- Lower panels (cooler, more moisture retention): Ferns, peace lilies, mind-your-own-business, creeping jenny
- Full-shade indoor walls: Pothos, heartleaf philodendron, ZZ plant, and cast iron plant
When planting, firm each root ball into its cell or pocket securely — loose planting in a vertical system leads to plants shifting or dropping as the substrate settles after the first watering. Water every panel thoroughly immediately after planting, even if your irrigation timer is already running. This first manual soak helps settle the growing medium around the roots and eliminates air pockets that would otherwise dry out and stress newly planted specimens.
Give your wall four to six weeks before making any judgements. New transplants look rough before they establish. As long as your irrigation is working and your zones are correctly matched, the foliage will knit together and the wall will start looking intentional rather than freshly planted. For more guidance, check out this modular vertical garden tutorial.
Best Plants for Modular Vertical Garden Systems
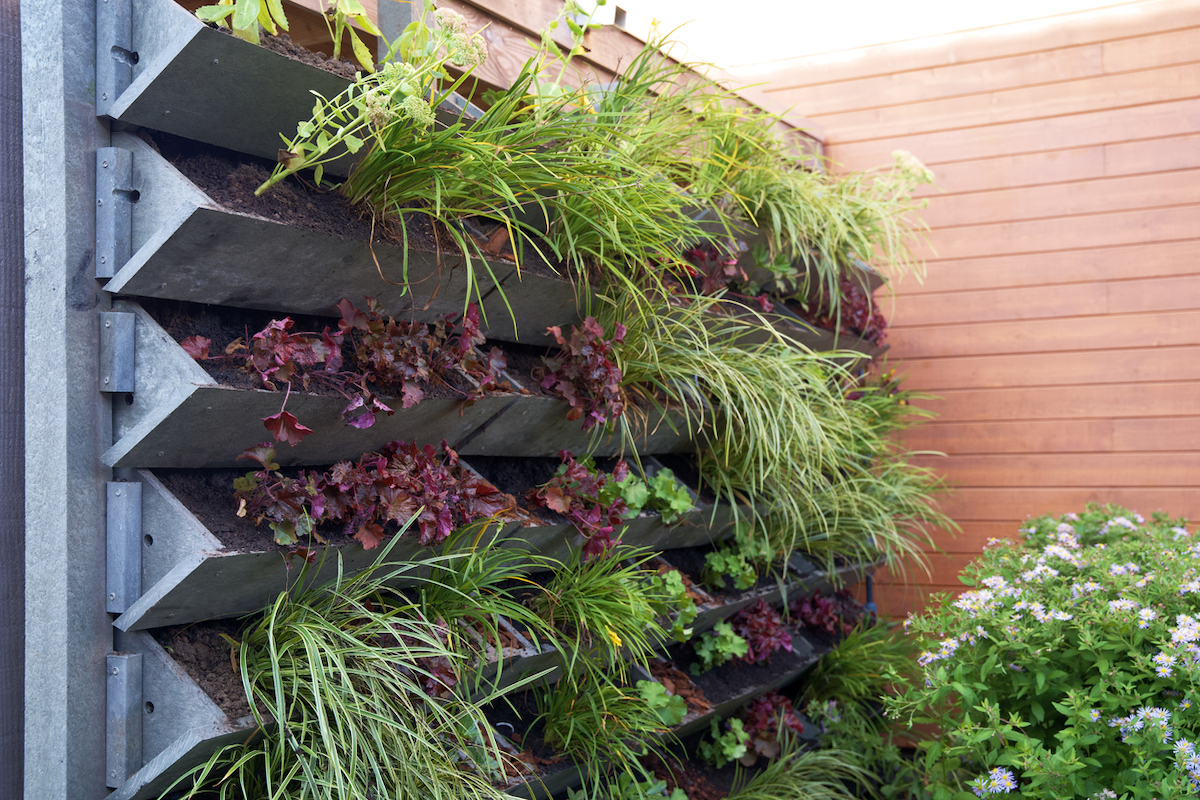
“21 Vertical Garden Ideas for Those …” from www.bobvila.com and used with no modifications.
Not every plant that looks good in a pot will perform on a wall. Vertical growing puts different demands on root systems — shallower growing depth, faster drainage, more exposure to air on all sides. The plants that thrive are ones that are either naturally adapted to these conditions or compact enough that they don’t fight the format.
The good news is that the plant palette for modular walls is genuinely wide. You’re not limited to a handful of ferns and a pothos. Edible walls planted with herbs, strawberries, and compact vegetables are completely achievable. So are flowering walls using calibrachoa, lobelia, and bacopa. The key is matching plant vigour to panel size — fast-growing, large-rooted plants will outcompete their neighbours and destabilise the grid.
- Compact and well-behaved: Mind-your-own-business, baby tears, moss, and thyme spread evenly without aggression
- Strong visual impact: Rex begonias, coleus, and caladiums deliver bold colour without deep root requirements
- Edible options: Strawberries, lettuce varieties, radishes, dwarf kale, chives, and flat-leaf parsley
- Structural foliage: Bird’s nest fern, asparagus fern, and Japanese forest grass add texture and depth
- Low-maintenance fillers: Sedum varieties, echeveria, and string of pearls for sunny outdoor panels
Avoid any plant described as vigorous, invasive, or fast-spreading in standard garden conditions. Mint is a classic example — it will take over neighbouring panels within a single season. If you want mint on your wall, isolate it in its own column with a physical barrier between panels.
Low-Light Panels: Ferns, Pothos, and Peace Lilies
Indoor walls and shaded outdoor walls are where ferns, pothos, and peace lilies genuinely shine. Pothos — particularly the golden pothos (Epipremnum aureum) — is arguably the most forgiving vertical garden plant in existence. It tolerates low light, irregular watering, and high humidity, and it trails beautifully across adjacent panels as it matures. Bird’s nest fern (Asplenium nidus) adds a sculptural, architectural quality to lower panels and handles indirect indoor light without complaint. Peace lilies (Spathiphyllum wallisii) bring occasional white blooms to shaded walls and actively filter indoor air — a benefit backed by research into interior plant performance.
Full-Sun Panels: Herbs, Succulents, and Trailing Nasturtiums
South-facing outdoor walls in full sun are the domain of Mediterranean herbs, succulent varieties, and fast-flowering trailing plants. Thyme, oregano, and rosemary are practically built for vertical growing — shallow roots, drought tolerance, and a spreading habit that fills panel cells efficiently. Trailing nasturtiums (Tropaeolum majus) are one of the best choices for a full-sun wall that needs fast visual impact: they establish quickly, cascade over panel edges, produce edible flowers, and attract pollinators all season. Pair them with a mix of echeveria and sedum in adjacent panels for a wall that combines lush colour with near-zero water demands in the drier months.
Irrigation Options That Fit Any Budget
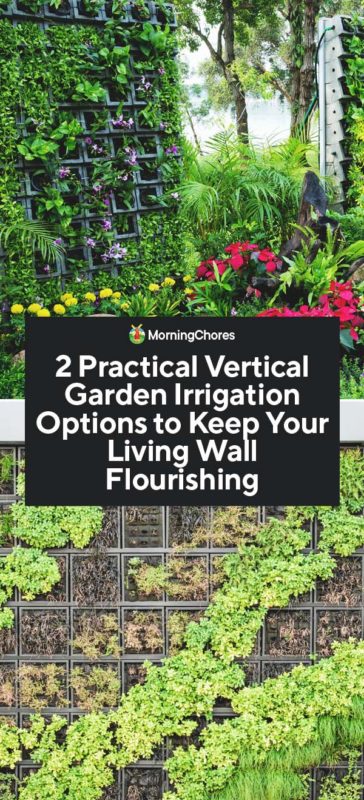
“2 Vertical Garden Irrigation Options to …” from morningchores.com and used with no modifications.
Water is the make-or-break variable in any vertical garden. Get it right and your wall is largely self-sustaining. Get it wrong and you’ll be replacing dead panels every few months. The good news is that effective irrigation doesn’t require a complex or expensive setup — it just requires the right approach for your wall’s size and location.
Manual Watering for Small Indoor Walls
A wall of six to twelve panels in a low-humidity indoor environment can be managed manually with a long-neck watering can — the Haws Slimline Indoor Watering Can with its narrow spout is ideal for reaching panels without splashing walls or floors. Water from the top down, allowing each panel to absorb before moving to the next. Check moisture levels by pressing a finger 2–3cm into the growing medium rather than watering on a fixed schedule. Indoor walls in temperature-controlled environments can often go four to five days between waterings in winter, dropping to every one to two days in peak summer.
Drip Line Systems for Larger or Outdoor Installations
Once your wall exceeds twelve panels or sits outdoors in a warm climate, manual watering becomes inconsistent at best and completely impractical at worst. A drip line system solves this. Run 13mm main supply tubing along the top of your frame, then branch off with 4mm micro-tubing to individual emitters positioned at the top of each panel column. Gravity and pressure carry water down through the panels naturally.
For outdoor walls connected to a mains tap, the Rain Bird DRIP KIT or the Claber Oasis Automatic Drip Kit offer complete starter systems with adjustable emitters, tubing, and a timer unit — both are designed for exactly this application and can be expanded modularly as your wall grows. Pressure-compensating emitters are worth the small extra cost: they deliver a consistent flow rate regardless of whether a panel sits at the top or bottom of the system, preventing overwatering at the base. For more information on creating vertical gardens, check out our vertical garden systems tips.
Outdoor walls in exposed positions also benefit from a moisture sensor paired with the timer — the Rachio 3 Smart Sprinkler Controller integrates with weather data and will skip a watering cycle automatically if rain is forecast or soil sensors detect adequate moisture. This single addition can extend the life of your plants significantly by preventing the root rot that comes from watering a wall that’s already saturated from rainfall.
Smart Sensors and App-Controlled Systems
Smart irrigation has moved from commercial-only territory into genuinely affordable DIY range. The Rachio 3 Smart Sprinkler Controller connects to your home Wi-Fi and adjusts watering schedules automatically based on local weather data, soil type, and plant zone settings you configure through its app. For a modular wall in a climate with unpredictable rainfall, this kind of automation is not a luxury — it’s the difference between a thriving wall and one that gets waterlogged every time it rains because the timer doesn’t know to skip a cycle.
For indoor walls, the Xiaomi Mi Flora Plant Sensor is a low-cost moisture, light, and nutrient monitor that pushes readings to your phone. Place one in a representative panel in each zone and you’ll know exactly when each section needs attention without guessing or checking manually every day. Pair it with a smart plug on a small submersible pump and reservoir and you have a near-automated indoor wall system for well under $150. If you’re interested in creating a vertical garden, check out these vertical garden systems tips for more ideas.
Mistakes That Kill Vertical Gardens Fast
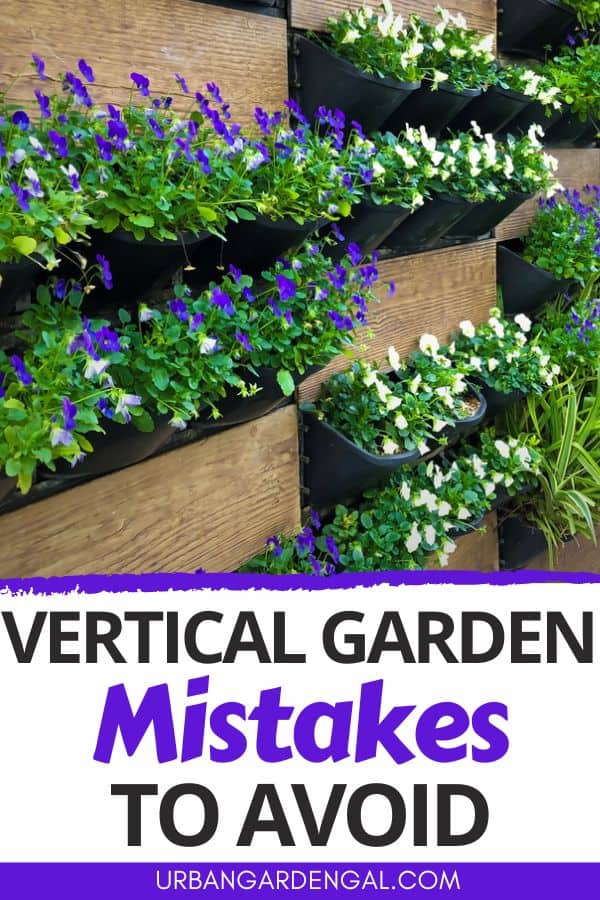
“11 Vertical Garden Mistakes to Avoid …” from www.urbangardengal.com and used with no modifications.
The single most common killer of vertical gardens isn’t pests, poor soil, or bad plant choices — it’s inconsistent watering combined with no airflow gap behind the frame. These two issues account for the vast majority of failed DIY green walls. Waterlogged lower panels rot from the inside while the top panels dry out and crisp, all because the irrigation wasn’t zoned correctly and moisture had nowhere to escape. Add a frame sitting flush against the wall with no gap, and you get mold on the wall surface within weeks. For more guidance on setting up your green wall, check out these vertical garden systems tips. Beyond those two, there are a handful of other mistakes that are worth knowing before you start:
- Overplanting at install: Filling every cell to capacity on day one looks great in photos but leads to overcrowding and root competition within months. Plant at 70% density and let the wall fill in.
- Ignoring panel weight limits: Most residential modular panels have a stated weight limit per unit. Exceeding it — especially with heavy soil mixes — risks bracket failure, particularly on stud walls.
- Using standard potting mix: Dense potting soil compacts in vertical cells and blocks drainage. Use a purpose-made vertical garden medium or a lightweight blend of coco coir, perlite, and slow-release fertiliser at a 60:30:10 ratio.
- Skipping the light audit: Buying plants before assessing actual light hours on your wall is the fastest route to a wall of dead specimens. Measure your light first, then select plants.
- No maintenance plan: A vertical wall needs monthly checks at minimum — loose panels, blocked emitters, dying plants, and nutrient depletion all need catching early before they cascade into larger problems.
Your Modular Wall Can Grow With You
One of the most underrated qualities of a modular vertical garden system is that it’s never truly finished. Unlike a built-in planter or a fixed trellis, a modular wall is a living system you can keep refining. A panel that isn’t performing — wrong light zone, wrong plant, wrong position — can be pulled, replanted, and re-slotted in an afternoon. For more ideas, explore vertical garden systems tips to enhance your modular wall experience.
As your confidence grows, so can the wall itself. Start with a single 1m x 1m grid, get comfortable with the irrigation and maintenance rhythm, then add another row or column when you’re ready. Many modular systems are specifically engineered for this kind of incremental expansion — the Naturi Modular Living Wall System, for example, uses a click-lock rail design that lets you extend horizontally or vertically without dismantling what’s already established.
Seasonally, your wall can be completely transformed. Swap summer annuals for autumn foliage plants. Replace spent herb panels with winter greens like dwarf kale and spinach. Use the modularity as a genuine design tool rather than treating the initial planting as permanent. The gardeners who get the most from vertical systems are the ones who stay curious about what the wall can do next, not just what it looks like right now.
Frequently Asked Questions
Below are the most common questions from people planning their first modular vertical garden wall, with direct answers based on real-world building and maintenance experience.
Can You Build a Modular Vertical Garden on a Rental Property Wall?
Yes — with the right approach. Freestanding modular frame systems are the best option for renters because they require no wall fixings at all. Structures like the Greenwall Freestanding Vertical Garden Frame use a weighted base or tension system to stand independently against a wall without drilling. These can be fully dismantled and moved when you leave. If you do need to fix to a wall, use the minimum number of fixings possible, fill holes with matching filler on departure, and always check your tenancy agreement before drilling into any surface.
How Much Weight Can a Vertical Garden Wall Hold?
This depends entirely on your wall type and fixing method, not on the panels themselves. A brick or concrete wall fixed with correctly rated Rawlplug or Fischer anchors can support very substantial loads — well beyond what a residential modular system would ever require. A timber stud wall is load-bearing only at the stud positions, which typically sit 400mm or 600mm apart. Fixing between studs into plasterboard alone is not safe for any load-bearing garden application.
As a practical guide, assume a fully planted and watered modular panel system in a soil-based medium will average 25–35kg per square metre. For a 2m x 1m wall, that’s a potential total load of 50–70kg distributed across your fixing points. Engineer your bracket spacing and fixing specification to that number, with a safety margin, and you’ll have no structural concerns.
How Often Do You Need to Water a Vertical Garden Wall?
Watering frequency depends on panel location, plant type, and season. Outdoor walls in full summer sun may need watering once or twice daily in short cycles. Shaded indoor walls in temperature-controlled spaces can often go three to five days between waterings in cooler months. The fastest way to calibrate your schedule is to check the growing medium in the panels that dry out quickest — usually the top row — and water when the top 2cm feels dry to the touch. For more information on maintaining vertical gardens, explore these vertical garden systems tips.
With a drip irrigation timer set to run two short cycles per day (morning and early afternoon), most modular walls in temperate climates stay consistently moist without waterlogging. Adjust the timer output up or down based on what you observe in the first two weeks after planting — that settling-in period gives you the most useful data about your specific wall’s needs.
What Is the Cheapest Way to Build a Modular Vertical Garden?
The most budget-friendly approach uses upcycled timber pallets as a freestanding frame, combined with repurposed plastic planter inserts or fabric pouches as individual growing cells. A single heat-treated (HT-stamped) pallet, sanded and sealed with exterior wood stain, can hold twelve to sixteen planting pockets and costs almost nothing beyond the plants and growing medium. Avoid pallets stamped MB — these have been treated with methyl bromide, which is toxic and not safe for edible or ornamental growing.
For growing medium, a DIY blend of coco coir bricks (rehydrated), perlite, and a slow-release granular fertiliser like Osmocote Exact 5-6 Month is significantly cheaper than proprietary vertical garden mixes and performs just as well. A full pallet wall with plants and a basic manual watering setup can be built for under $100, making it one of the most accessible entry points into vertical gardening available.
Can Modular Vertical Garden Panels Be Used Indoors and Outdoors?
Most quality modular systems are designed to work in both environments, but the specific configuration matters. Outdoors, panels need UV-stabilised materials that won’t degrade in direct sun, and frames need corrosion-resistant fixings — galvanized or stainless steel only. Indoors, the priority shifts to waterproofing the wall behind the panels and managing drainage so runoff doesn’t damage flooring or interior surfaces. For more on creating a pollen-free balcony, check out our guide.
Some modular systems include integrated drip trays specifically for indoor use — the Woolly Pocket Living Wall Planter, for example, has a built-in moisture barrier and drainage pouch that captures excess water and directs it away from the wall surface. Without this kind of feature, indoor walls need a custom drainage collection tray fitted below the bottom panel row.
If you plan to use the same panels across different locations — indoors in winter, outdoors in summer — choose a system rated for both environments from the outset. Switching a system not designed for outdoor UV exposure into a sunny garden position will cause the panels to become brittle and crack within a single season, which is a frustrating and avoidable outcome.
Whether you’re starting with six panels or sixty, Urban Oasis Contracting brings the expertise to help you design, install, and maintain a modular vertical garden wall that genuinely transforms your space.
Creating a vertical garden can be a rewarding project for any green thumb. By using modular systems, you can easily customize the size and layout of your garden to fit your space. For a comprehensive guide on setting up your own vertical garden, check out this vertical gardens guide that provides step-by-step instructions and helpful tips.